Connect through Cloudflare Access over RDP
You can connect to machines over RDP using Cloudflare’s Zero Trust platform.
🗺️ This walkthrough covers how to:
- Build a policy in Cloudflare Access to secure the machine
- Connect a machine to Cloudflare’s network using an RDP connection
- Connect from a client machine
⏲️ Time to complete: 30 minutes
Before you start
Create a Zero Trust policy
-
Navigate to the Zero Trust Dashboard to create a new application.
-
Select the
Applicationspage from the sidebar. -
Click Add application.

-
Choose Self-hosted on the next page.
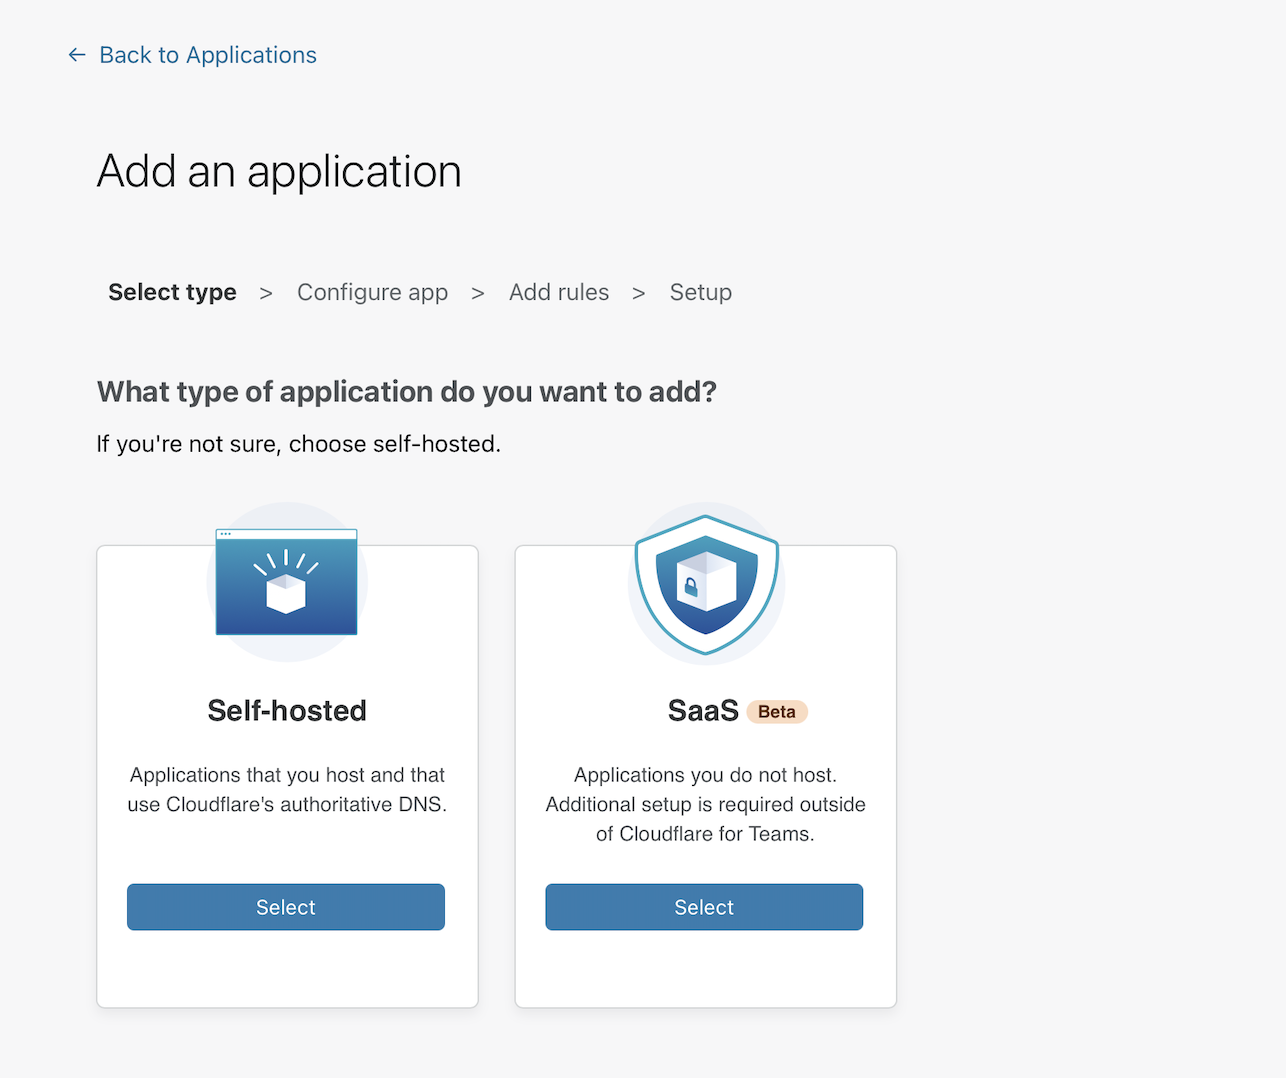
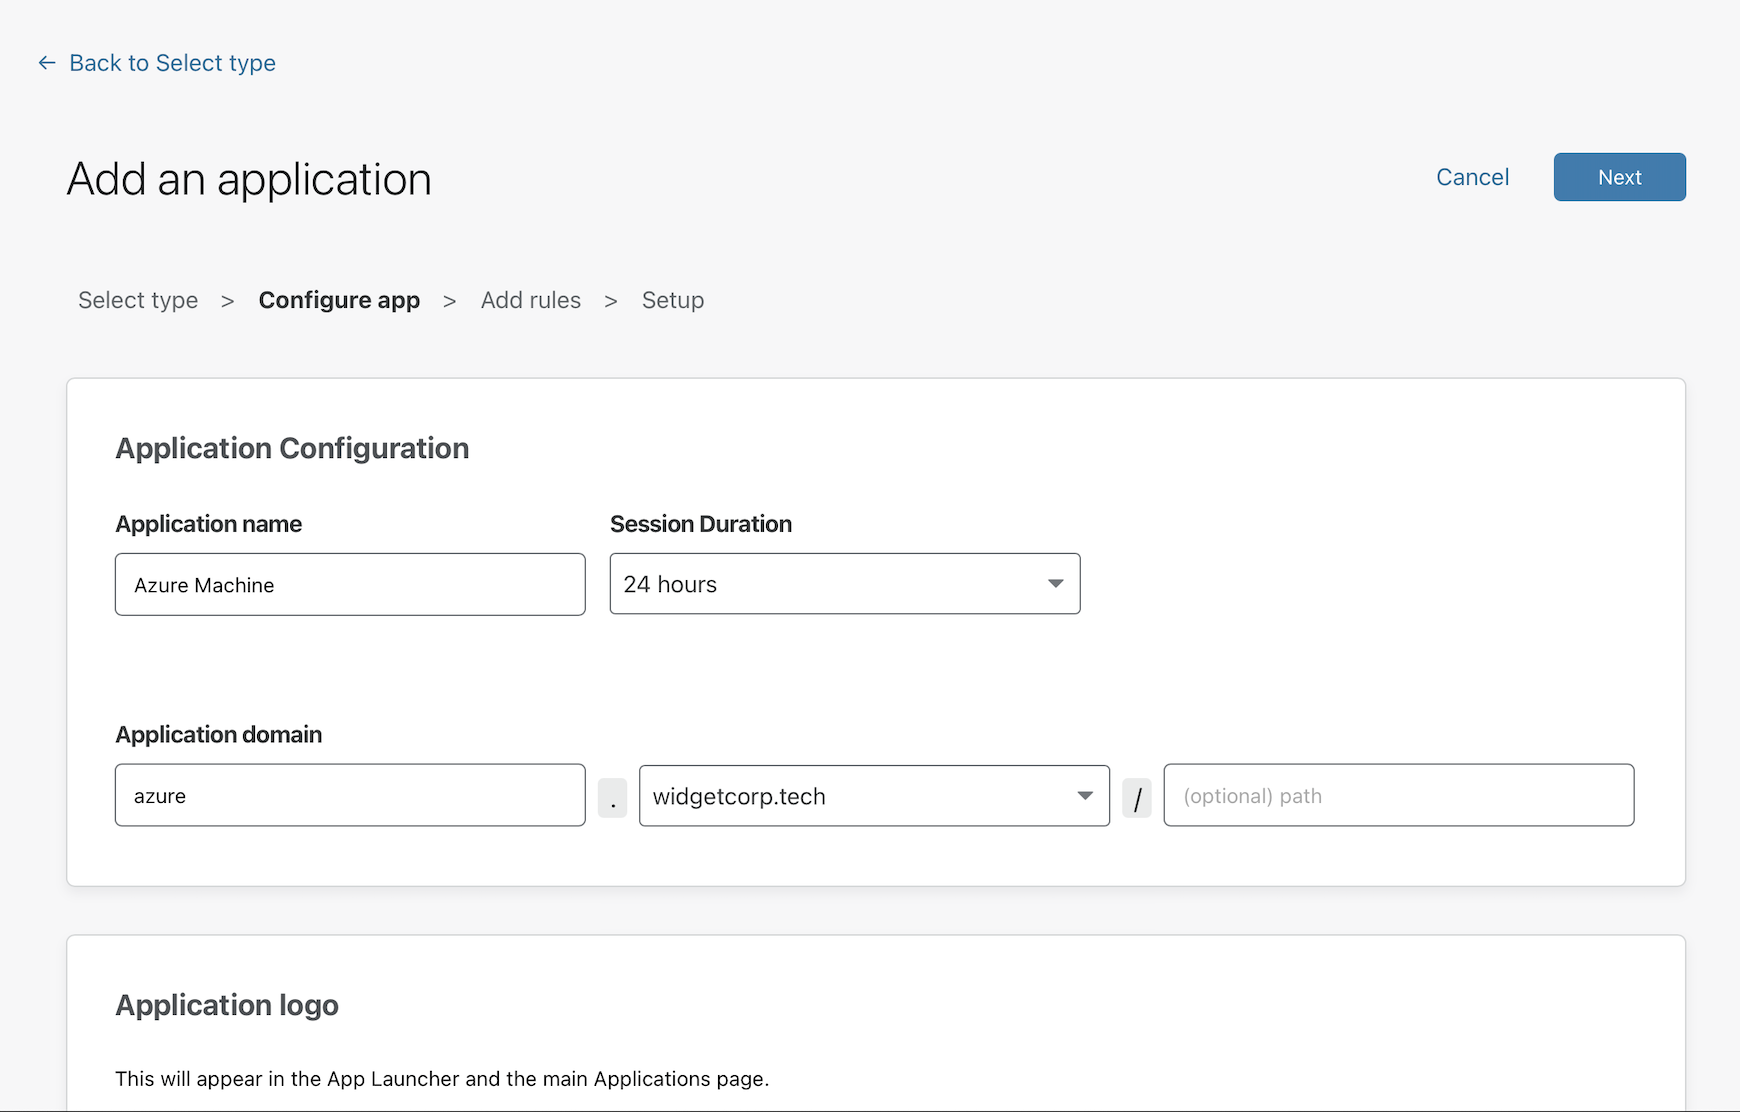
-
Input a subdomain where your application will be available to users.
-
Next, create rules that control who can reach the application.
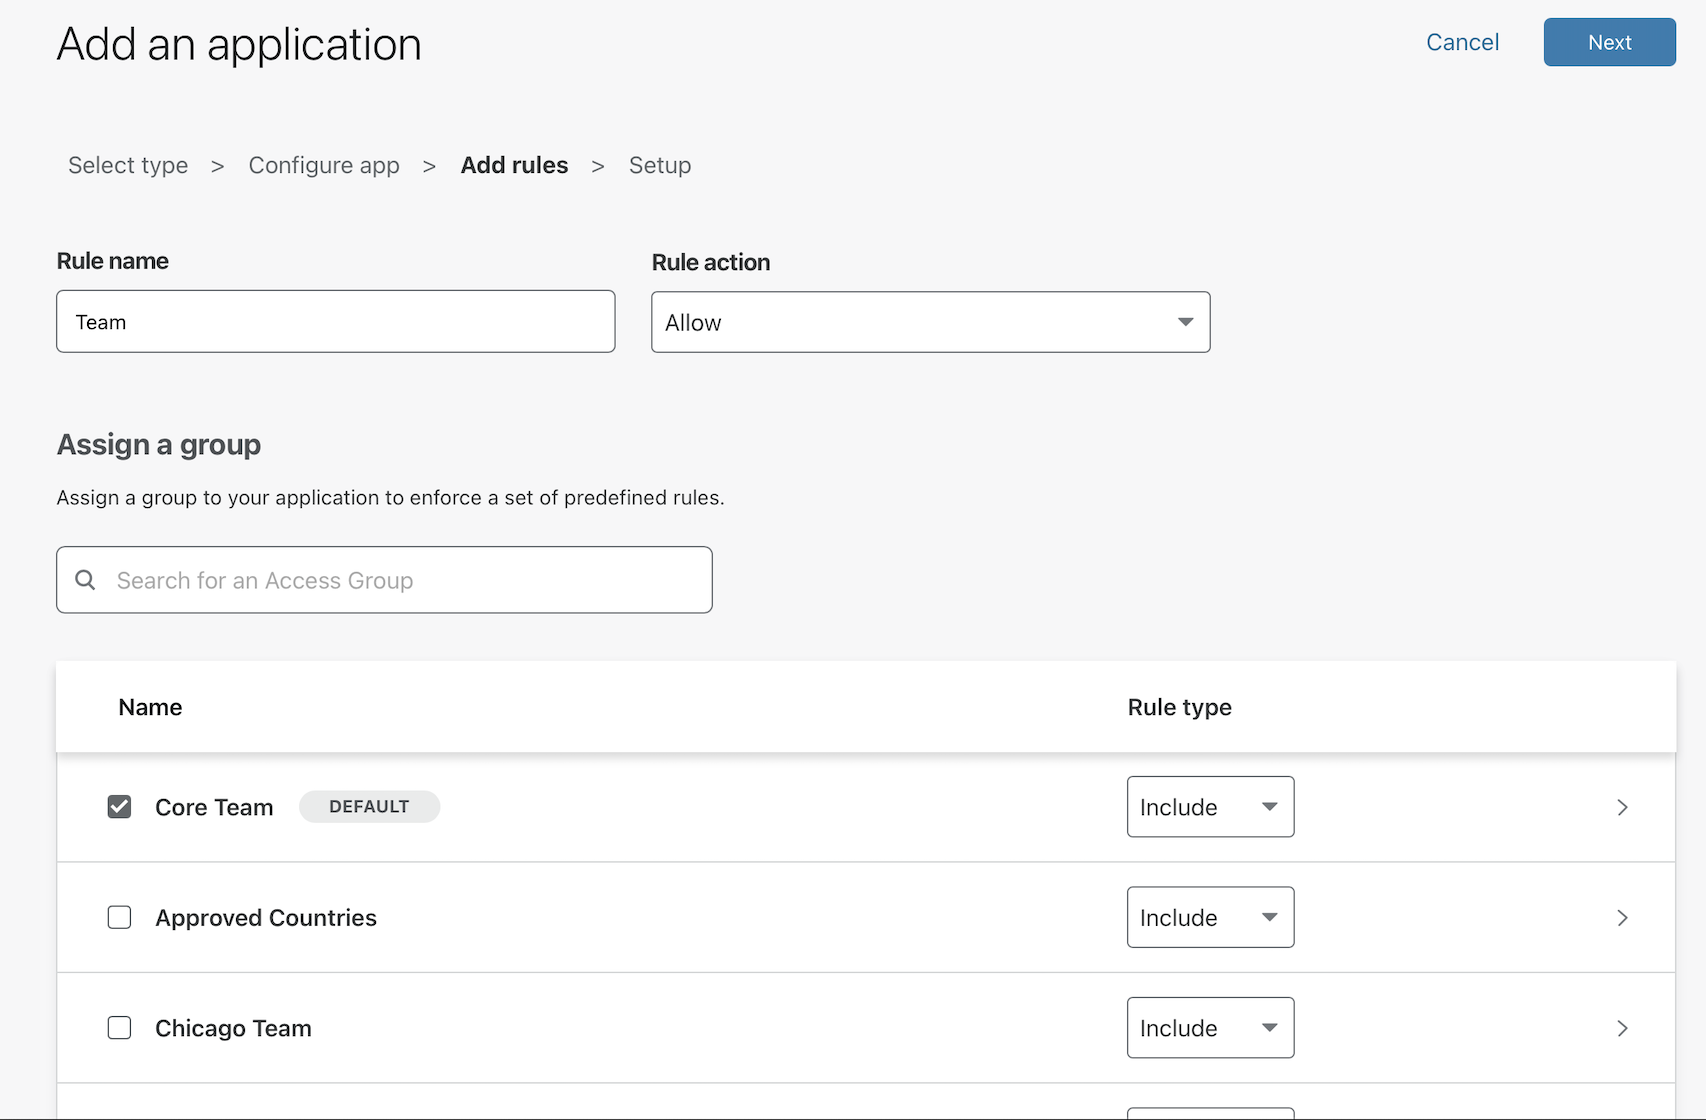
-
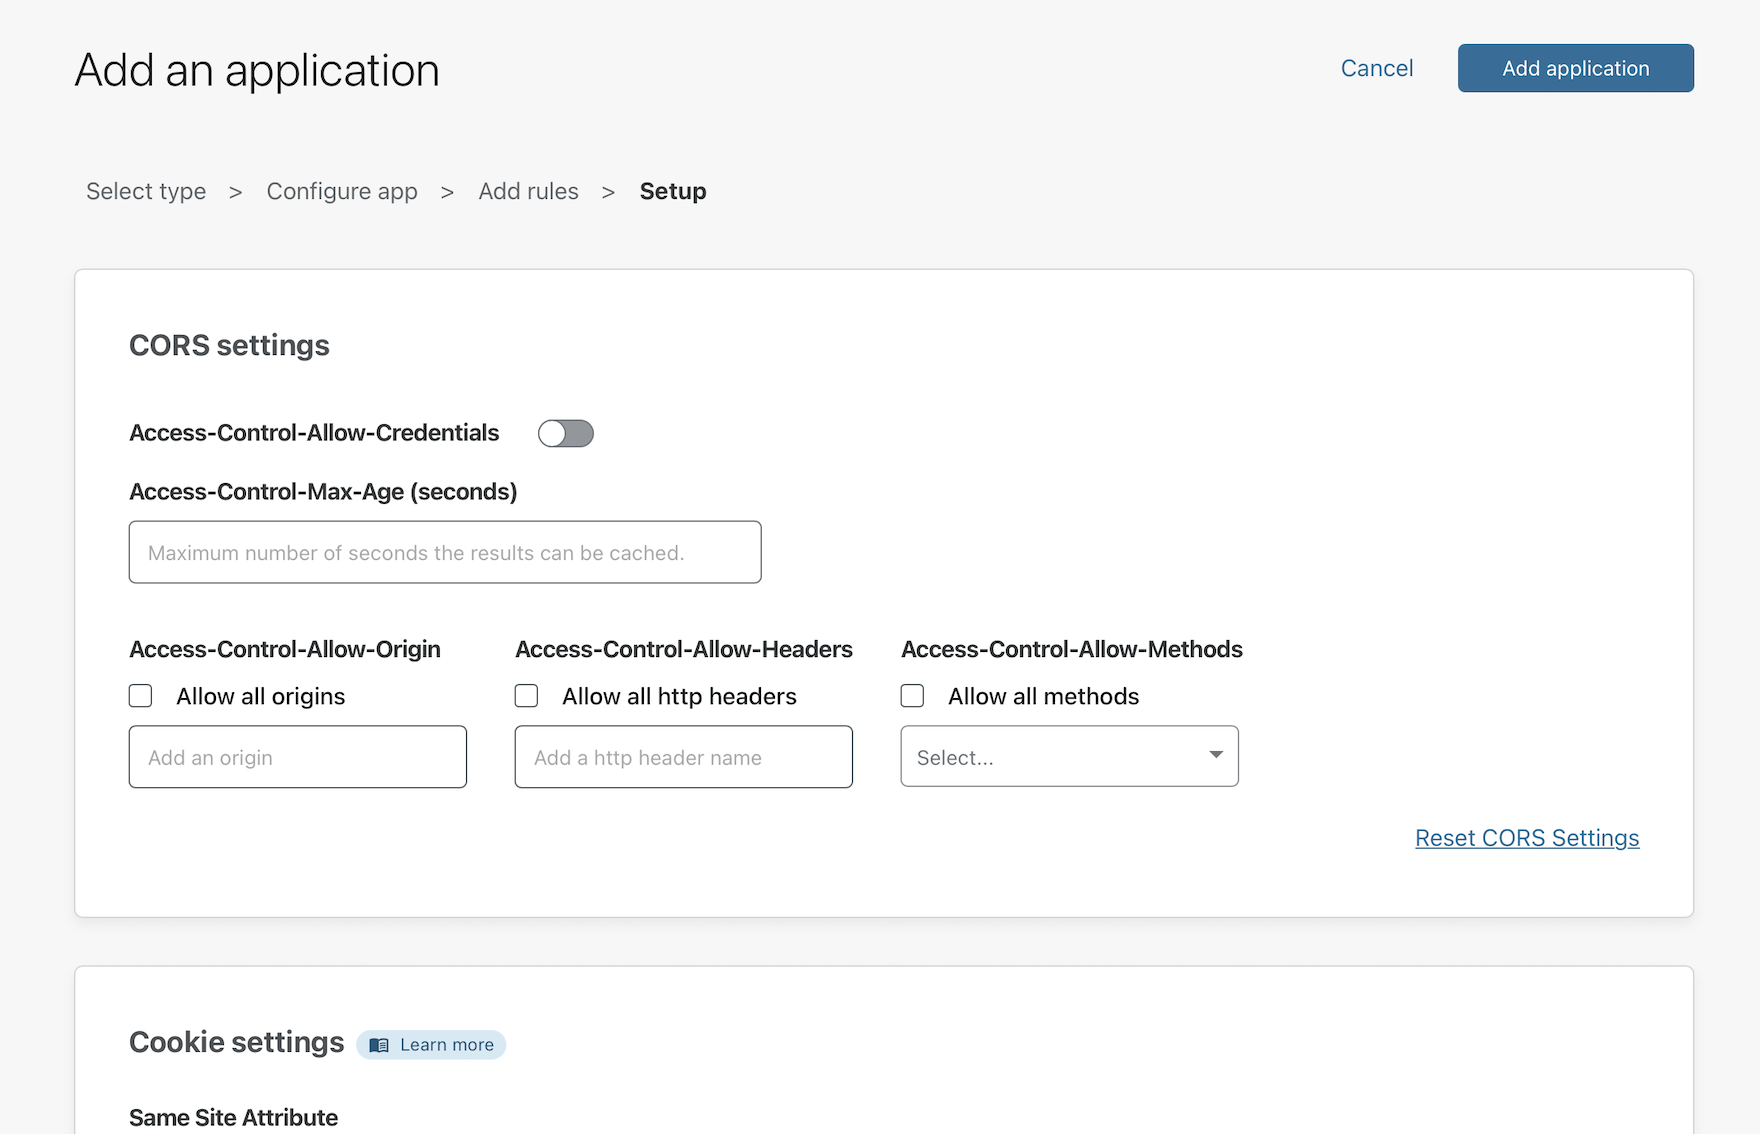
Finally, click Save to save the policy.
You can always edit the policy to change who should be allowed access to the application, or to change which authentication providers can be used to access the application.
Install cloudflared
Cloudflare Tunnel creates a secure, outbound-only connection between this machine and Cloudflare’s network. With an outbound-only model, you can prevent any direct access to this machine and lock down any externally exposed points of ingress. And with that, no open firewall ports.
-
Download the version of
cloudflaredthat matches your architecture from the available releases. -
Place the
cloudflaredexecutable in a location accessible to the OS, for example:C:\Cloudflared\bin\cloudflared.exe -
Next, run
CMDas an administrator to install the service.C:\Cloudflared\bin\cloudflared.exe service installBy default, the agent will run as a Local Account service and will look for the configuration and certificate file in the systemprofile.
-
Run the following command to create a new directory within systemprofile, replacing the
System32value if needed to match your architecture.mkdir C:\Windows\System32\config\systemprofile\.cloudflared
Authenticate cloudflared
-
Run the following command to authenticate
cloudflaredinto your Cloudflare account.C:\Cloudflared\bin\cloudflared.exe login -
cloudflaredwill open a browser window and prompt you to login to your Cloudflare account.If you are working on a machine that does not have a browser, or a browser window does not launch, you can copy the URL from the command-line output and visit the URL in a browser on any machine.
-
Choose any hostname presented in the list. Cloudflare will issue a certificate scoped to your account. You do not need to pick the specific hostname where you will serve the Tunnel.
-
Copy the file to the
systemprofiledirectory created previously.copy C:\Users\%USERNAME%\.cloudflared\cert.pem C:\Windows\System32\config\systemprofile\.cloudflared
Create a Tunnel
Next, create a Tunnel with the command below.
$ cloudflared tunnel create <NAME>
Replace <NAME> with a name for the Tunnel. This name can be any value. A single Tunnel can also serve traffic for multiple hostnames to multiple services in your environment, including a mix of connection types like SSH and HTTP.
The command will output an ID for the Tunnel and generate an associated credentials file. At any time you can list the Tunnels in your account with the following command.
C:\Cloudflared\bin\cloudflared.exe tunnel list
Configure the Tunnel
You can now configure the Tunnel to serve traffic.
-
Create a
YAMLfile thatcloudflaredcan reach. By defaultcloudflaredwill look for the file in theC:\Users\%USERNAME%\.cloudflared\folder of your Windows machine. -
Run
Notepad.exeas an administrator. Next, configure the Tunnel, replacing the example ID below in the first two lines with the ID of the Tunnel created above. Additionally, replace the hostname in this example with the hostname of the application configured with Cloudflare Access.tunnel: 6ff42ae2-765d-4adf-8112-31c55c1551ef credentials-file: C:\Users\%USERNAME%\.cloudflared\6ff42ae2-765d-4adf-8112-31c55c1551ef.json ingress: - hostname: azure.widgetcorp.tech service: rdp://localhost:3389 - service: http_status:404 # Catch-all rule, which responds with 404 if traffic doesn't match any of # the earlier rules -
Make sure the file is saved to the following location:
C:\Users\%USERNAME%\.cloudflared\config.ymlwith
%USERNAME%being your Windows username (this is your user folder).
Route to the Tunnel
You can now create a DNS record that will route traffic to this Tunnel. Multiple DNS records can point to a single Tunnel and will send traffic to the service configured as long as the hostname is defined with an ingress rule .
-
Navigate to
dash.cloudflare.comand choose the hostname where you want to create a Tunnel. This should match the hostname of the Access policy. Click + Add record.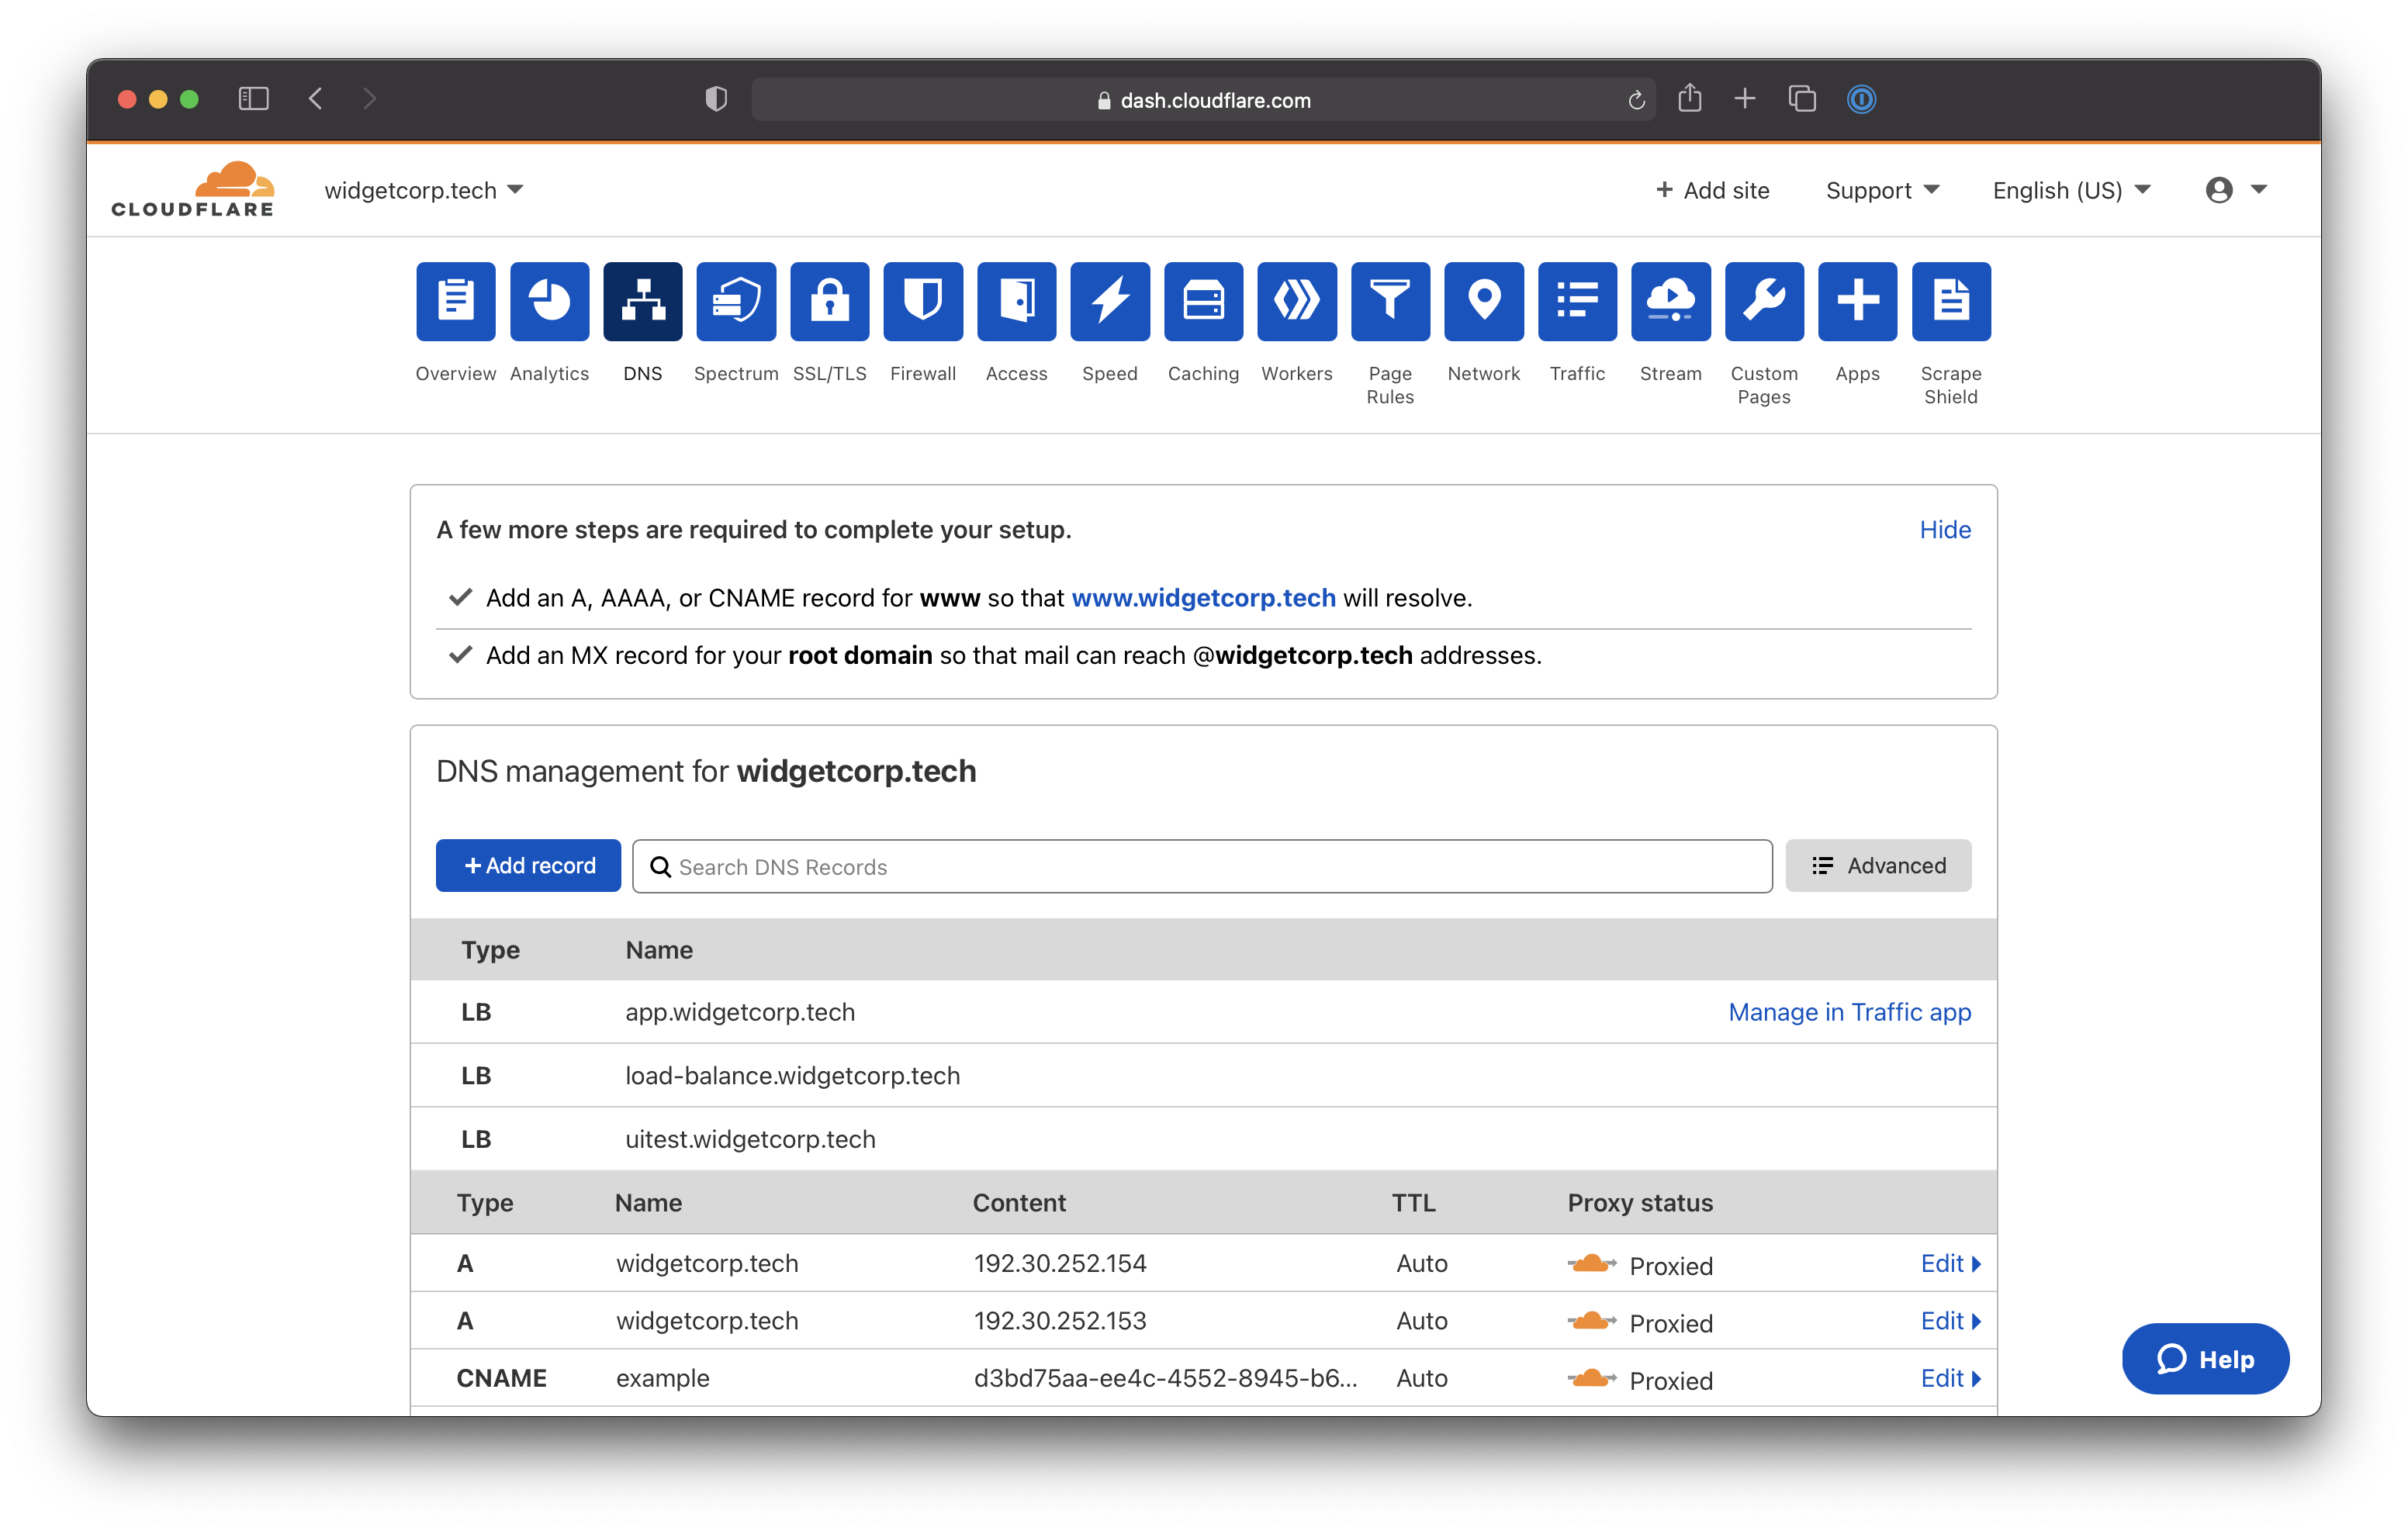
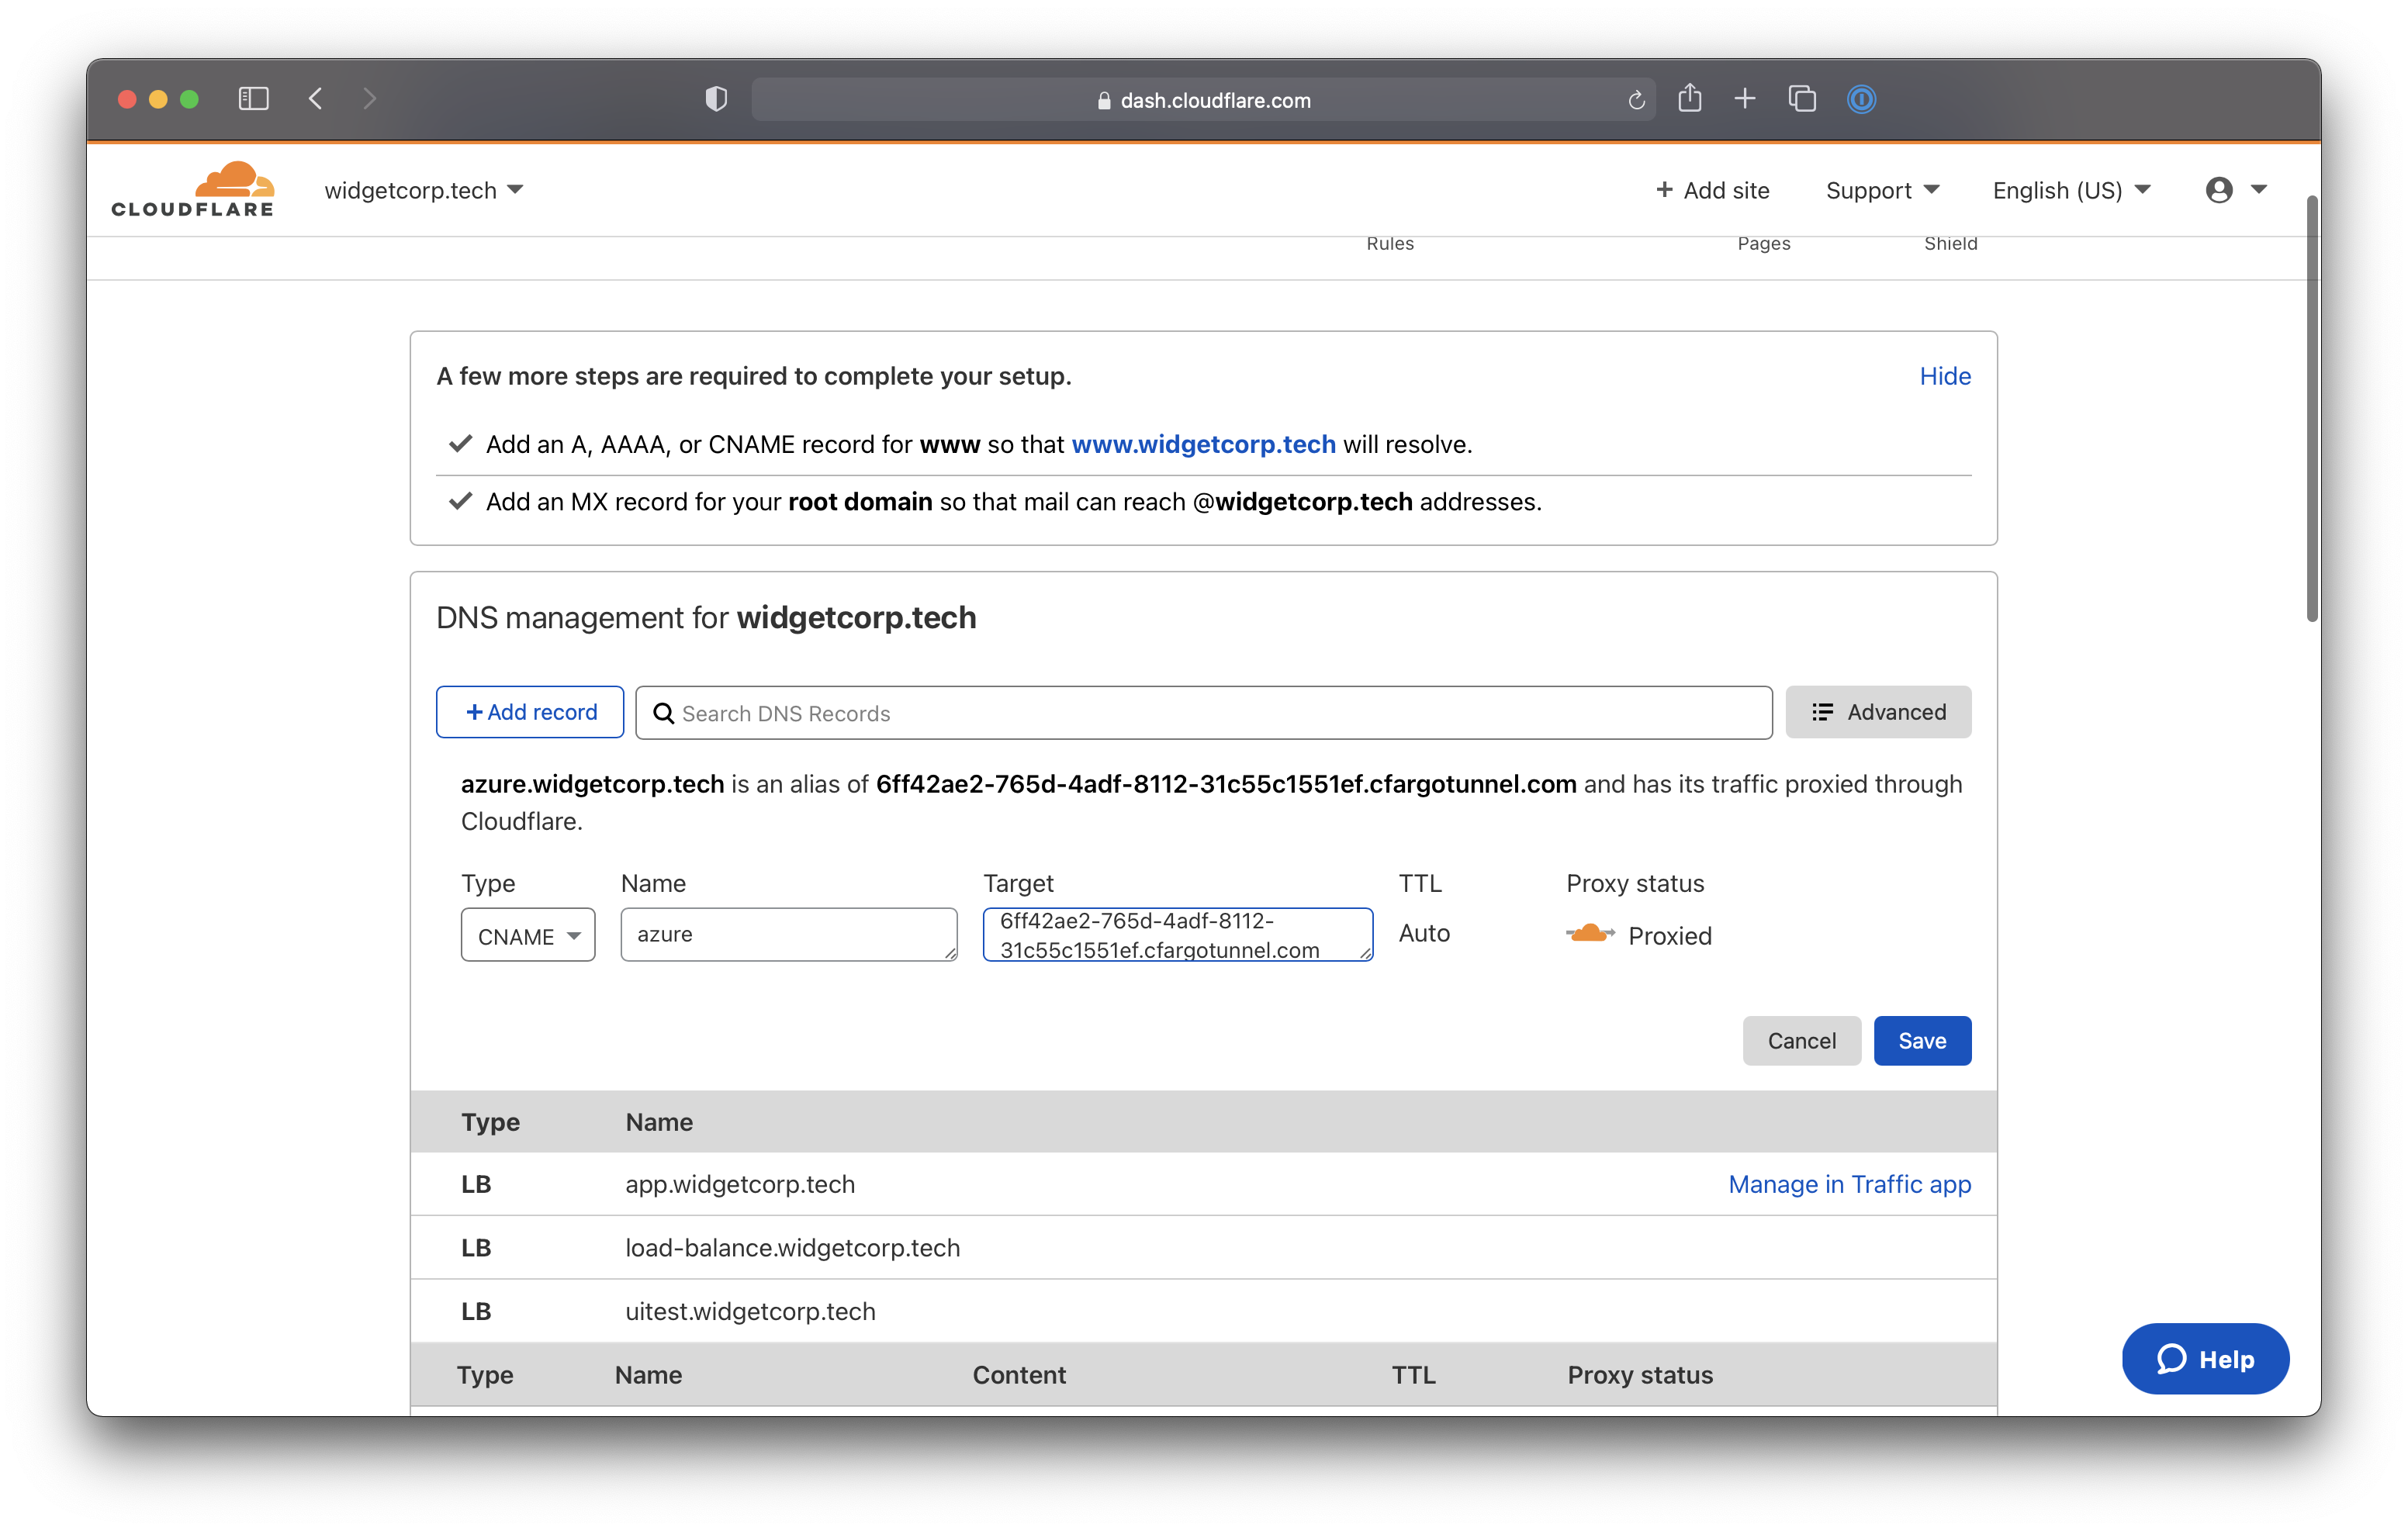
-
Select
CNAMEas the record type. For the target, input the ID of your Tunnel followed bycfargotunnel.com. In this example, the target would be:6ff42ae2-765d-4adf-8112-31c55c1551ef.cfargotunnel.com -
Click Save.
Run the Tunnel
You can now run the Tunnel to connect the target service to Cloudflare. Use the following command to run the Tunnel, replacing <NAME> with the name created for your Tunnel.
C:\Cloudflared\bin\cloudflared.exe tunnel run <NAME>
We recommend that you run cloudflared
as a service
that is configured to launch on start.
Connect from a client machine
Install cloudflared on the client machine
Download and install
cloudflared on the client desktop that will connect to the remote desktop. Note that cloudflared will need to be installed on each user device that will connect.
Connect to the remote desktop
-
Run the following command to create a connection from the device to Cloudflare. Any available port can be specified, but in this example we will use
3389as it is the default port for RDP connections.C:\Cloudflared\bin\cloudflared.exe access rdp --hostname rdp.site.com --url localhost:3389This command can be wrapped as a desktop shortcut so that end users do not need to use the command line.
-
Open your RDP client and configure the client to point to
localhost:3389. Do not input the hostname. -
When the client launches,
cloudflaredwill launch a browser window and prompt the user to authenticate with your SSO provider.
Configuring A Desktop Shortcut
Windows
You can help end users connect without requiring the command line by providing them with a shortcut that can be launched from the desktop.
-
Ensure that
cloudflared.exeis installed on the end user device and available in the Windows Path. -
Right-click on the Windows desktop and select New > Shortcut.
-
In the wizard that appears, paste in the path to your
cloudflared.exefile, followed by this command with the hostname your team uses:C:\Cloudflared\bin\cloudflared.exe access rdp --hostname monday.example.com --url localhost:3389 -
Click Next and complete the wizard.
At this point the shortcut will appear on the desktop, and users can launch with a double-click. The shortcut can then be distributed to end users along with
cloudflared.
Common issues
-
You may get a warning indicating that the
.exe(cloudflared.exe) is unknown. This can be skipped by clickingMore Infoin the dialog box and then clicking Run Anyway. This will only appear one time. -
Ensure that RDP is enabled on the target Windows machine. If not, you may encounter an error:
No connection could be made because the target machine actively refused it.
MacOS
MacOS users can save a command shortcut that will launch the RDP flow.
-
The command below can be saved as a
.commandfile that can be launched on login:var=/Applications/CF-RDP-Tunnel.command && echo "`which cloudflared` access rdp --hostname monday.example.com --url localhost:3389 &" > $var && chmod +x $var -
Check that everything is successful by running the following command:
$ lsof -nP -iTCP:3389 | grep LISTENIf needed, you can kill the process by running the following command:
$ sudo kill -9 [process id]The command from Step 1 can then be configured to run at device login by navigating to System Preferences > Users & Groups.
-
Select the
+sign. -
Navigate to Macintosh HD > Applications.
-
Double click on the previously created
CF-RDP-Tunnel.commandfile.The default behavior in MacOS is for the Terminal window to stay open. You can configure it to close automatically.