Generic SAML 2.0
Cloudflare Zero Trust integrates with any identity provider that supports SAML 2.0. If your identity provider is not listed in the integration list of login methods on the Zero Trust Dashboard, it can be configured using SAML 2.0 (or OpenID if OIDC based). Generic SAML can also be used if you would like to pass additional SAML headers or claims for an IdP in the integration list.
Most identity providers allow users to create an application. In this context, an application is a set of parameters that the identity provider will then pass on to Cloudflare to establish an integration.
Minimum requirements for identity providers:
- The IdP must conform to SAML 2.0
- The IdP must provide: A Single Sign on URL, an Entity ID, and a signing certificate
Depending on the identity provider you would like to integrate, the following steps may happen in a different order.
Create an application in your identity provider
The typical setup requirements are:
- Create a new integration in the identity provider with the type set as SAML.
- Set the Entity/Issuer ID to:
https://<your-team-name>.cloudflareaccess.com/cdn-cgi/access/callback, where<your-team-name>should be your Cloudflare Zero Trust team name . - Set the Single Sign On URL (or similarly named) to:
https://<your-team-name>.cloudflareaccess.com/cdn-cgi/access/callback, where<your-team-name>should be your Cloudflare Zero Trust team name . - Set the Name ID/Email format to
emailAddress. - [Optional] Set the signature policy to Always Sign.
- [Optional] If your identity provider supports metadata file configuration, use the endpoint:
https://<your-team-name>.cloudflareaccess.com/cdn-cgi/access/saml-metadatato download and generate an XML file. Upload this XML file to the identity provider.
Add a SAML identity provider to the Zero Trust Dashboard
- On the Zero Trust Dashboard, navigate to Settings > Authentication.
- In the Login methods card, click Add new and select SAML.
- Choose a descriptive name for your identity provider.
- Enter the Single Sign on URL, IdP Entity ID or Issuer URL, and Signing certificate.
- If you do not wish to enter any of the additional SAML configurations , click Save.
Additional SAML configurations
SAML integrations allow users to include additional headers or claims that can be passed to applications.
Sign SAML authentication request
This optional configuration signs the Access JWT with the Cloudflare Access public key to ensure that the JWT is coming from a legitimate source. The Cloudflare public key can be obtained at https://<your-team-name>.cloudflareaccess.com/cdn-cgi/access/certs.
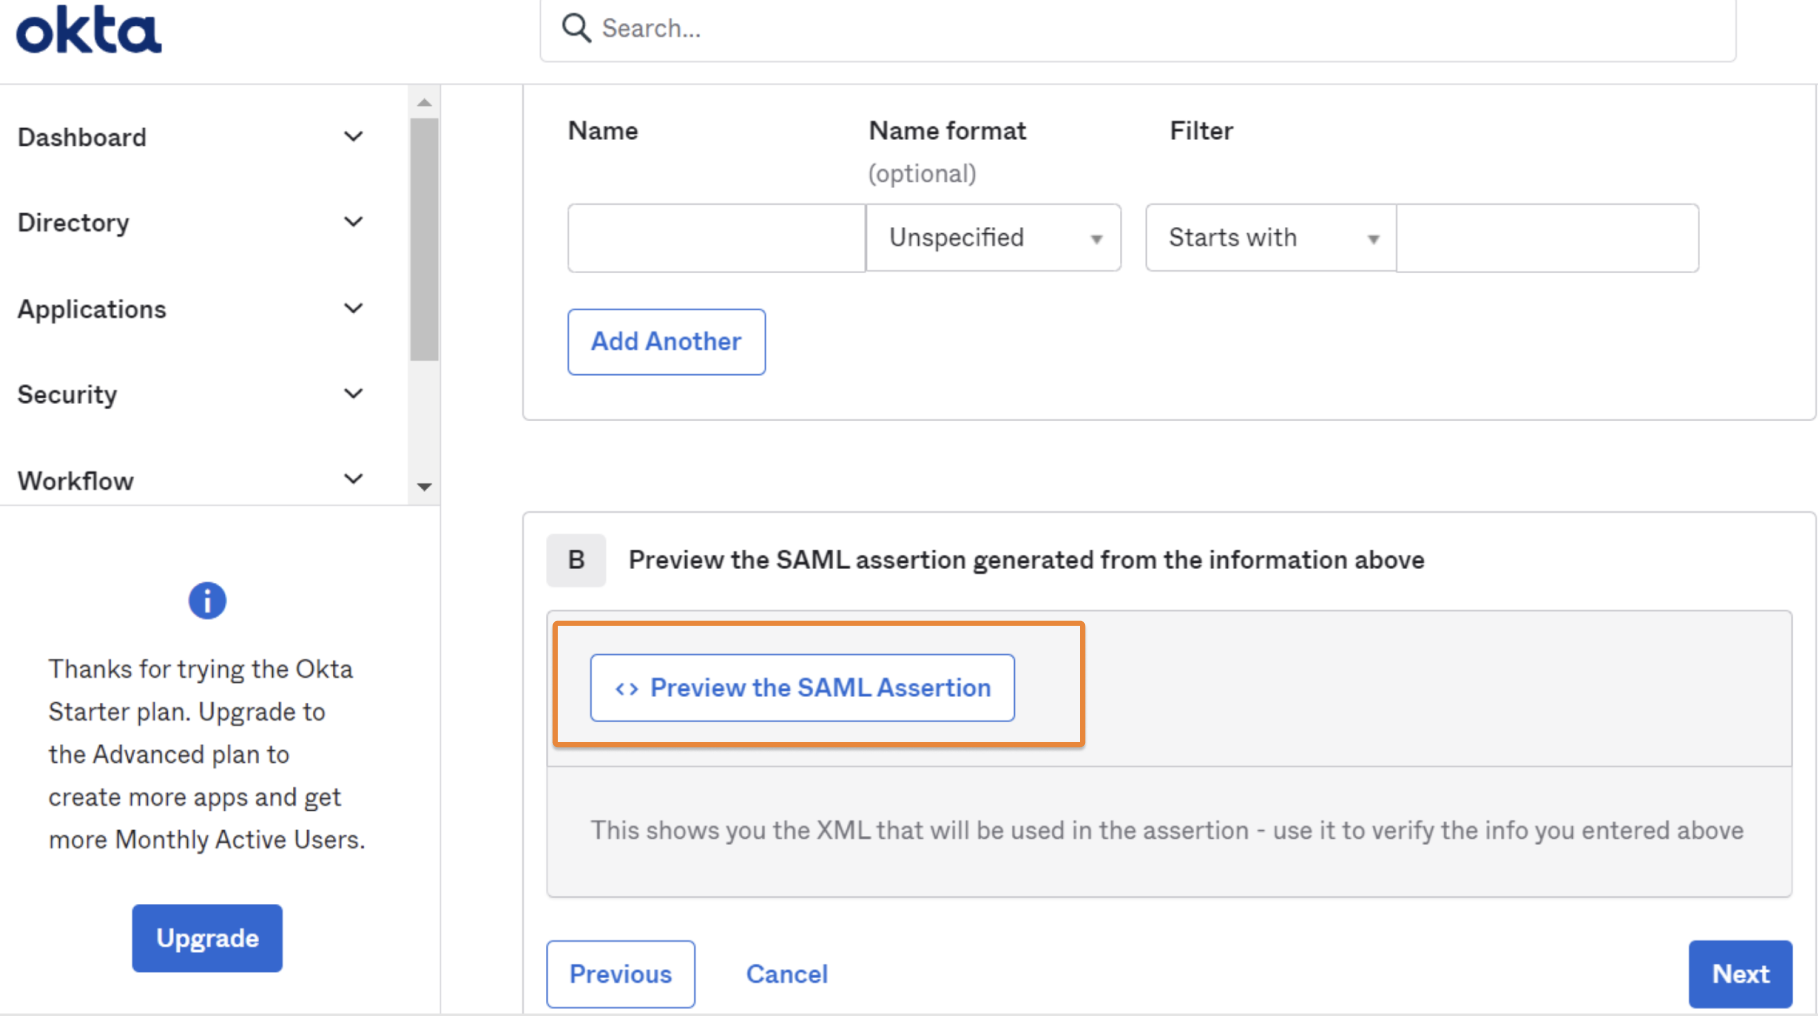
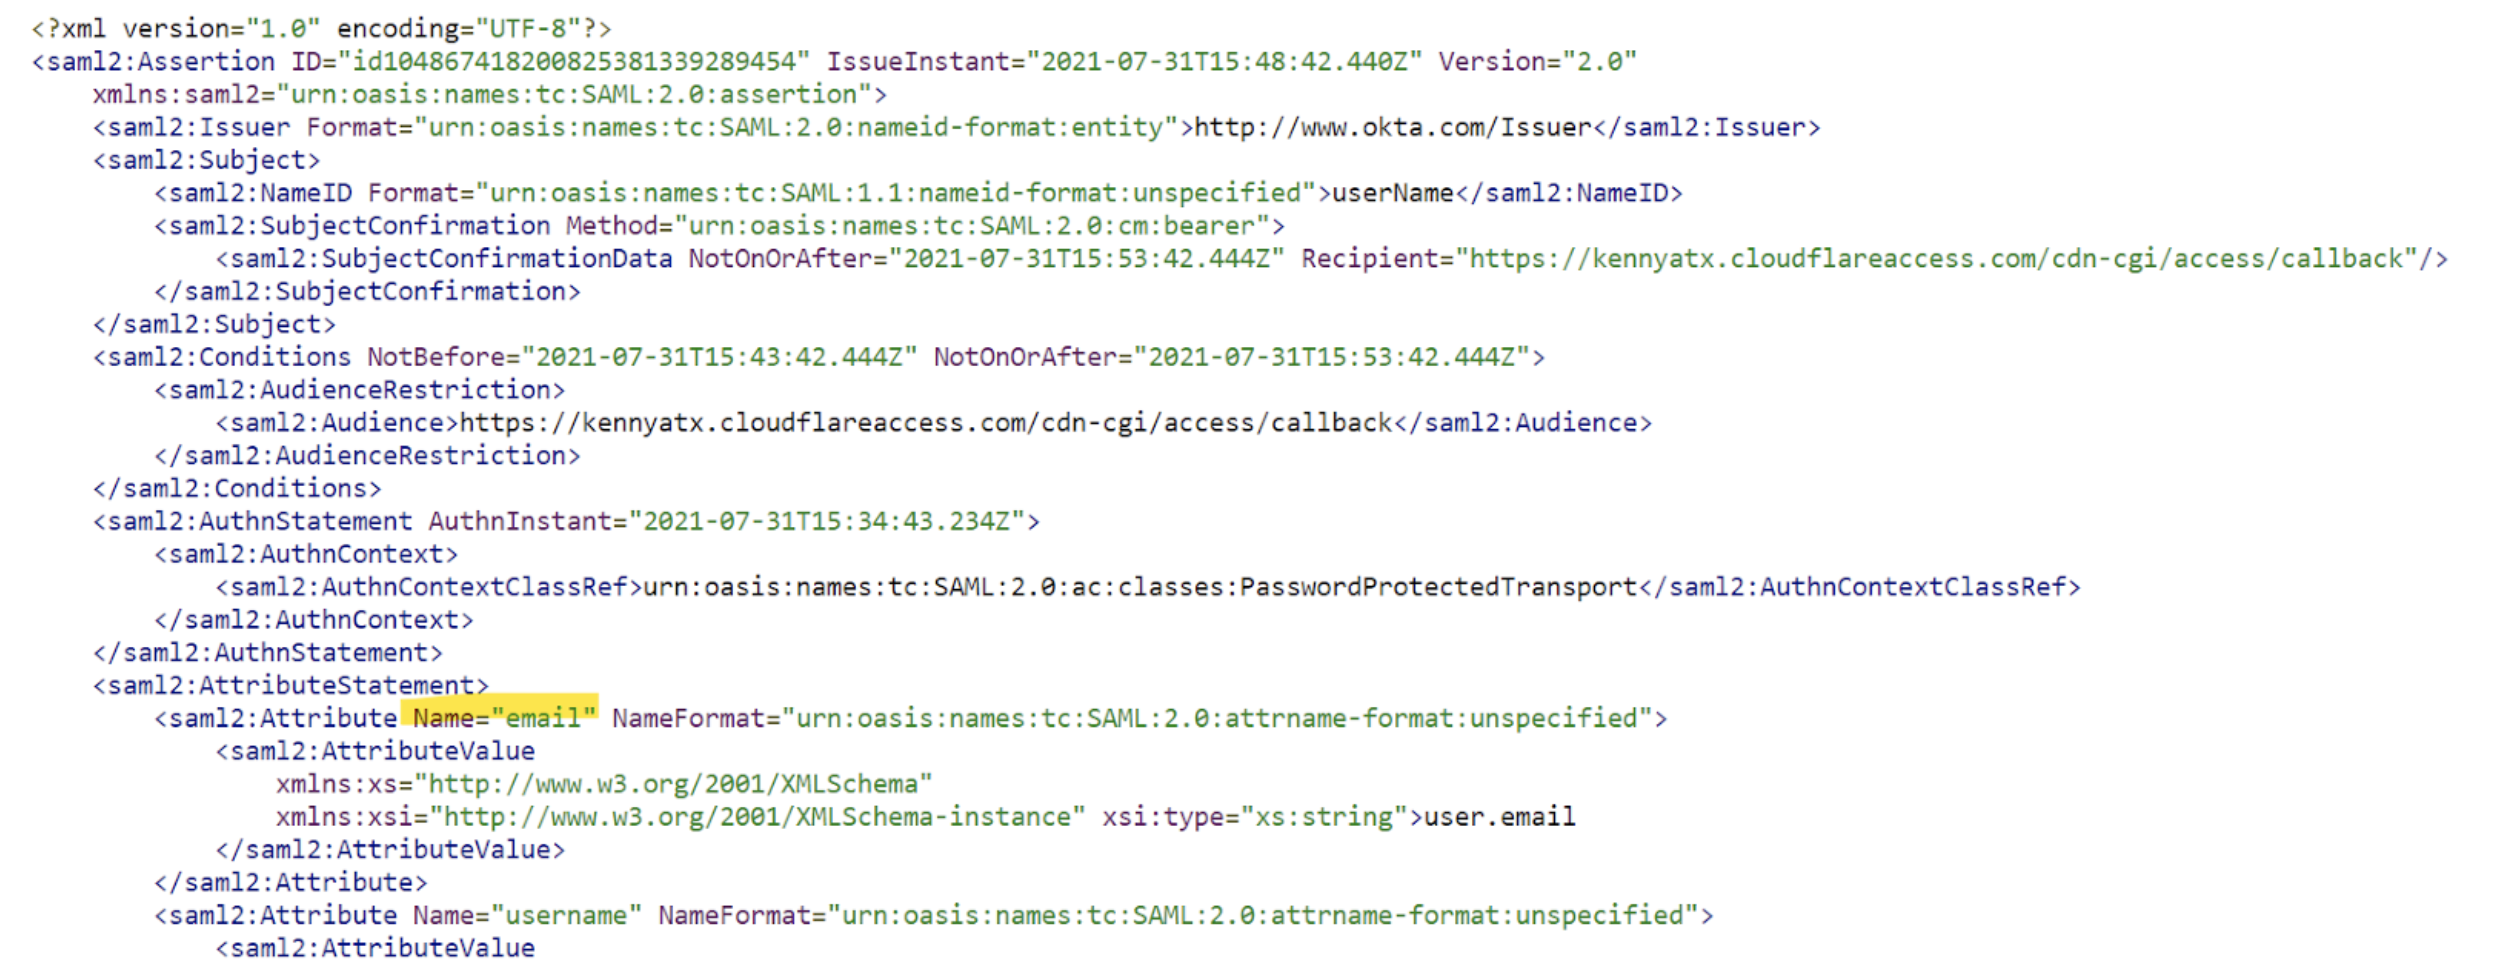
Email attribute name
Many
Zero Trust policies
depend on a user’s email address. Some identity providers have a different naming for the email address attribute (for example, Email, e-mail, emailAddress). This can typically be checked in the identity provider’s SAML test option.
Example in Okta:
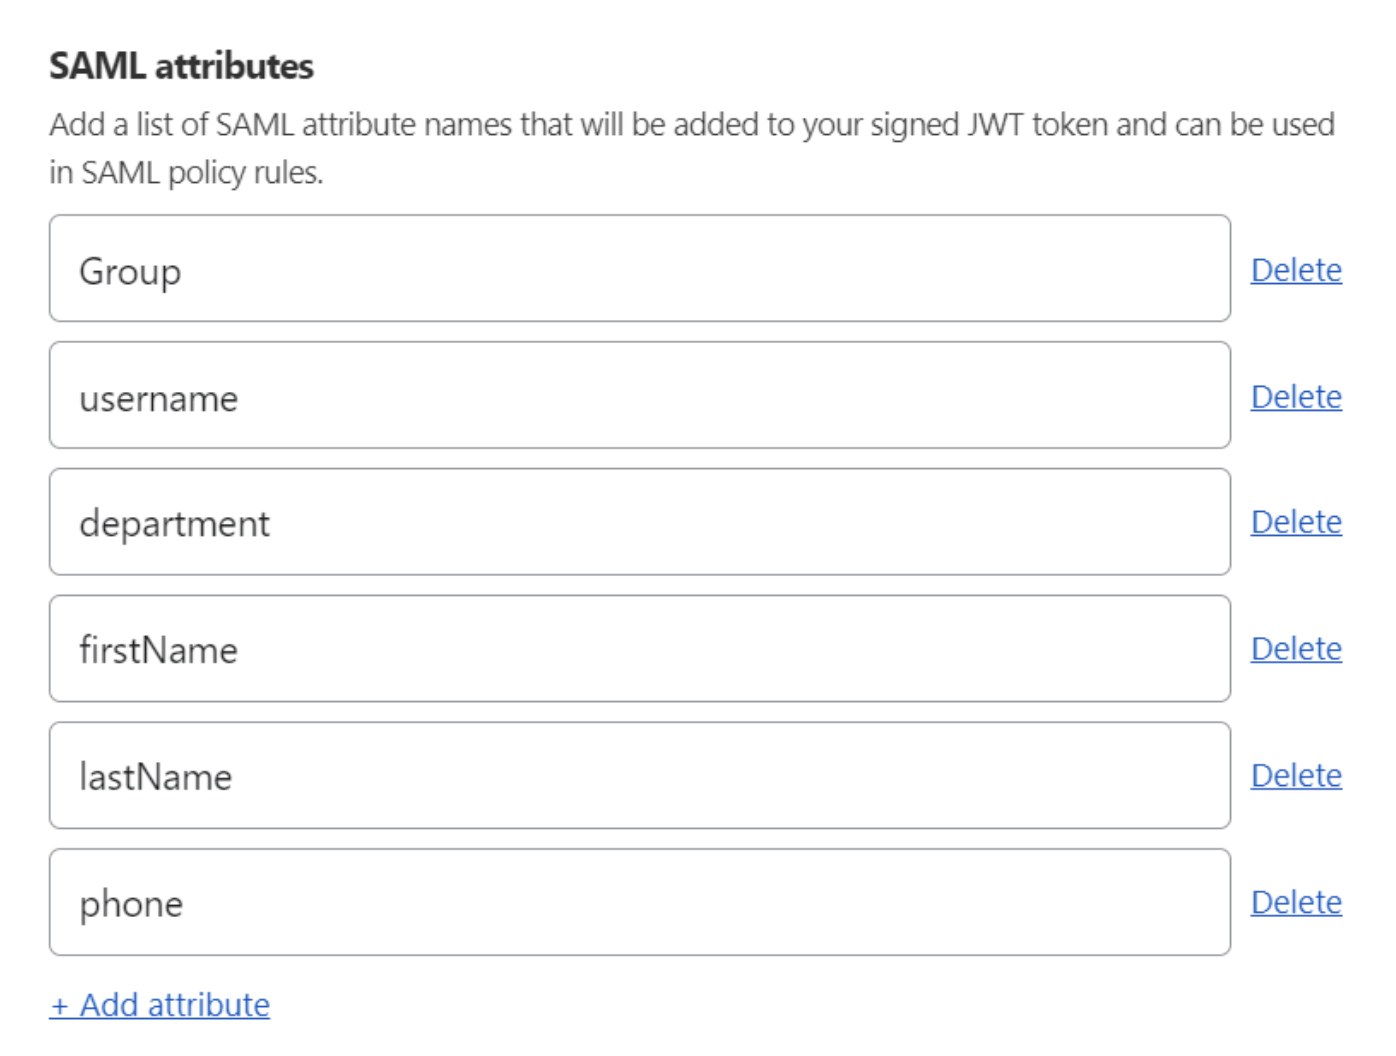
SAML attributes
SAML attributes can be added to the Access JWT. These can then be consumed by self-hosted or SaaS applications connected to Access. Any SAML attribute configured in the SAML integration must also be sent from the IdP.
Example in Okta:

How to receive these Attributes in Cloudflare:
SAML header attributes
If an application only requires specific SAML attributes on sign-in, then the attributes can be passed as headers. The Attribute Name should be the values coming from the IdP. The Header Name is what will appear in the initial authorization header from Access.
Testing the connection
Save the initial SAML configuration and click Test. This will prompt an error or success message. The error message will provide instructions on how to update the configuration to successfully integrate your identity provider with Cloudflare.