Private hostnames and IPs
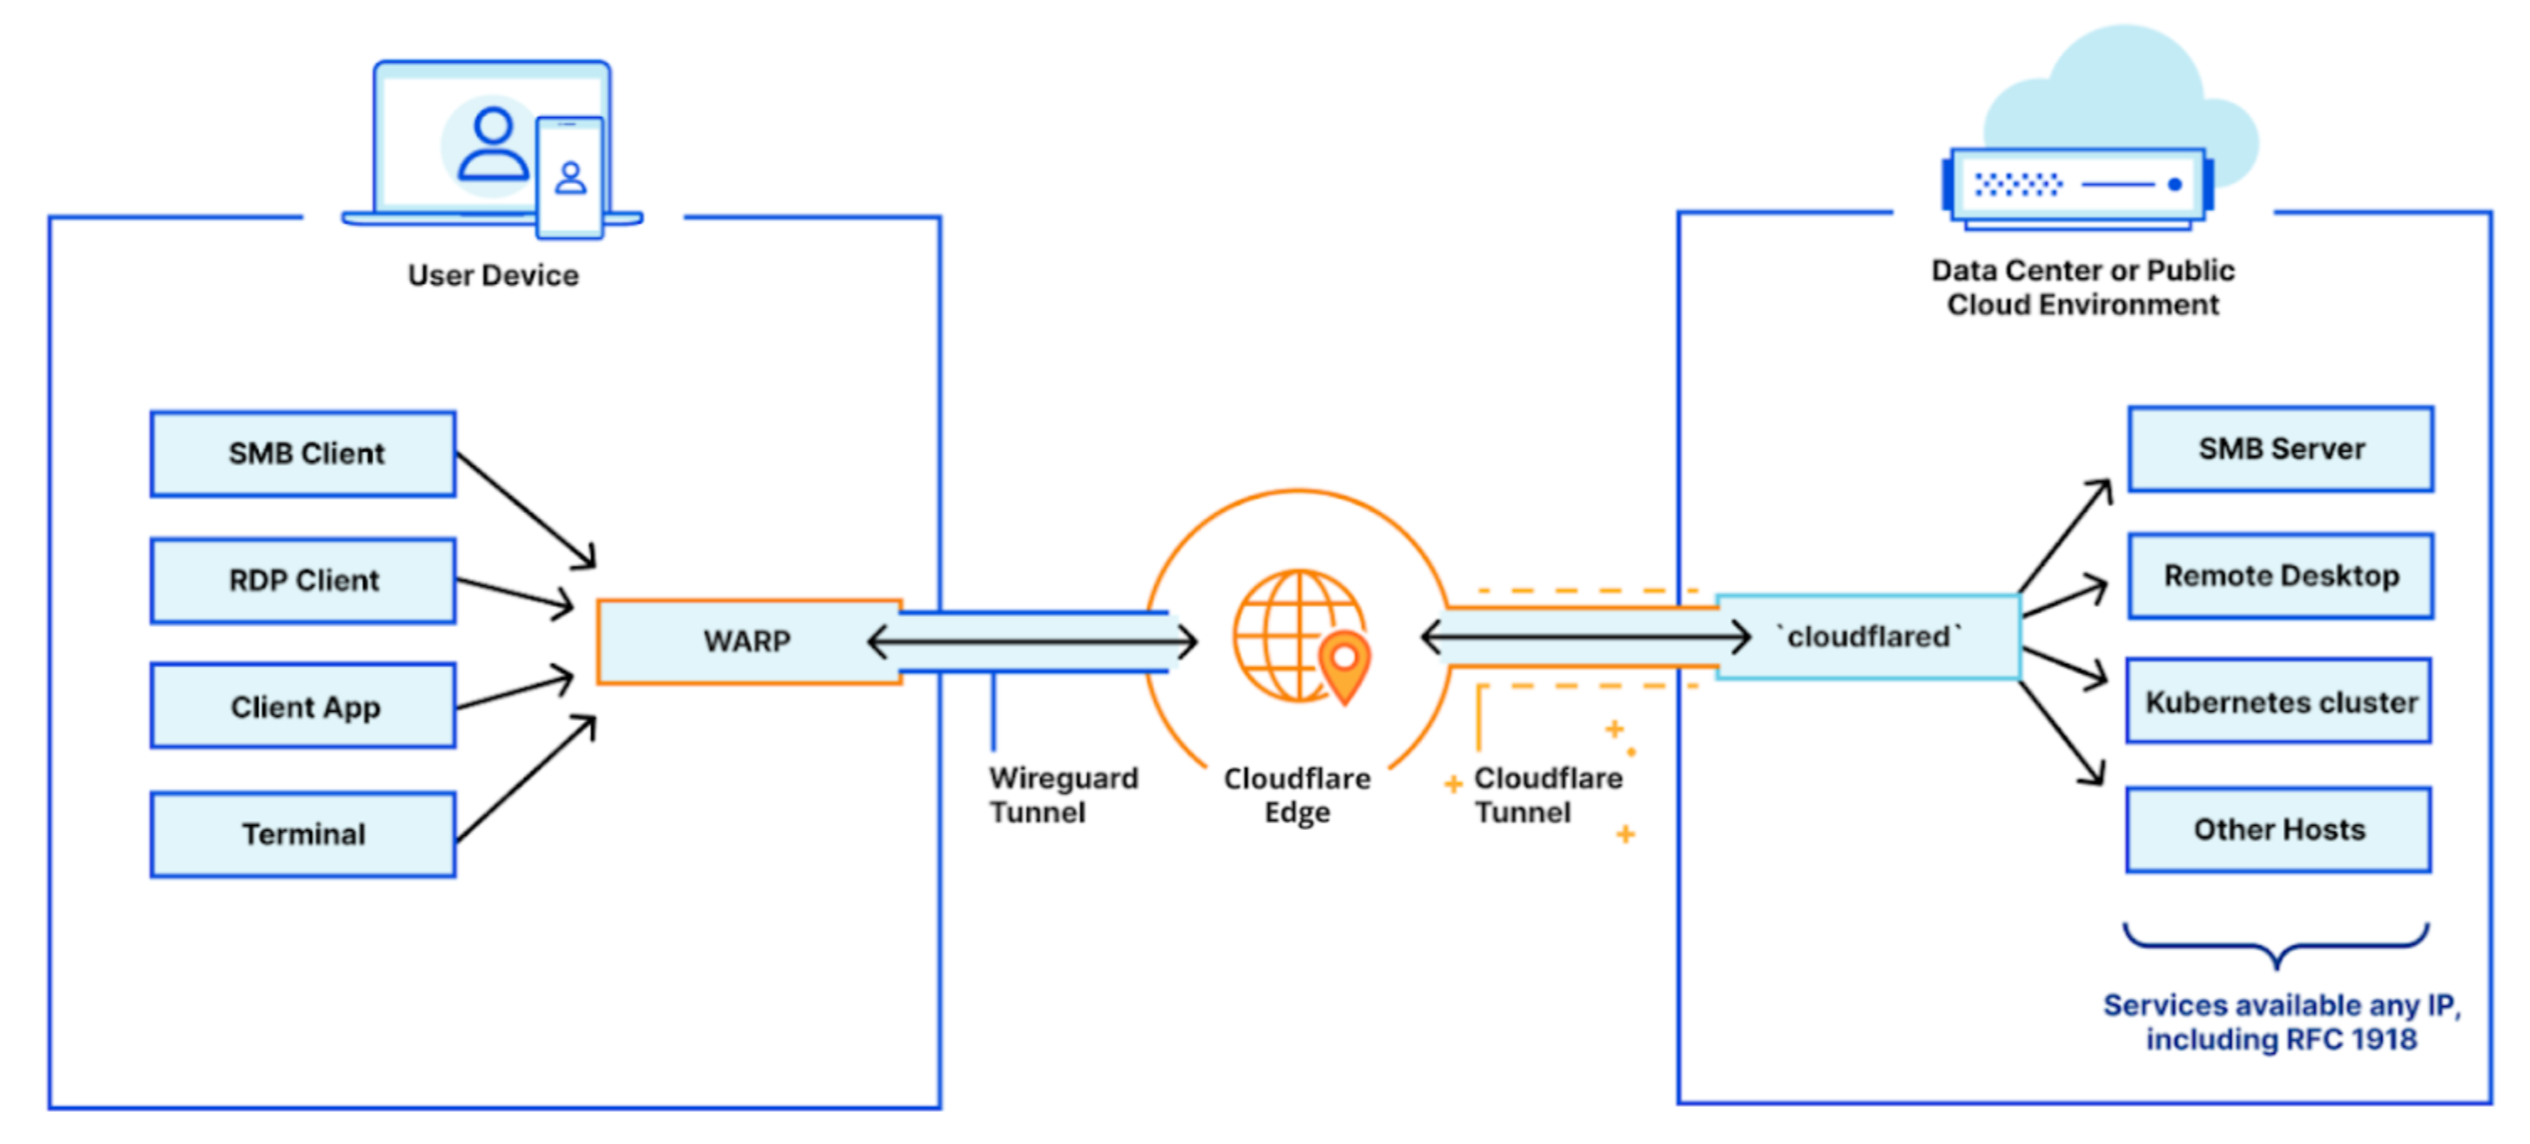
Building out a private network has two primary components: the infrastructure side and the client side.
The infrastructure side is powered by Cloudflare Tunnel, which connects your infrastructure to Cloudflare — whether that be a singular application, many applications, or an entire network segment. This is made possible by running cloudflared in your environment to establish multiple secure, outbound-only, load-balanced links to Cloudflare.
On the client side, your end users need to be able to easily connect to Cloudflare and, more importantly, your network. This connection is handled by Cloudflare WARP. This client can be rolled out to your entire organization in just a few minutes using your in-house MDM tooling and it establishes a secure connection from your users’ devices to the Cloudflare network.
Follow the steps below to define your internal DNS resolver with Cloudflare Zero Trust and to resolve requests to your private network using Cloudflare Tunnel.
Prerequisites
- Cloudflare Tunnel must be properly configured to route traffic to a private IP space.
cloudflaredmust be connected to Cloudflare from your target private network.- Cloudflare WARP must be installed on end-user devices to connect your users to Cloudflare.
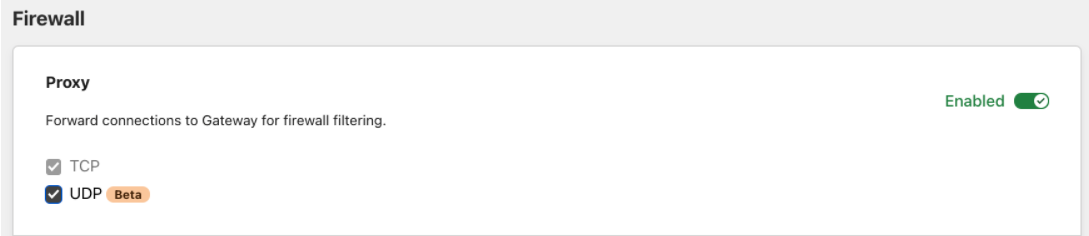
Enable UDP support
-
On the Zero Trust dashboard, navigate to Settings > Network.
-
Scroll down to Firewall settings.
-
Ensure the Proxy is enabled and both TCP and UDP are selected.
Create a Local Domain Fallback entry
Next, we need to create a Local Domain Fallback entry.
-
Remain in Network Settings and scroll further down to Local Domain Fallback.

-
Click Manage.
-
Create a new Local Domain Fallback entry pointing to the internal DNS resolver. The rule in the following example instructs the WARP client to resolve all requests for
myorg.privatecorpthrough an internal resolver at10.0.0.25rather than attempting to resolve this publicly.

Update cloudflared
Next, update your Cloudflare Tunnel configuration to ensure it is using QUIC as the default transport protocol. To do this, you can either set the protocol: quic property in your
configuration file
or
pass the –-protocol quic flag
directly through your CLI.
Finally, update to the latest available version (2021.12.3 as of the time of writing) of cloudflared running on your target private network.

You can now resolve requests through the internal DNS server you set up in your private network.
Test the setup
For testing, run a dig command for the internal DNS service:
$ dig AAAA www.myorg.privatecorp
The dig will work because myorg.privatecorp was configured above as a fallback domain. If you skip that step, you can still force dig to use your private DNS resolver:
$ dig @10.0.0.25 AAAA www.myorg.privatecorp
Both dig commands will fail if the WARP client is disabled in your end user’s device.
Troubleshooting
Use the following troubleshooting strategies if you are running into issues while configuring your private network with Cloudflare Tunnel.
-
Ensure that
cloudflaredis connected to Cloudflare by visiting Access > Tunnels in the Zero Trust dashboard. -
Ensure that
cloudflaredis running withquicprotocol (search forInitial protocol quicin its logs). -
Ensure that the machine where
cloudflaredis running is allowed to egress via UDP to port 7844 to talk out to Cloudflare. -
Ensure that end-user devices are enrolled into WARP by visiting https://help.teams.cloudflare.com
-
Double-check the precedence of your application policies in the Gateway Network policies tab. Ensure that a more global Block or Allow policy will not supersede the application policies.
-
Check the Gateway Audit Logs Network tab to see whether your UDP DNS resolutions are being allowed or blocked.
-
Ensure that your Private DNS resolver is available over a routable private IP address. You can check that by trying the
digcommands on your machine runningcloudflared. -
Check your set up by using
dig ... +tcpto force the DNS resolution to use TCP instead of UDP.