SaaS applications
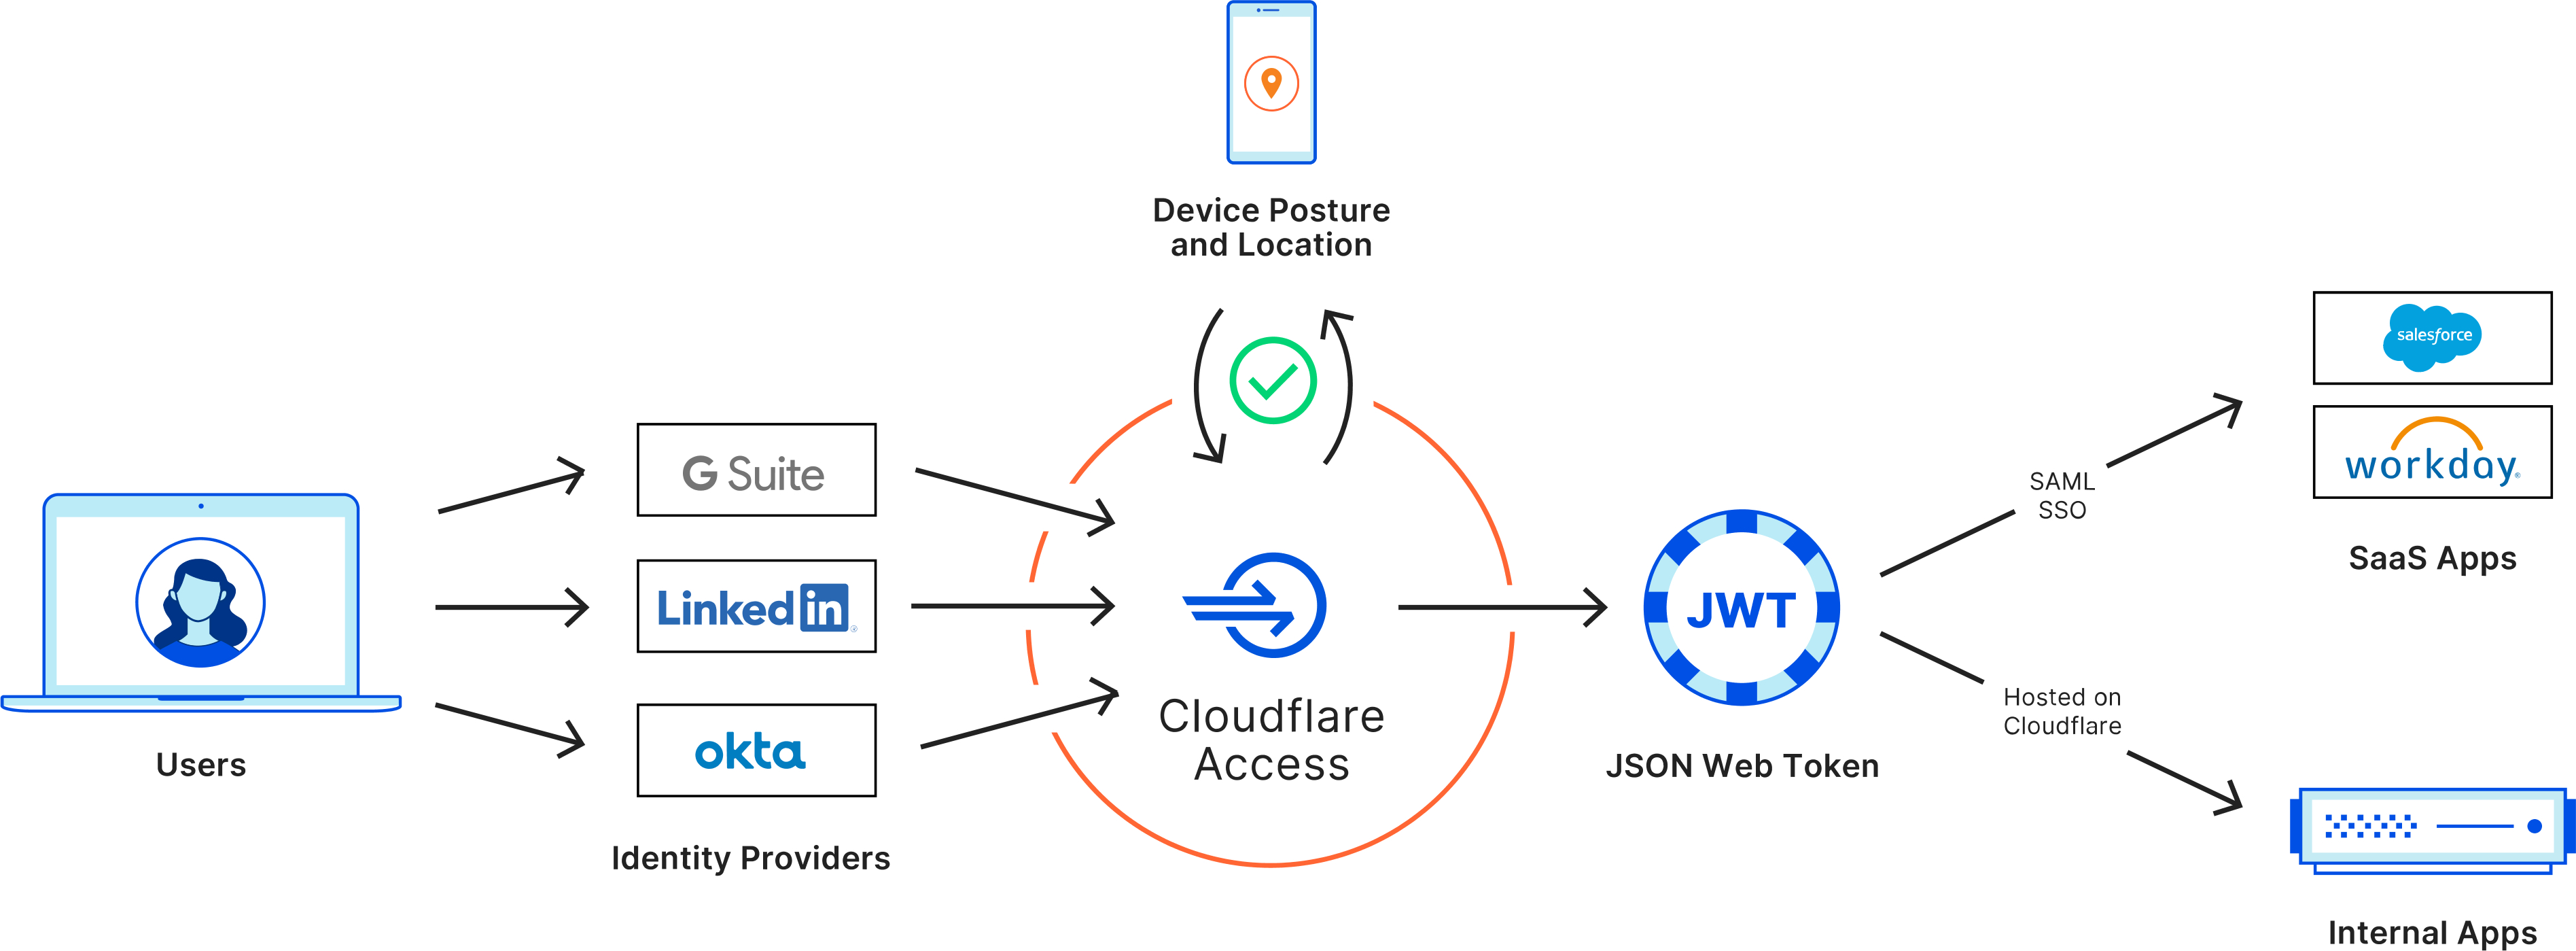
Cloudflare Access allows you to integrate your SaaS products by acting as an identity aggregator, or proxy. This way, users cannot login to SaaS applications without first meeting the criteria you want to introduce.
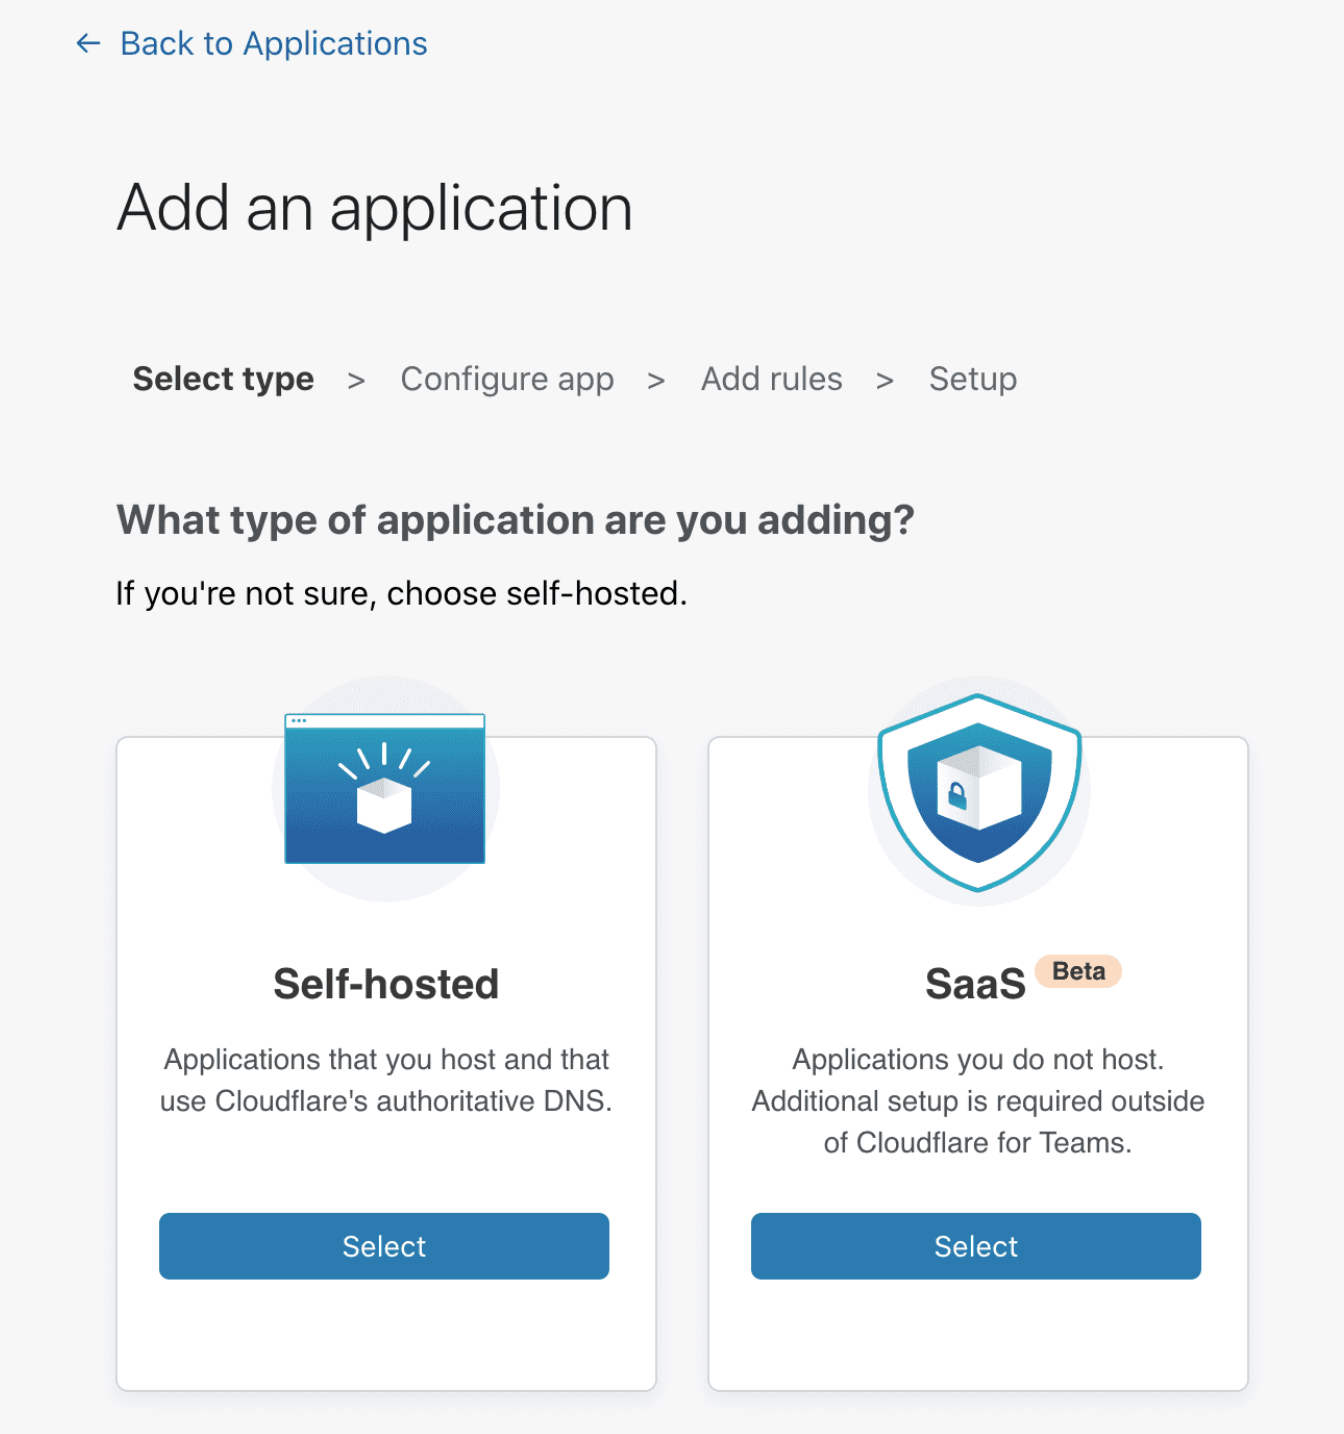
1. Add your application
-
On the Zero Trust dashboard, navigate to Access > Applications.
-
Click Add an application.
-
Select SaaS.
-
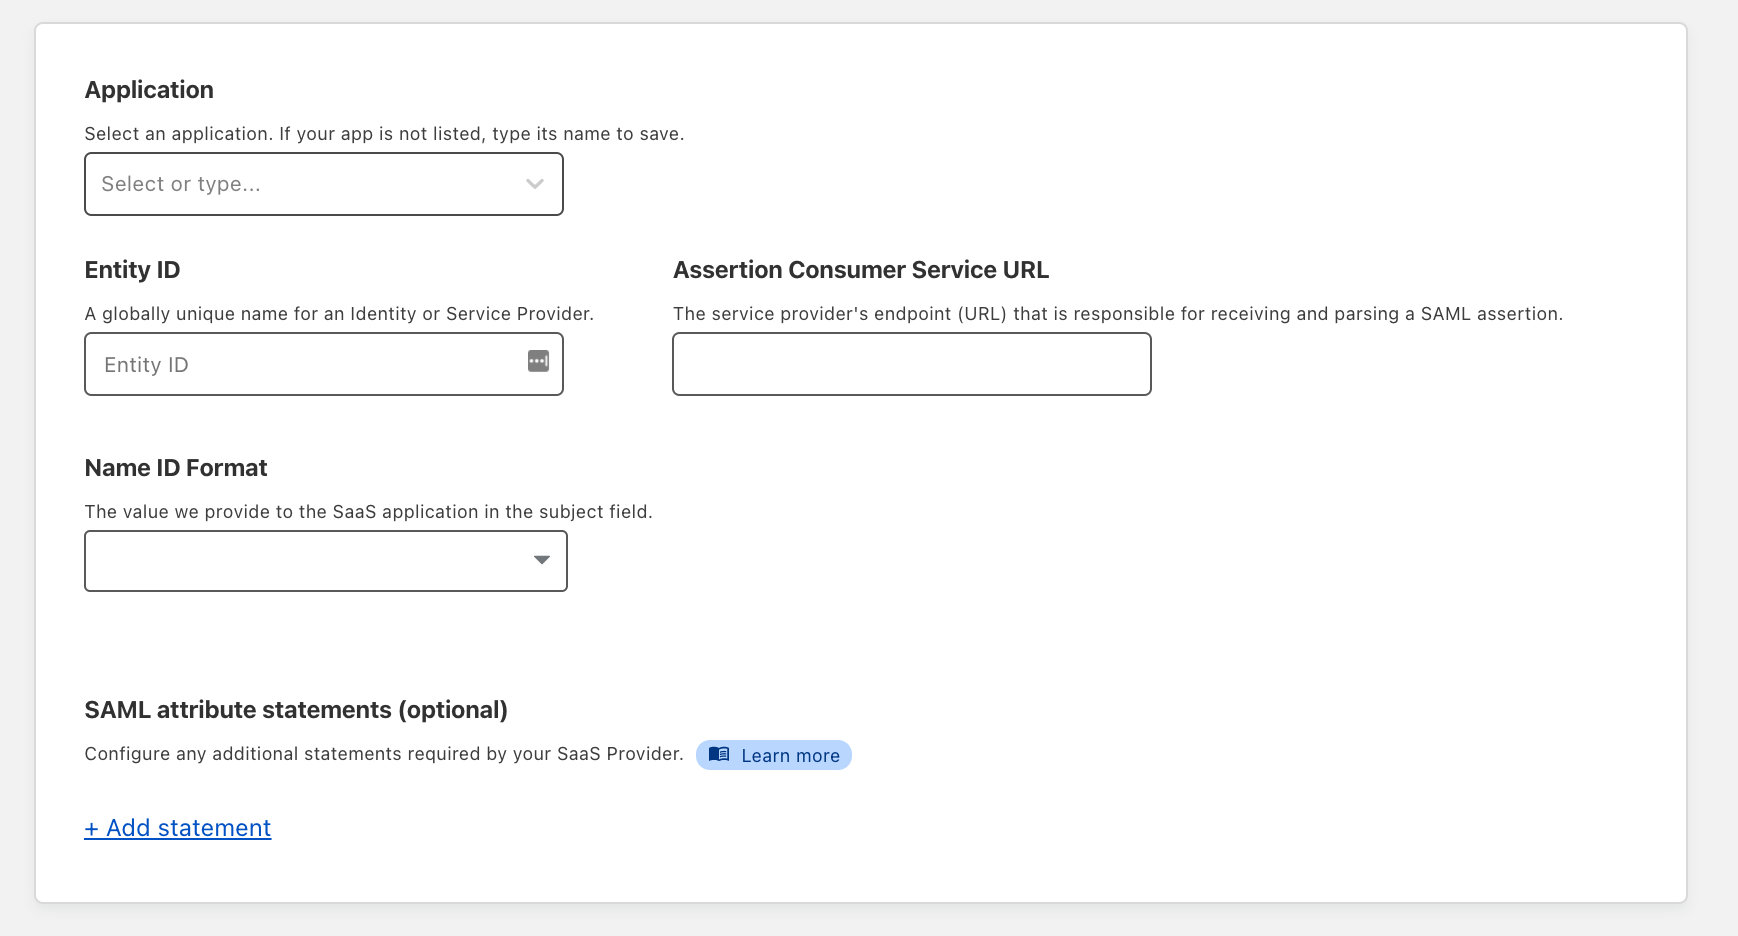
In the Configure app section, select an application from the Application drop-down menu. If your application is not listed, type its name in the textbox and select it.
-
In the Entity ID field, provide the unique identifier of your SaaS application. SaaS applications store this information in different ways.
-
In the Assertion Consumer Service URL field, input the service provider’s endpoint for receiving and parsing SAML assertions.
-
If your SaaS application requires additional SAML statements, add the mapping of your IdP’s attributes you would like to include in the SAML statement sent to the SaaS application.
-
Scroll down to the Application visibility card.
-
Toggle on Show application in the App Launcher if you want the application to be visible in the App Launcher. The toggle does not impact the ability for users to reach the application. Users with no access to the application will not see it in the App Launcher regardless of whether the toggle is enabled. Users with access to the application will still be able to reach it with a direct link.
-
[Optional] Add a custom logo for your application by clicking Custom and entering a link to your desired image.
-
-
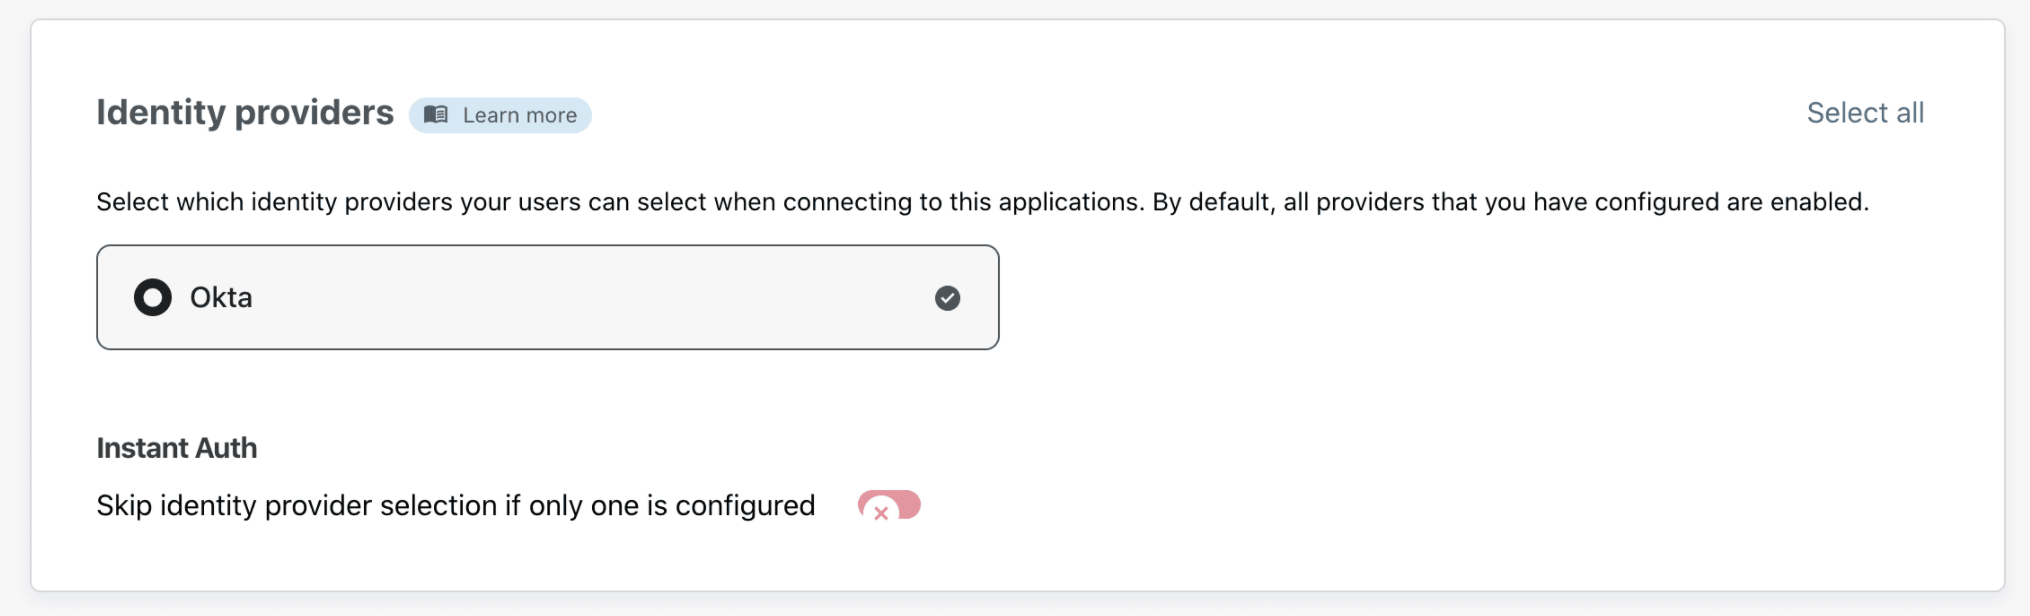
Next, scroll down to the Identity Providers card to select the identity providers you want to enable for your app.
-
Turn on Instant Auth if you are selecting only one login method for your application, and would like your end users to skip the identity provider selection step.
-
Click Next.
2. Add a policy
You can now configure a policy to control who can access your app.
To learn more about how policies work, read our Policies .
- First, specify a name for your rule. This is a mandatory field.
- Specify a policy action.
- Specify one or more rules in the Configure a rule box. You can add as many include, exception, or require statements as needed.
- Click Next to add your application to Access.
3. Integrate your SaaS application with Access
Before you begin using your application through Access, your last step is to integrate your SaaS application to Access.
-
First, configure these fields with your SAML SSO-compliant application. Take note of these fields before you click Done:
- Your SSO endpoint
- Your Access Entity ID or Issuer
- Your Public key
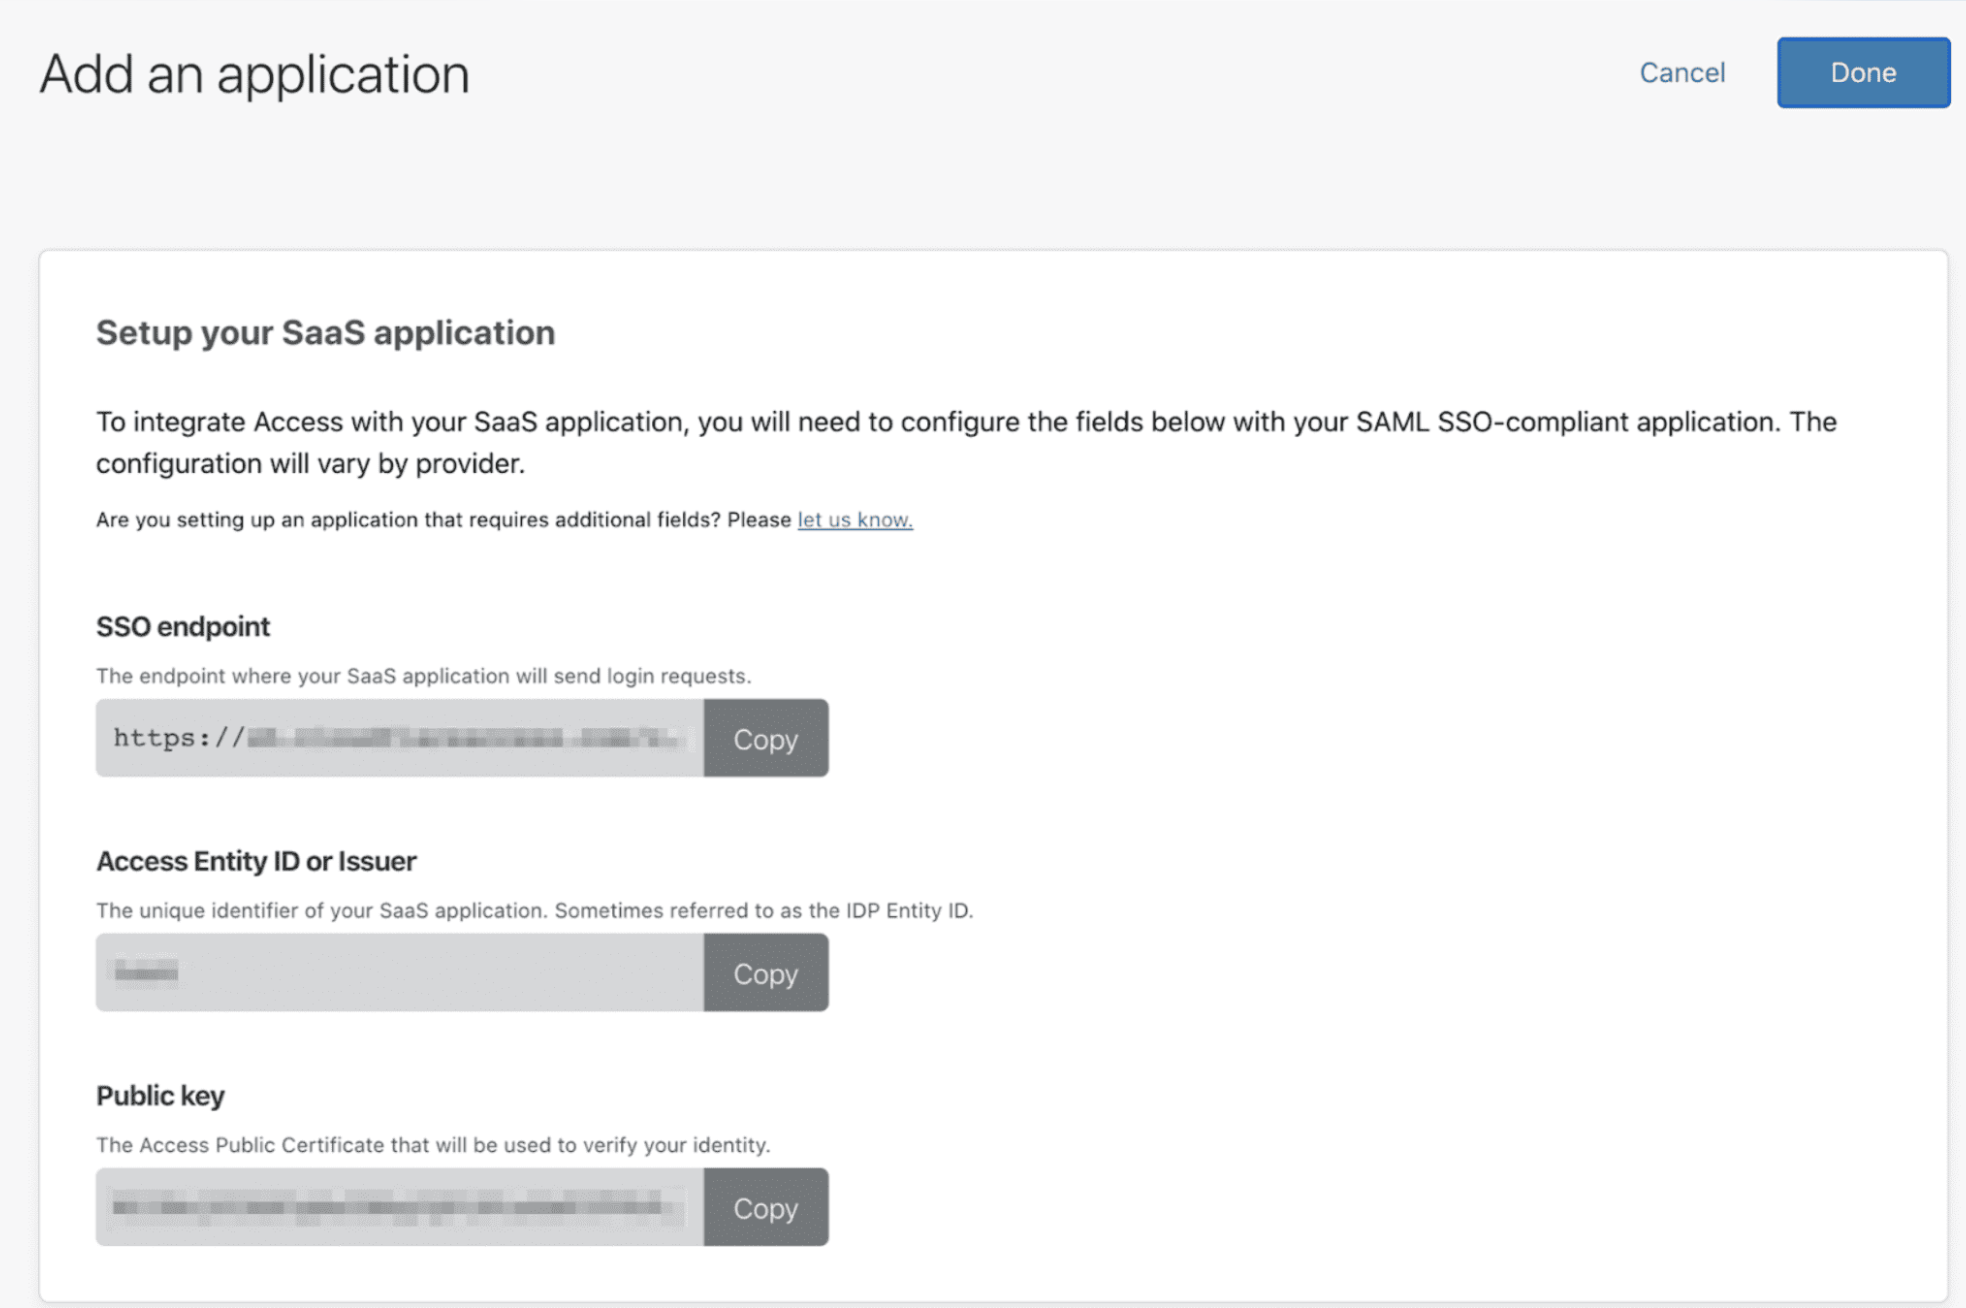
-
Click Done to see your application listed on your Applications tab.