Block page
Gateway responds to any blocked domain with 0.0.0.0, and does not return that blocked domain’s IP address. As a result, the browser will show a default error page, and users will not be able to reach that website. This may cause confusion and lead some users to think that their Internet is not working.
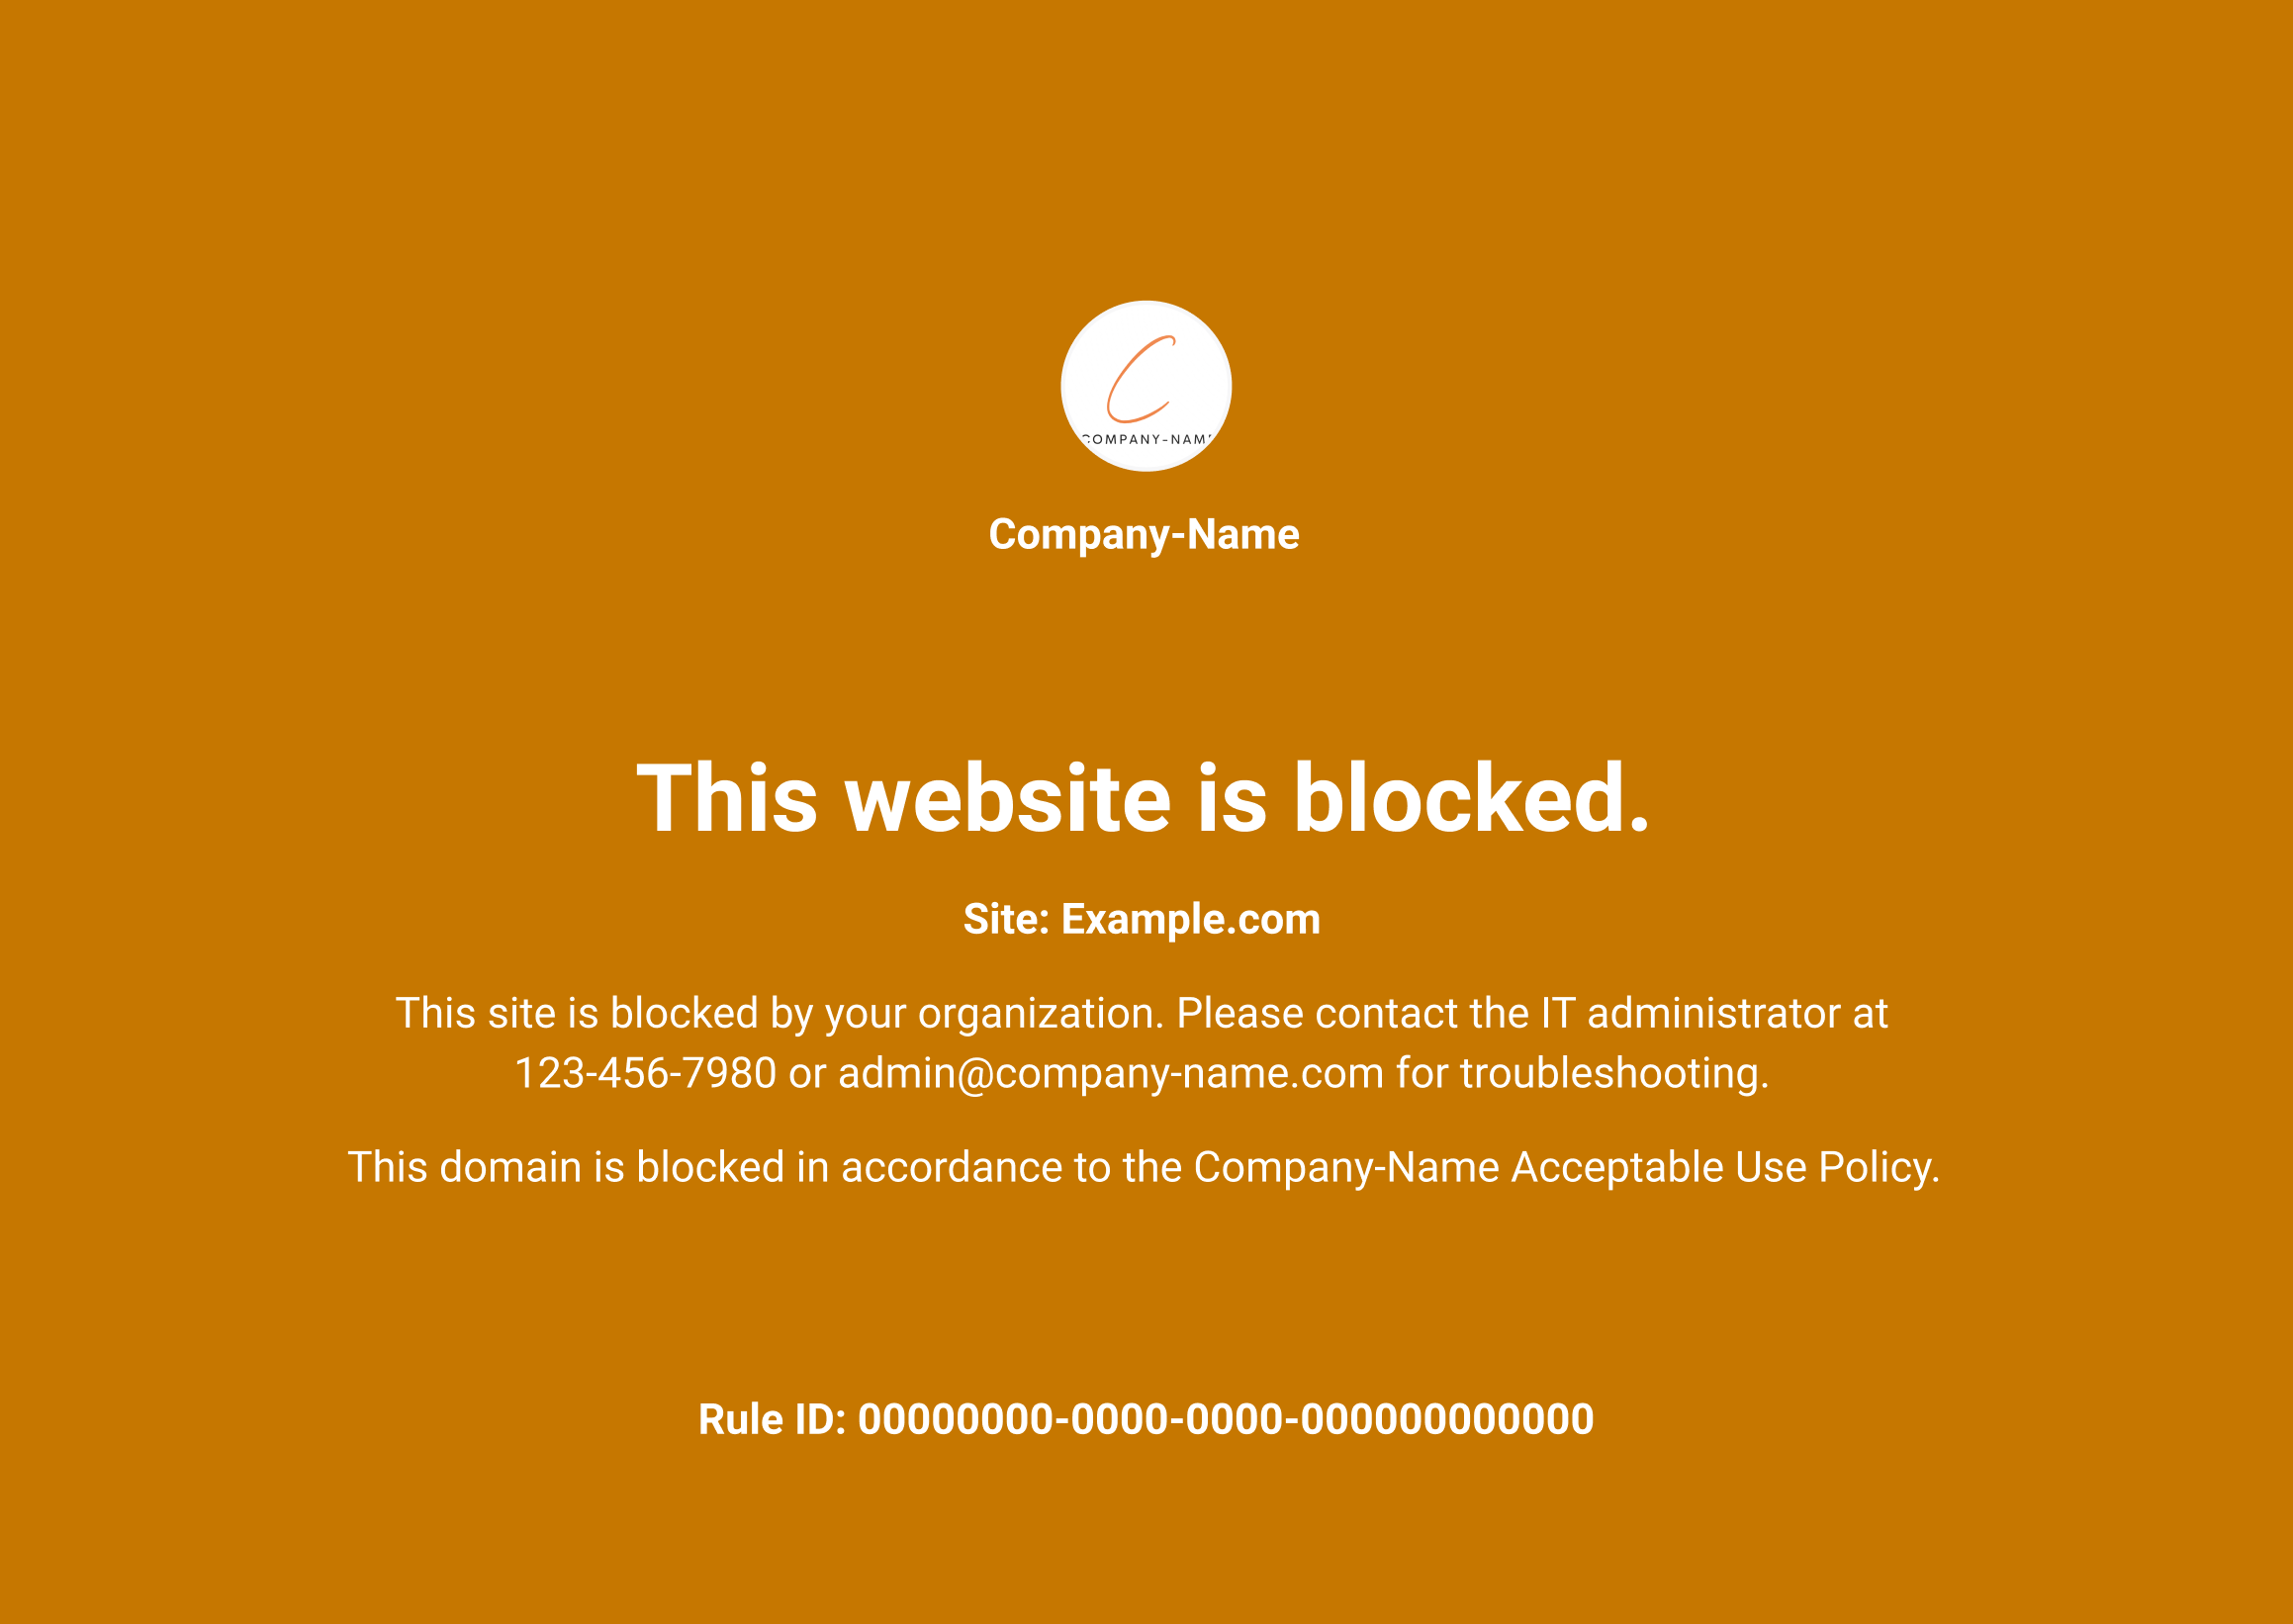
Configuring a block page on the Zero Trust dashboard helps avoid this confusion. Your block page will display information such as the rule ID of the policy blocking the website, a policy-specific block message, your organization’s name, and a global message you may want to show — for example, a message explaining that the website has been blocked by Gateway, and whom in the organizations users should contact for support.
To configure a block page:
- Download the Cloudflare certificate .
- Add the certificate to your system .
- Enable the block page for HTTP or DNS policies.
- Customize the block page .
Download the Cloudflare certificate
-
On the Zero Trust dashboard, navigate to Settings > Devices.
-
Scroll down to the Certificates card.
-
Click on Download certificate.
Now you will need to add the certificate to your system. This ensures your web browser can use it to establish HTTPS connections.
Add the certificate to your system
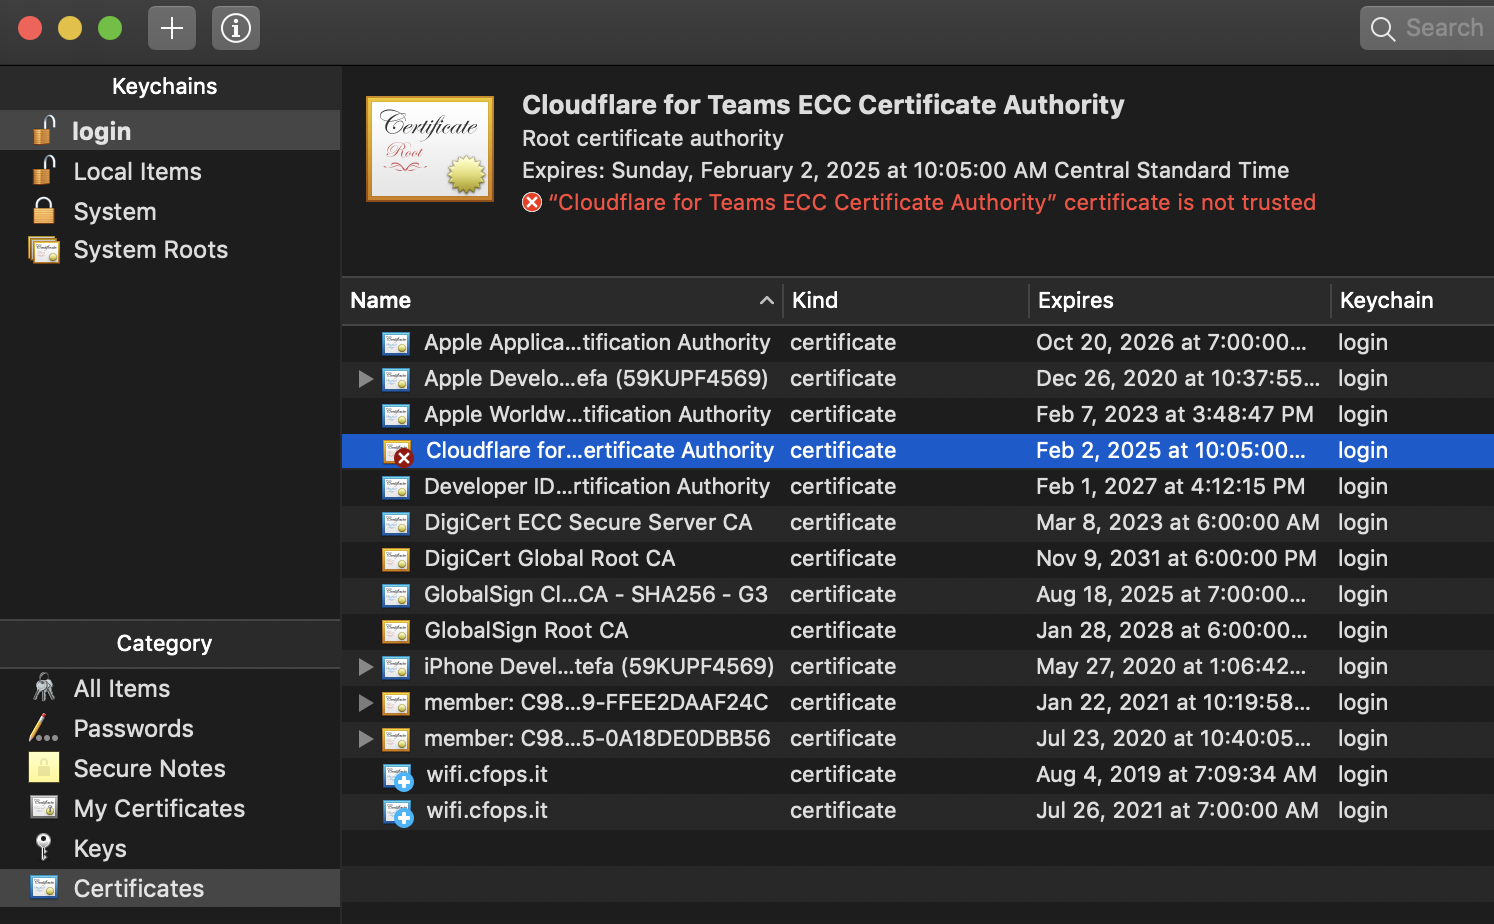
- If you are on a Mac, double-click on the
.pemfile.
The certificate is now listed in the Keychain Access application.
-
Double-click on the certificate.
-
Click Trust.
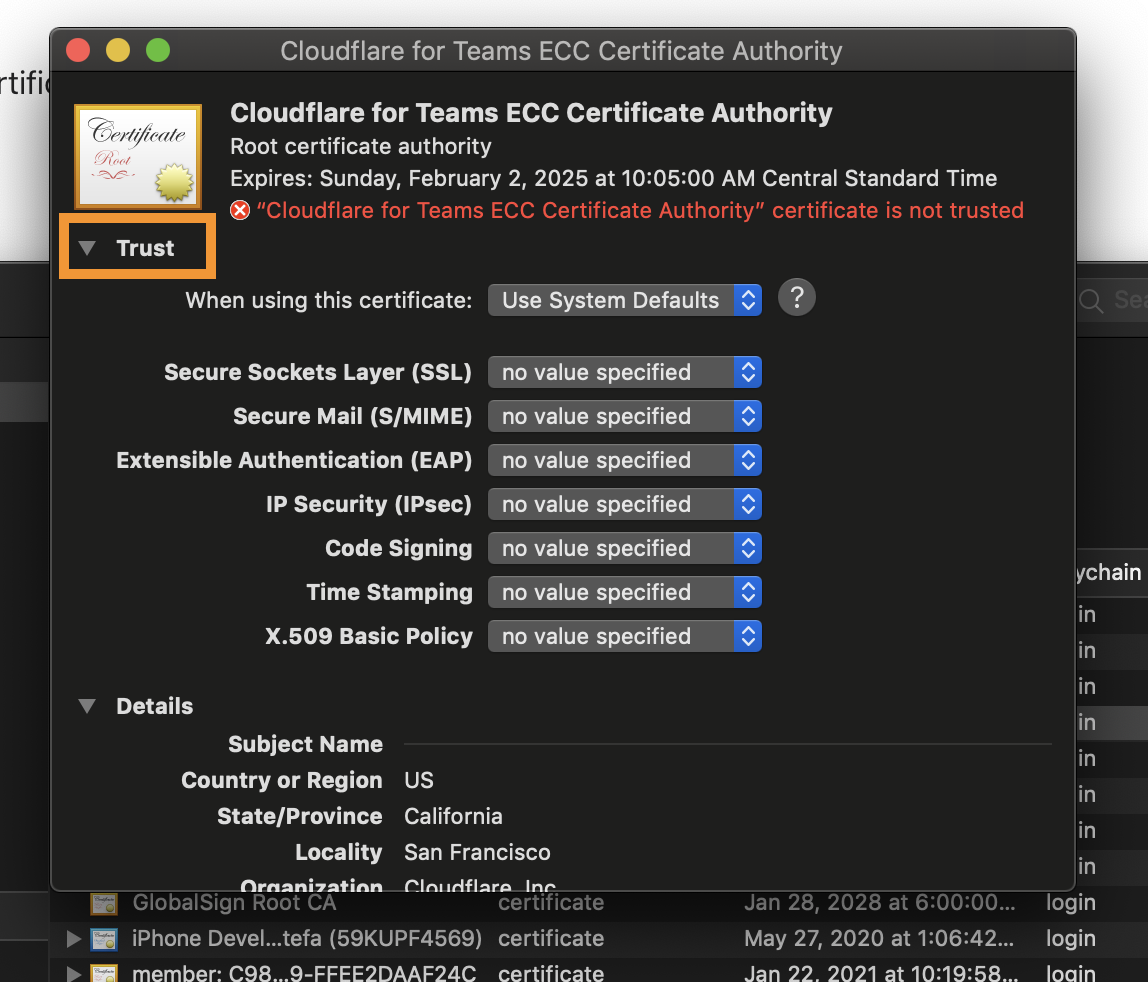
-
Select Always Trust from the drop-down menu for When using this certificate.
-
Close the menu.
If your system asks for admin permission, enter your password or use your fingerprint ID to confirm the changes.
Firefox
If you are not using Firefox, you can skip this section.
Follow the instructions below to finish configuring the block page:
- Enter about:config in the address bar.
- If you see a prompt from Firefox, click Accept the risk!.
- Set
security.enterprise_roots.enabledtotrue.
Enable the block page for HTTP policies
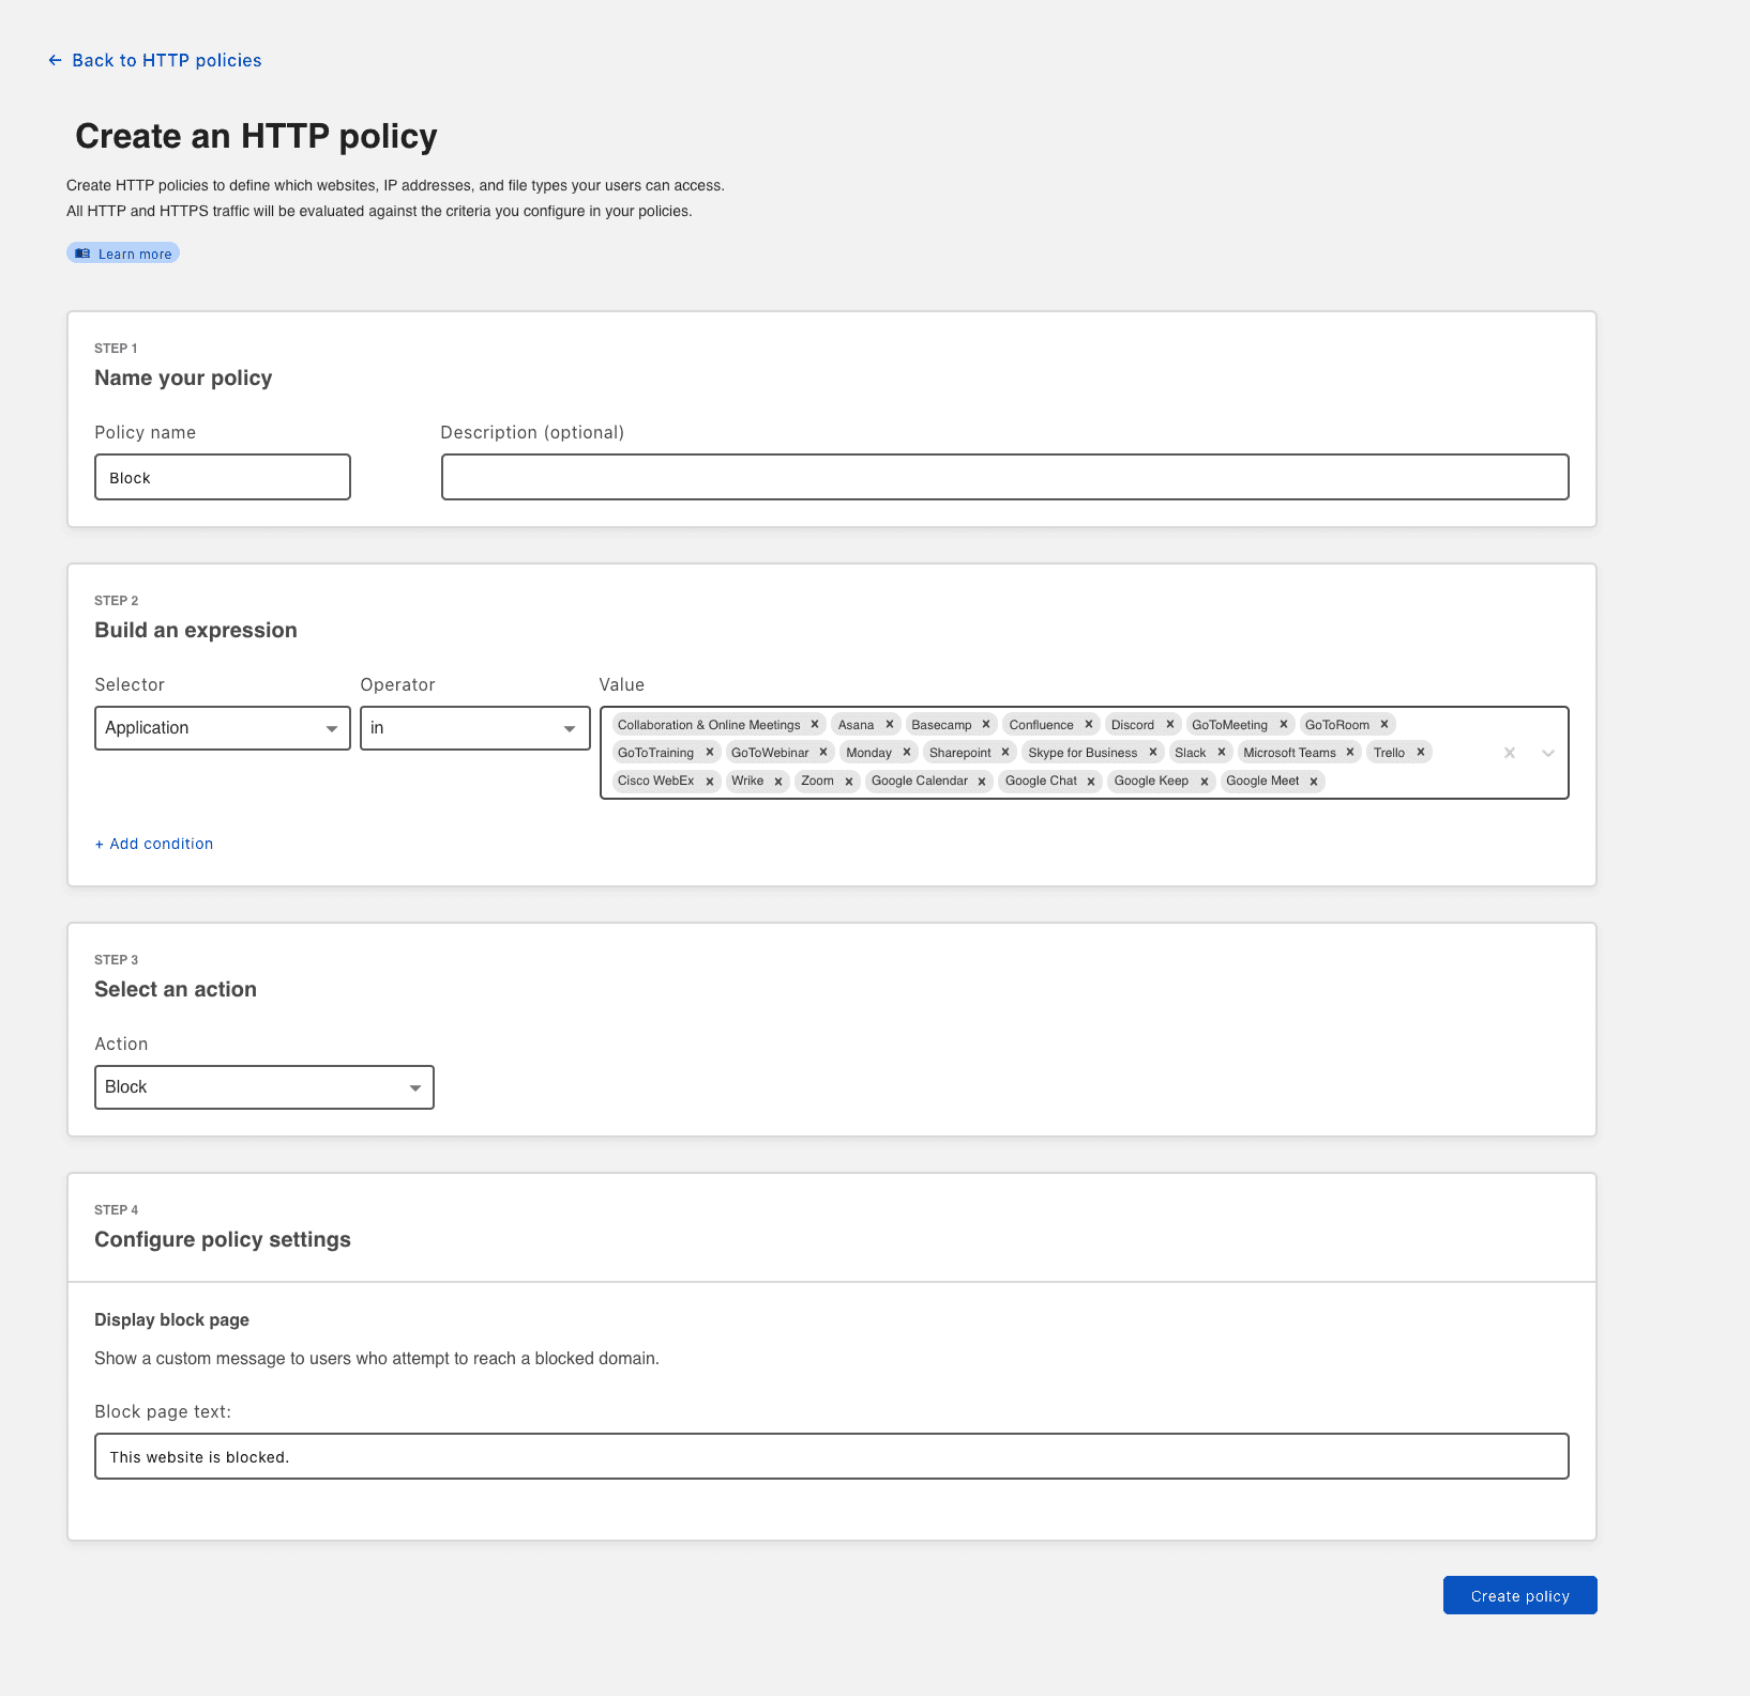
The block page is automatically enabled for all HTTP policies. When a user is blocked at the HTTP layer, the block page is displayed. As you configure a policy with a Block action, you can specify a policy-specific block message.
Enable the block page for DNS policies
For DNS policies:
- On the Zero Trust dashboard, navigate to Policies > DNS.
- Find the policy for which you would like to set up a block page.
- Click Edit.
- Scroll down to find the Configure policy settings step.
- Toggle the Display block page switch.
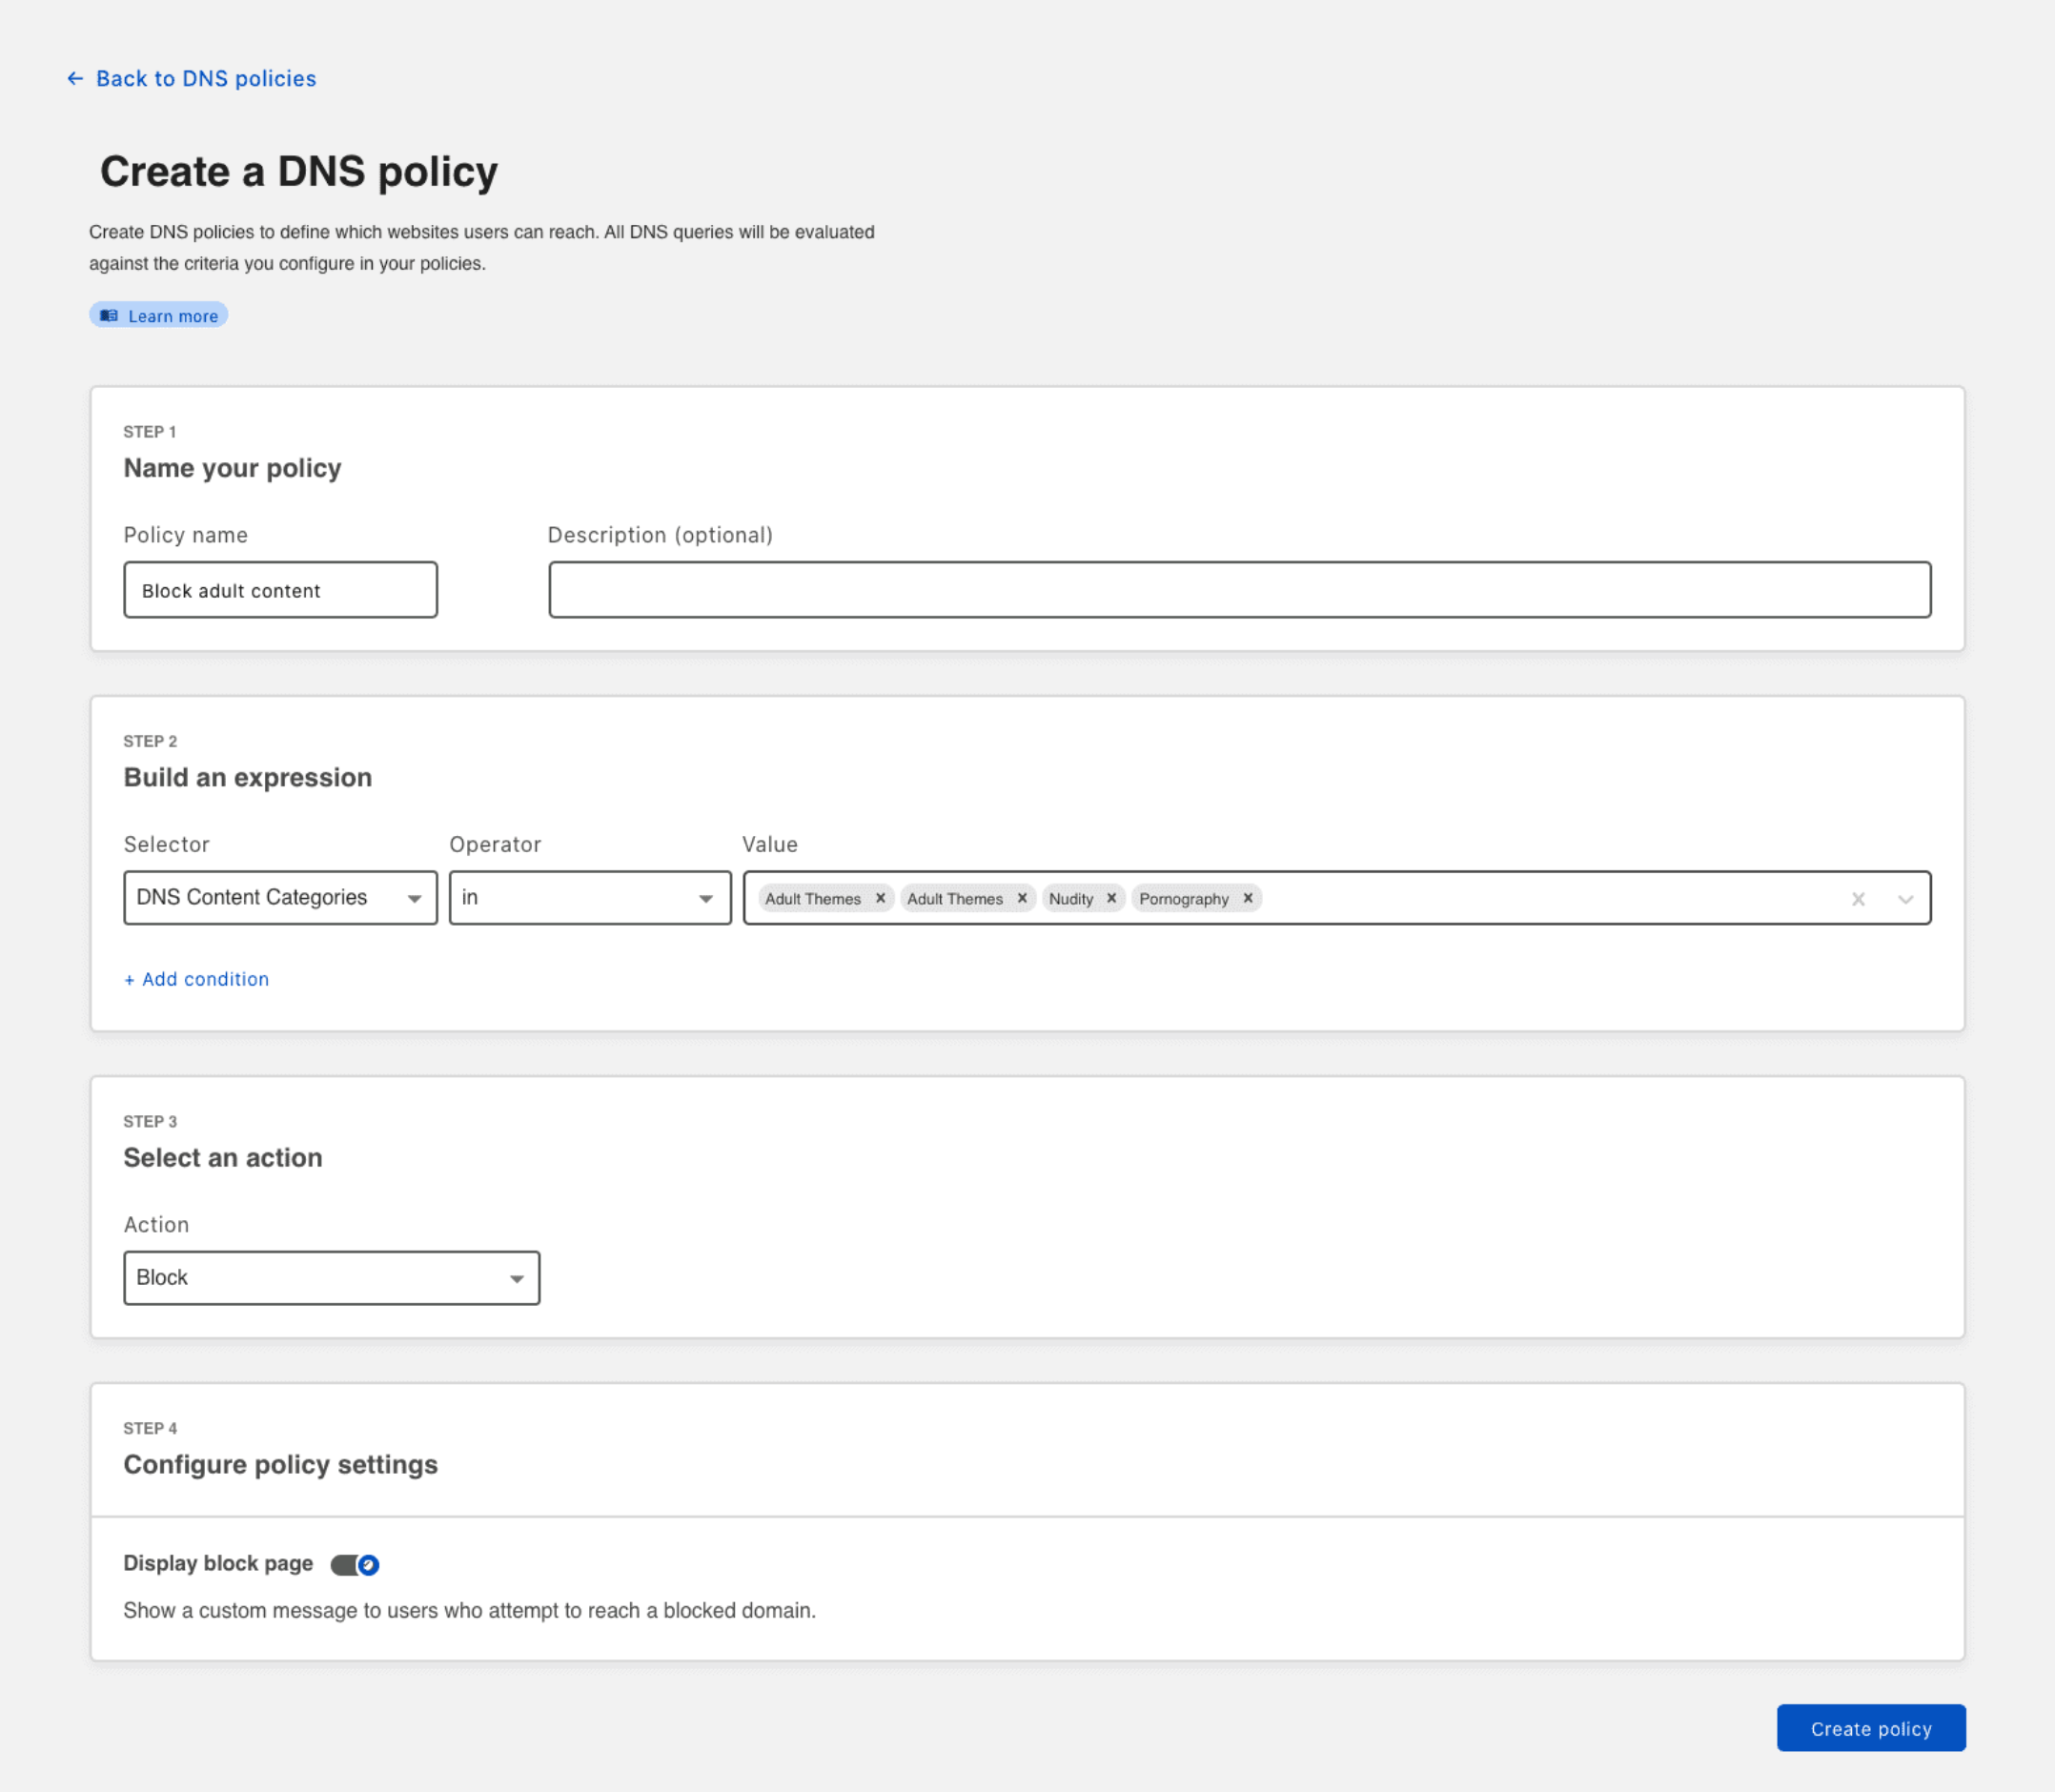
- Click Save.
Your block page is now enabled for this policy.
Customize the block page
You can customize the block page by making global changes that will show up every time a user navigates to a block page, independently of the type of rule (DNS or HTTP) that’s blocking the website. These global customizations include:
- Adding your organization’s name
- Adding a logo
- Adding a header text
- Adding a global block message
- Choosing a background color
All of these elements will display in addition to two fields specific to the policy that’s blocking the website:
-
The policy-specific block message you’ve specified while creating the policy. This message is displayed under your global block message, and above the Rule ID.
-
The Rule ID, which will make it easier for admins to debug possible policy issues in relation to blocked websites.
To apply customizations to your block page, navigate to the Block page card under Settings > General.
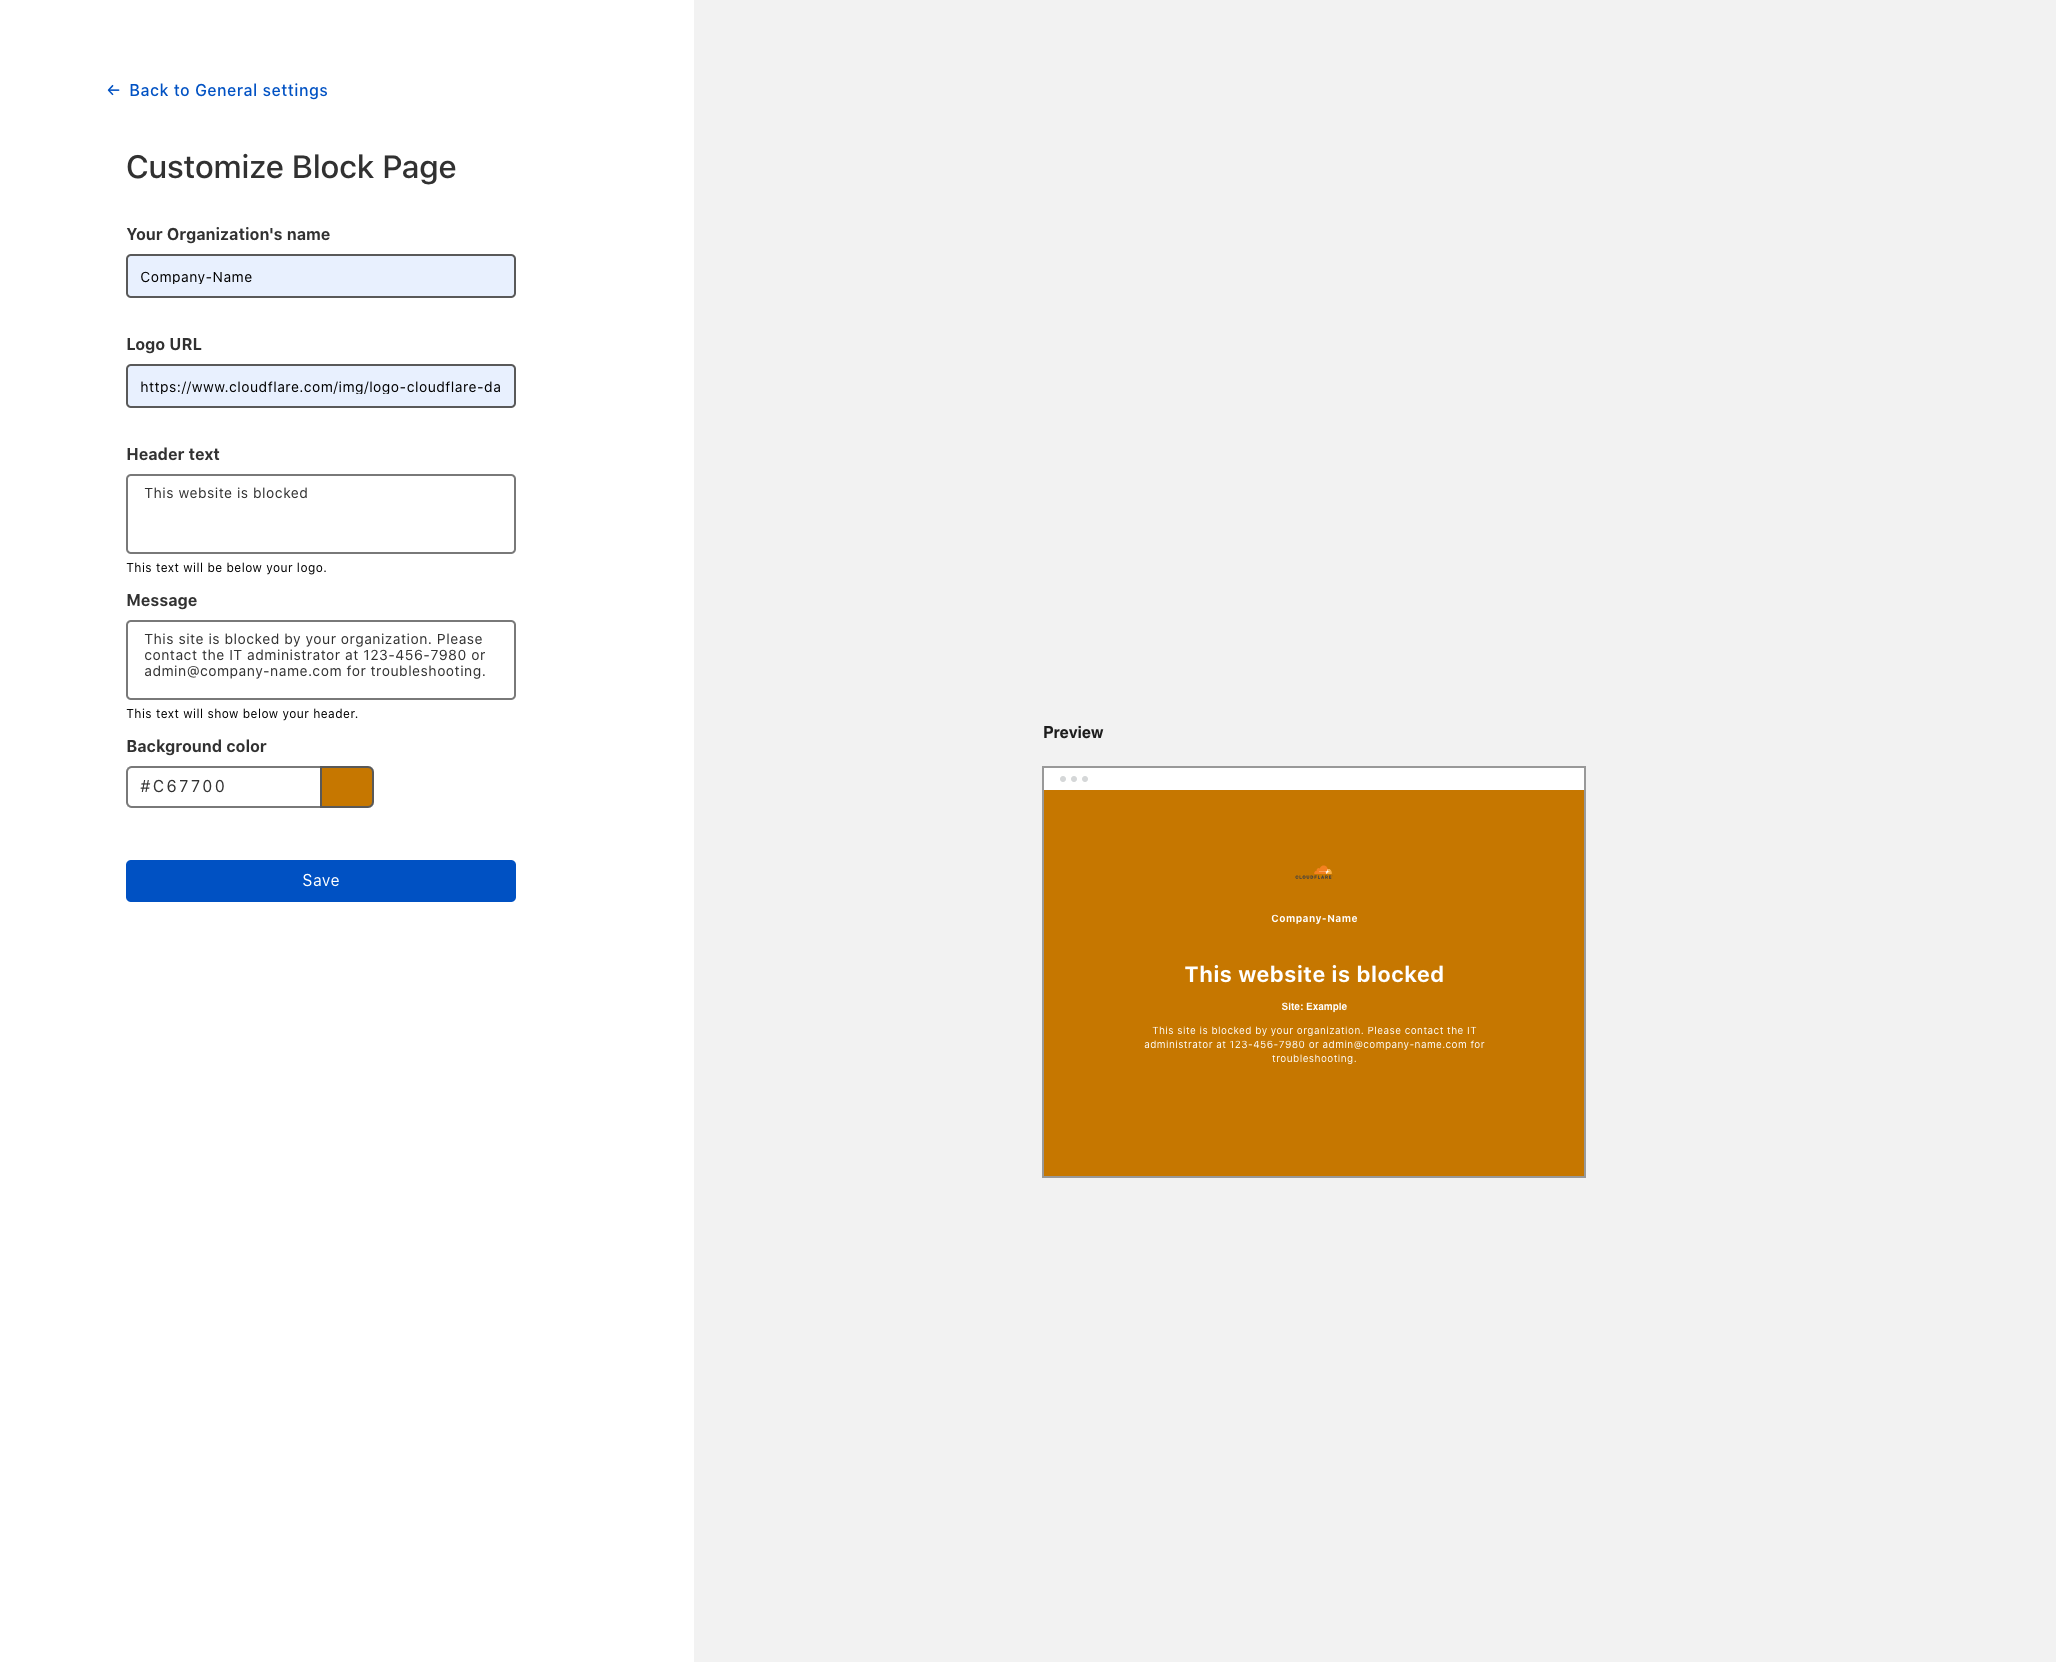
Once you have completed your customization, click Save. Your customers will now see your custom block page when navigating to a blocked website.