Connect through Cloudflare Access using kubectl
You can connect to machines over kubectl using Cloudflare’s Zero Trust platform.
🗺️ This walkthrough covers how to:
- Build a policy in Cloudflare Access to secure the machine
- Connect a machine to Cloudflare’s network using kubectl
- Connect from a client machine
Before you start
⏲️ Time to complete:
30 minutes
Create a Zero Trust policy
First, navigate to the
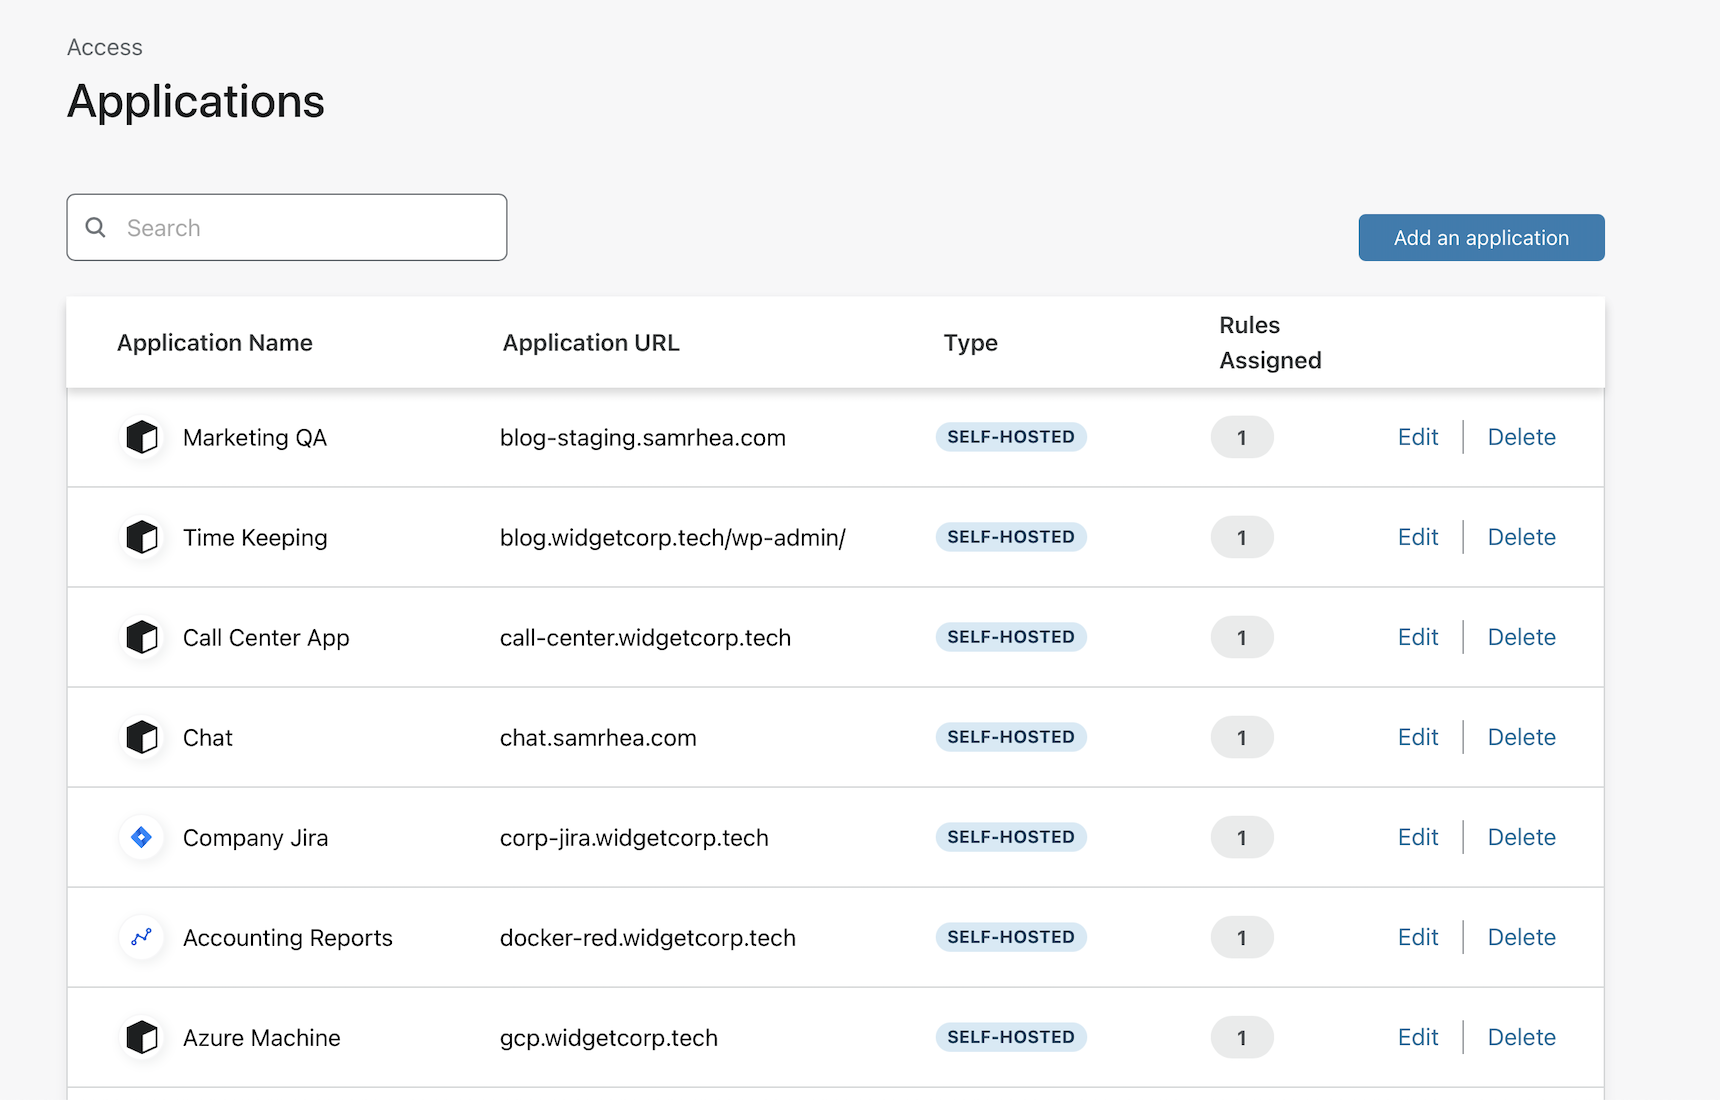
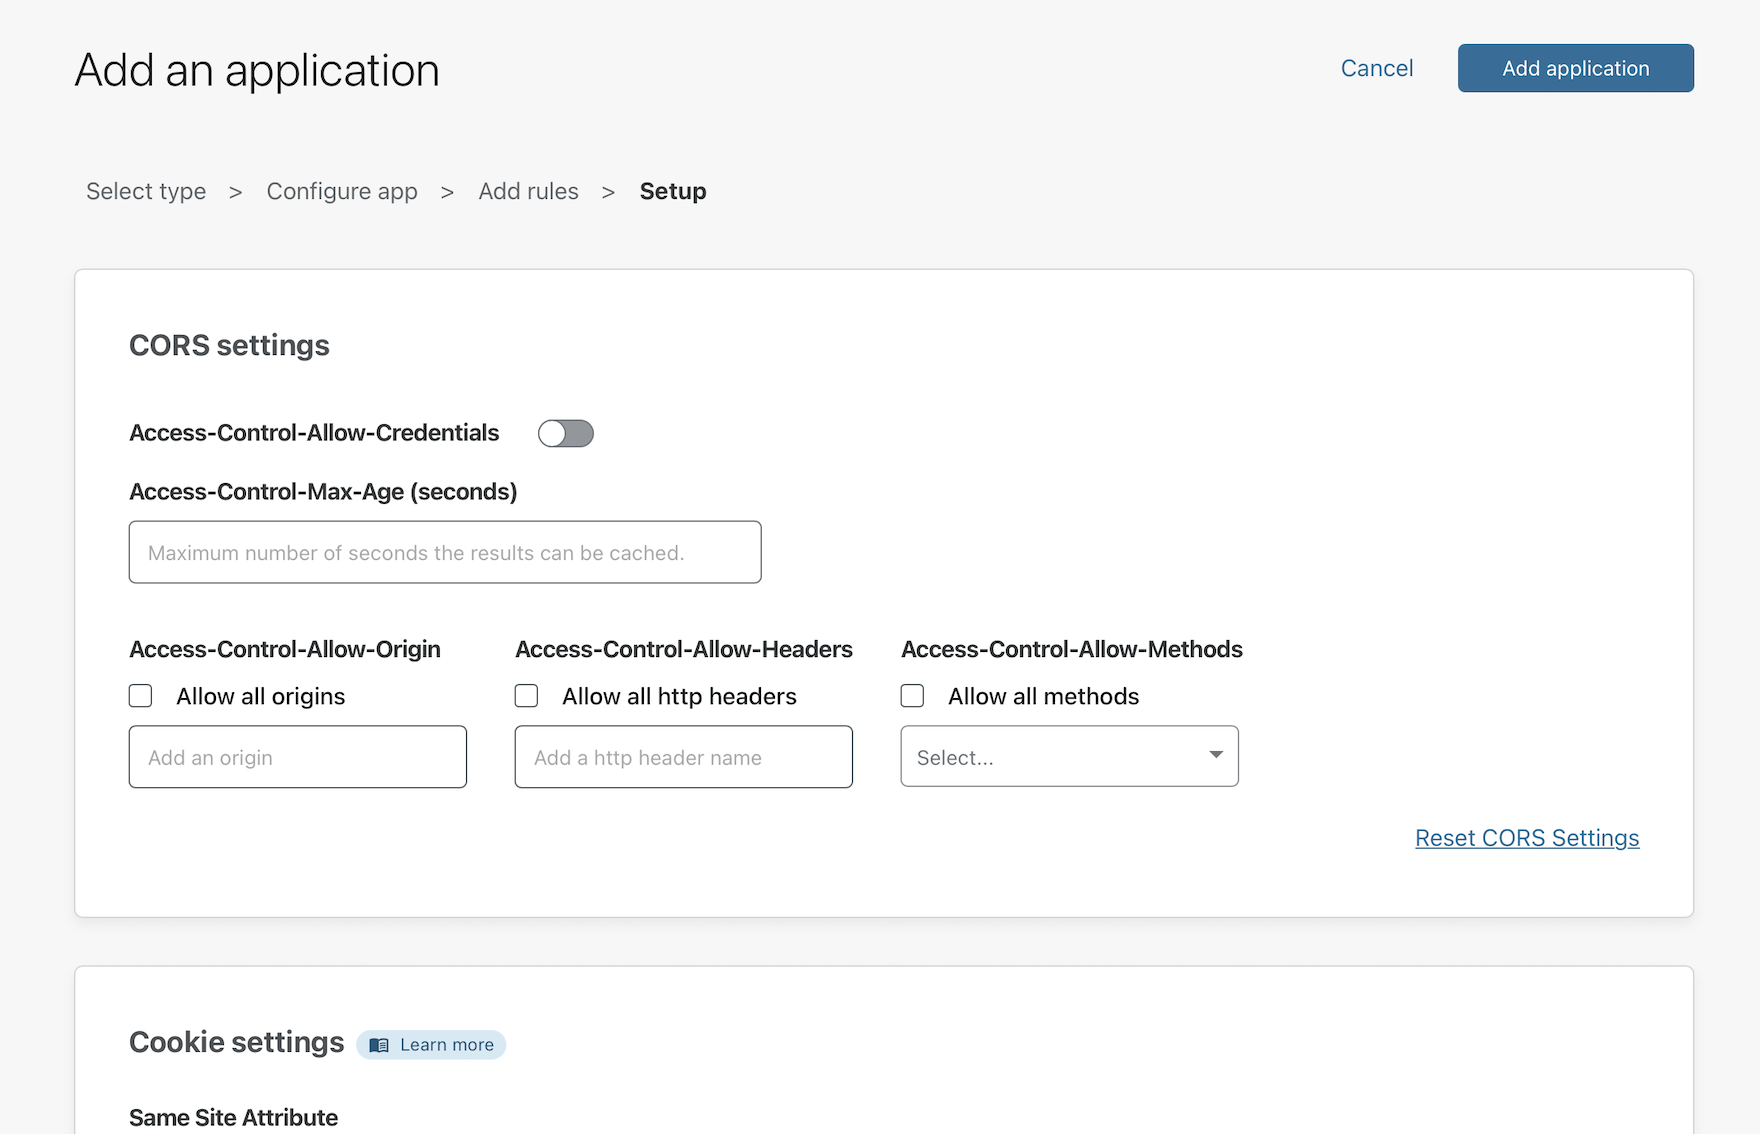
Zero Trust Dashboard to create a new application. Select the Applications page from the sidebar. Click Add application.
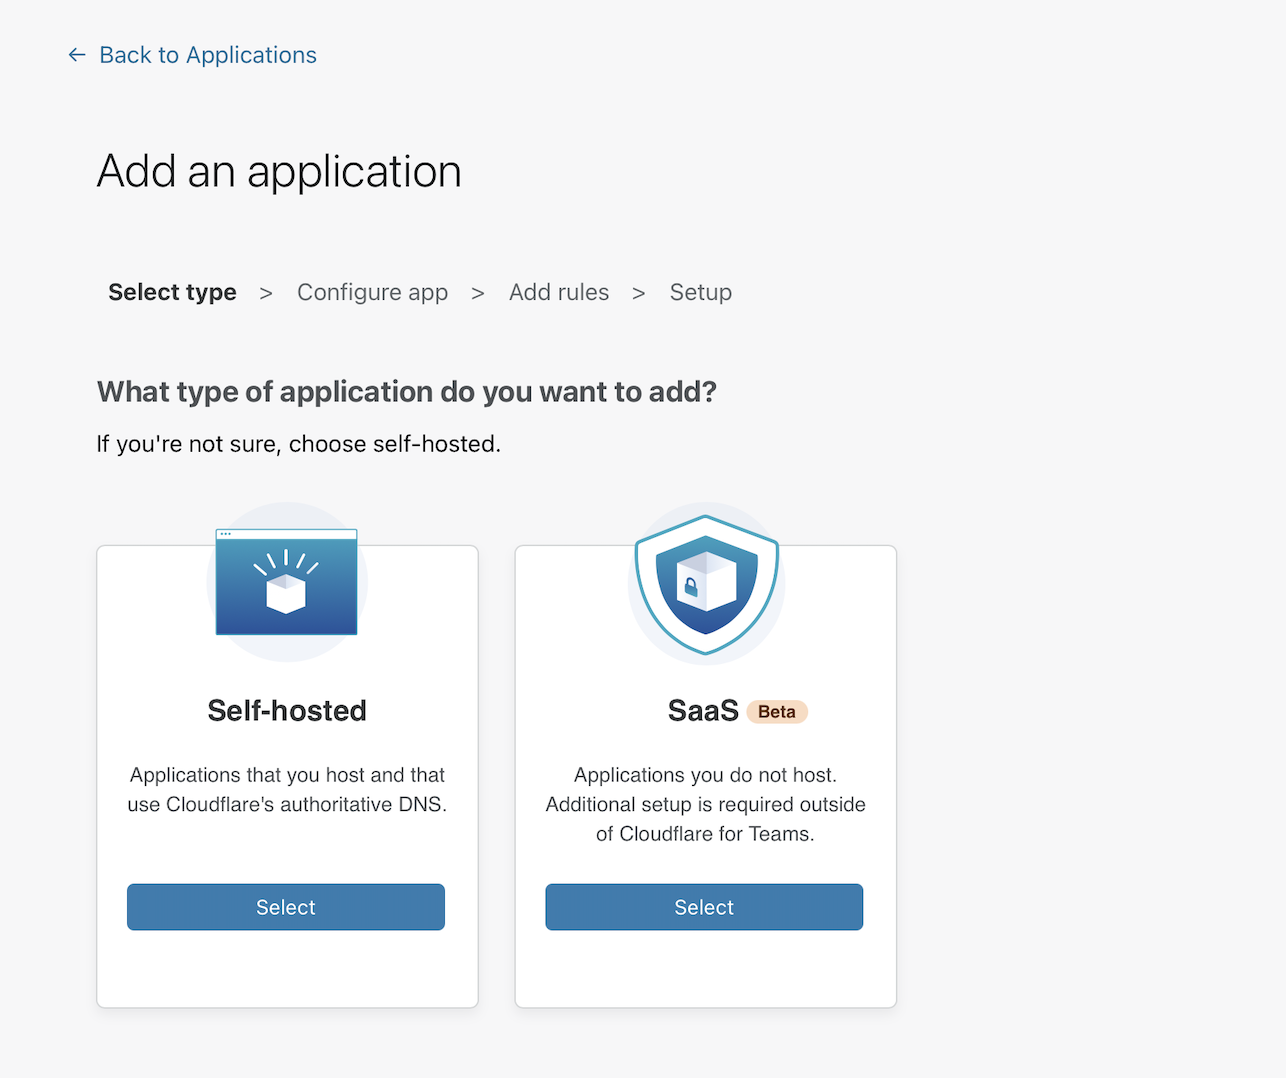
Choose Self-hosted on the next page.
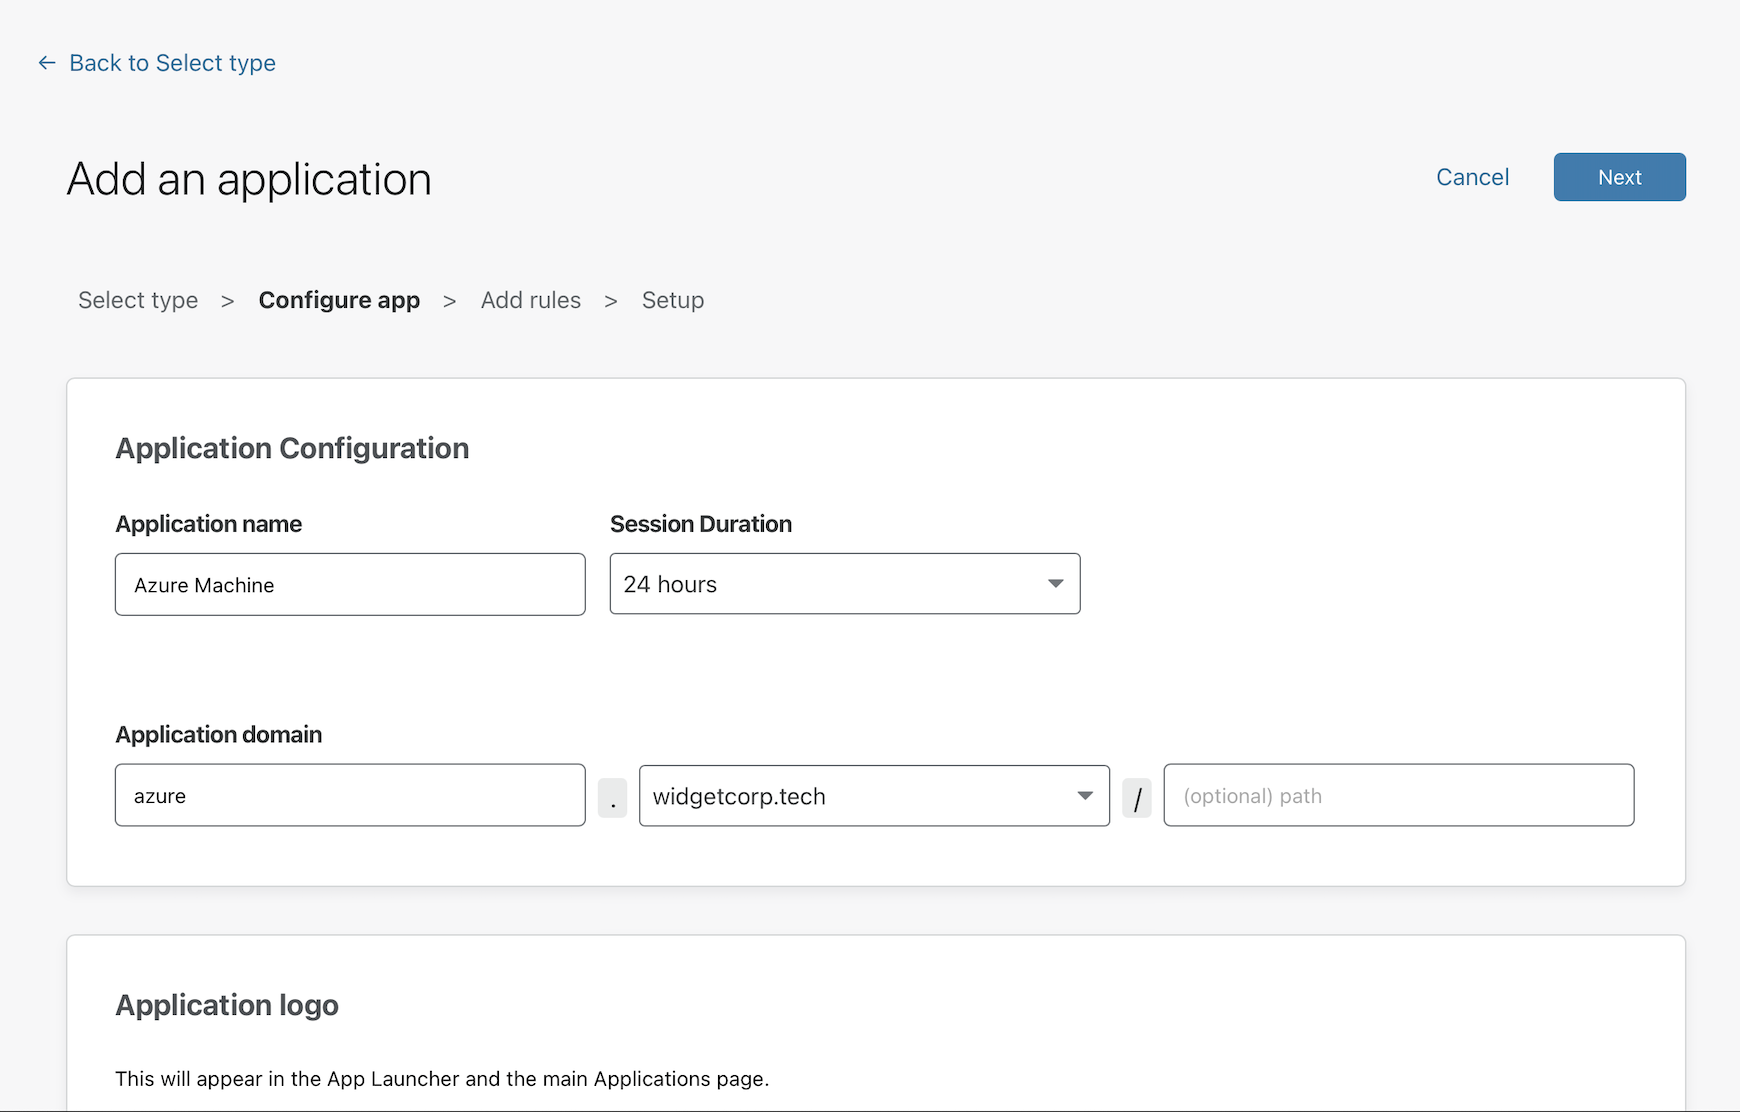
Input a subdomain where your application will be available to users.
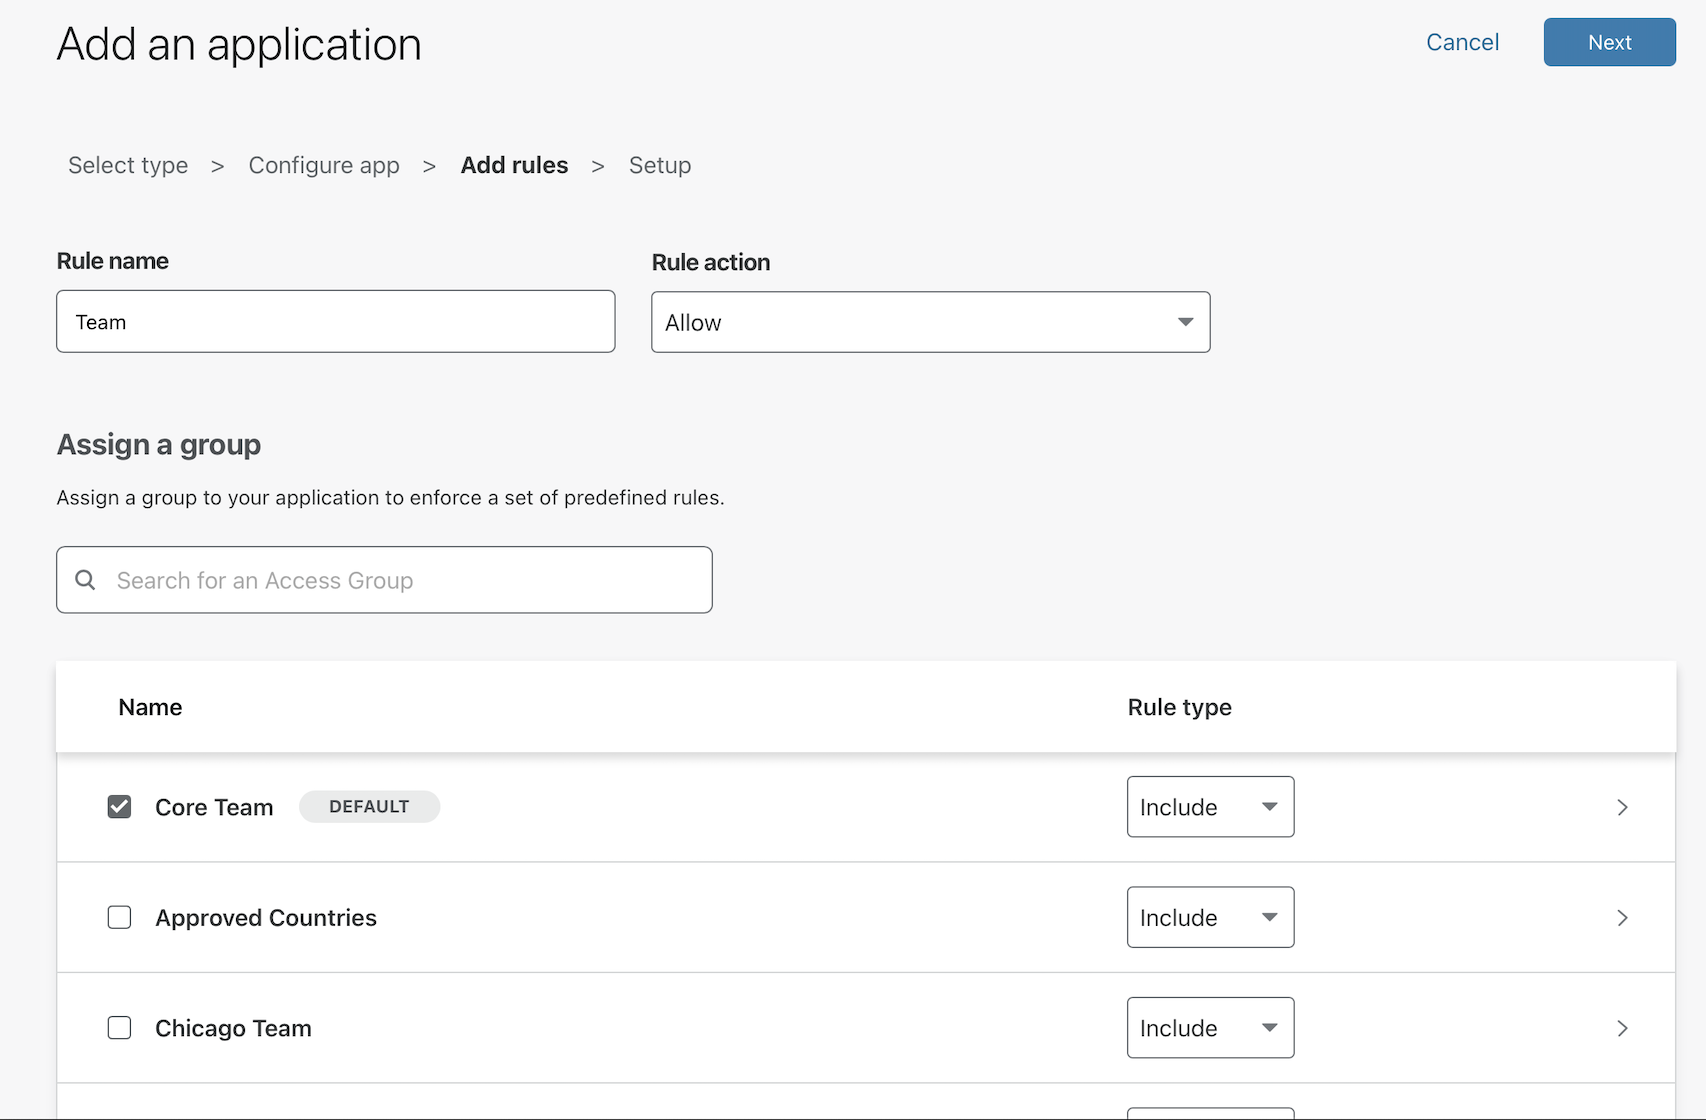
Next, create rules that control who can reach the application.
Finally, click Save to save the policy. You can return to edit the policy to make changes to who should be allowed or to choose what authentication providers can be used.
Install cloudflared
Cloudflare Tunnel creates a secure, outbound-only connection between this machine and Cloudflare’s network. With an outbound-only model, you can prevent any direct access to this machine and lock down any externally exposed points of ingress. And with that, no open firewall ports.
Cloudflare Tunnel is made possible through a lightweight daemon from Cloudflare called cloudflared. Download and then install cloudflared with the commands below. You can find releases for other operating systems
here.
sudo wget https://github.com/cloudflare/cloudflared/releases/latest/download/cloudflared-linux-amd64.deb
sudo dpkg -i ./cloudflared-linux-amd64.deb
Authenticate cloudflared
Run the following command to authenticate cloudflared into your Cloudflare account.
$ cloudflared tunnel login
cloudflared will open a browser window and prompt you to login to your Cloudflare account. If you are working on a machine that does not have a browser, or a browser window does not launch, you can copy the URL from the command-line output and visit the URL in a browser on any machine.
Choose any hostname presented in the list. Cloudflare will issue a certificate scoped to your account. You do not need to pick the specific hostname where you will serve the Tunnel.
Create a Tunnel
Next, create a Tunnel with the command below.
$ cloudflared tunnel create <NAME>
Replacing <NAME> with a name for the Tunnel. This name can be any value. A single Tunnel can also serve traffic for multiple hostnames to multiple services in your environment, including a mix of connection types like SSH and HTTP.
The command will output an ID for the Tunnel and generate an associated credentials file. At any time you can list the Tunnels in your account with the following command.
$ cloudflared tunnel list
Configure the Tunnel
You can now configure the Tunnel to serve traffic.
Create a YAML file that cloudflared can reach. By default, cloudflared will look for the file in the same folder where cloudflared has been installed.
$ vim ~/.cloudflared/config.yml
Next, configure the Tunnel, replacing the example ID below with the ID of the Tunnel created above. Additionally, replace the hostname in this example with the hostname of the application configured with Cloudflare Access.
tunnel: 6ff42ae2-765d-4adf-8112-31c55c1551ef
credentials-file: /root/.cloudflared/6ff42ae2-765d-4adf-8112-31c55c1551ef.json

ingress:
  - hostname: azure.widgetcorp.tech
    service: tcp://kubernetes.docker.internal:6443
    originRequest:
      proxyType: socks
  - service: http_status:404
  # Catch-all rule, which responds with 404 if traffic doesn't match any of
  # the earlier rules
Route to the Tunnel
You can now create a DNS record that will route traffic to this Tunnel. Multiple DNS records can point to a single Tunnel and will send traffic to the service configured as long as the hostname is defined with an ingress rule .
Navigate to dash.cloudflare.com and choose the hostname where you want to create a Tunnel. This should match the hostname of the Access policy. Click + Add record.
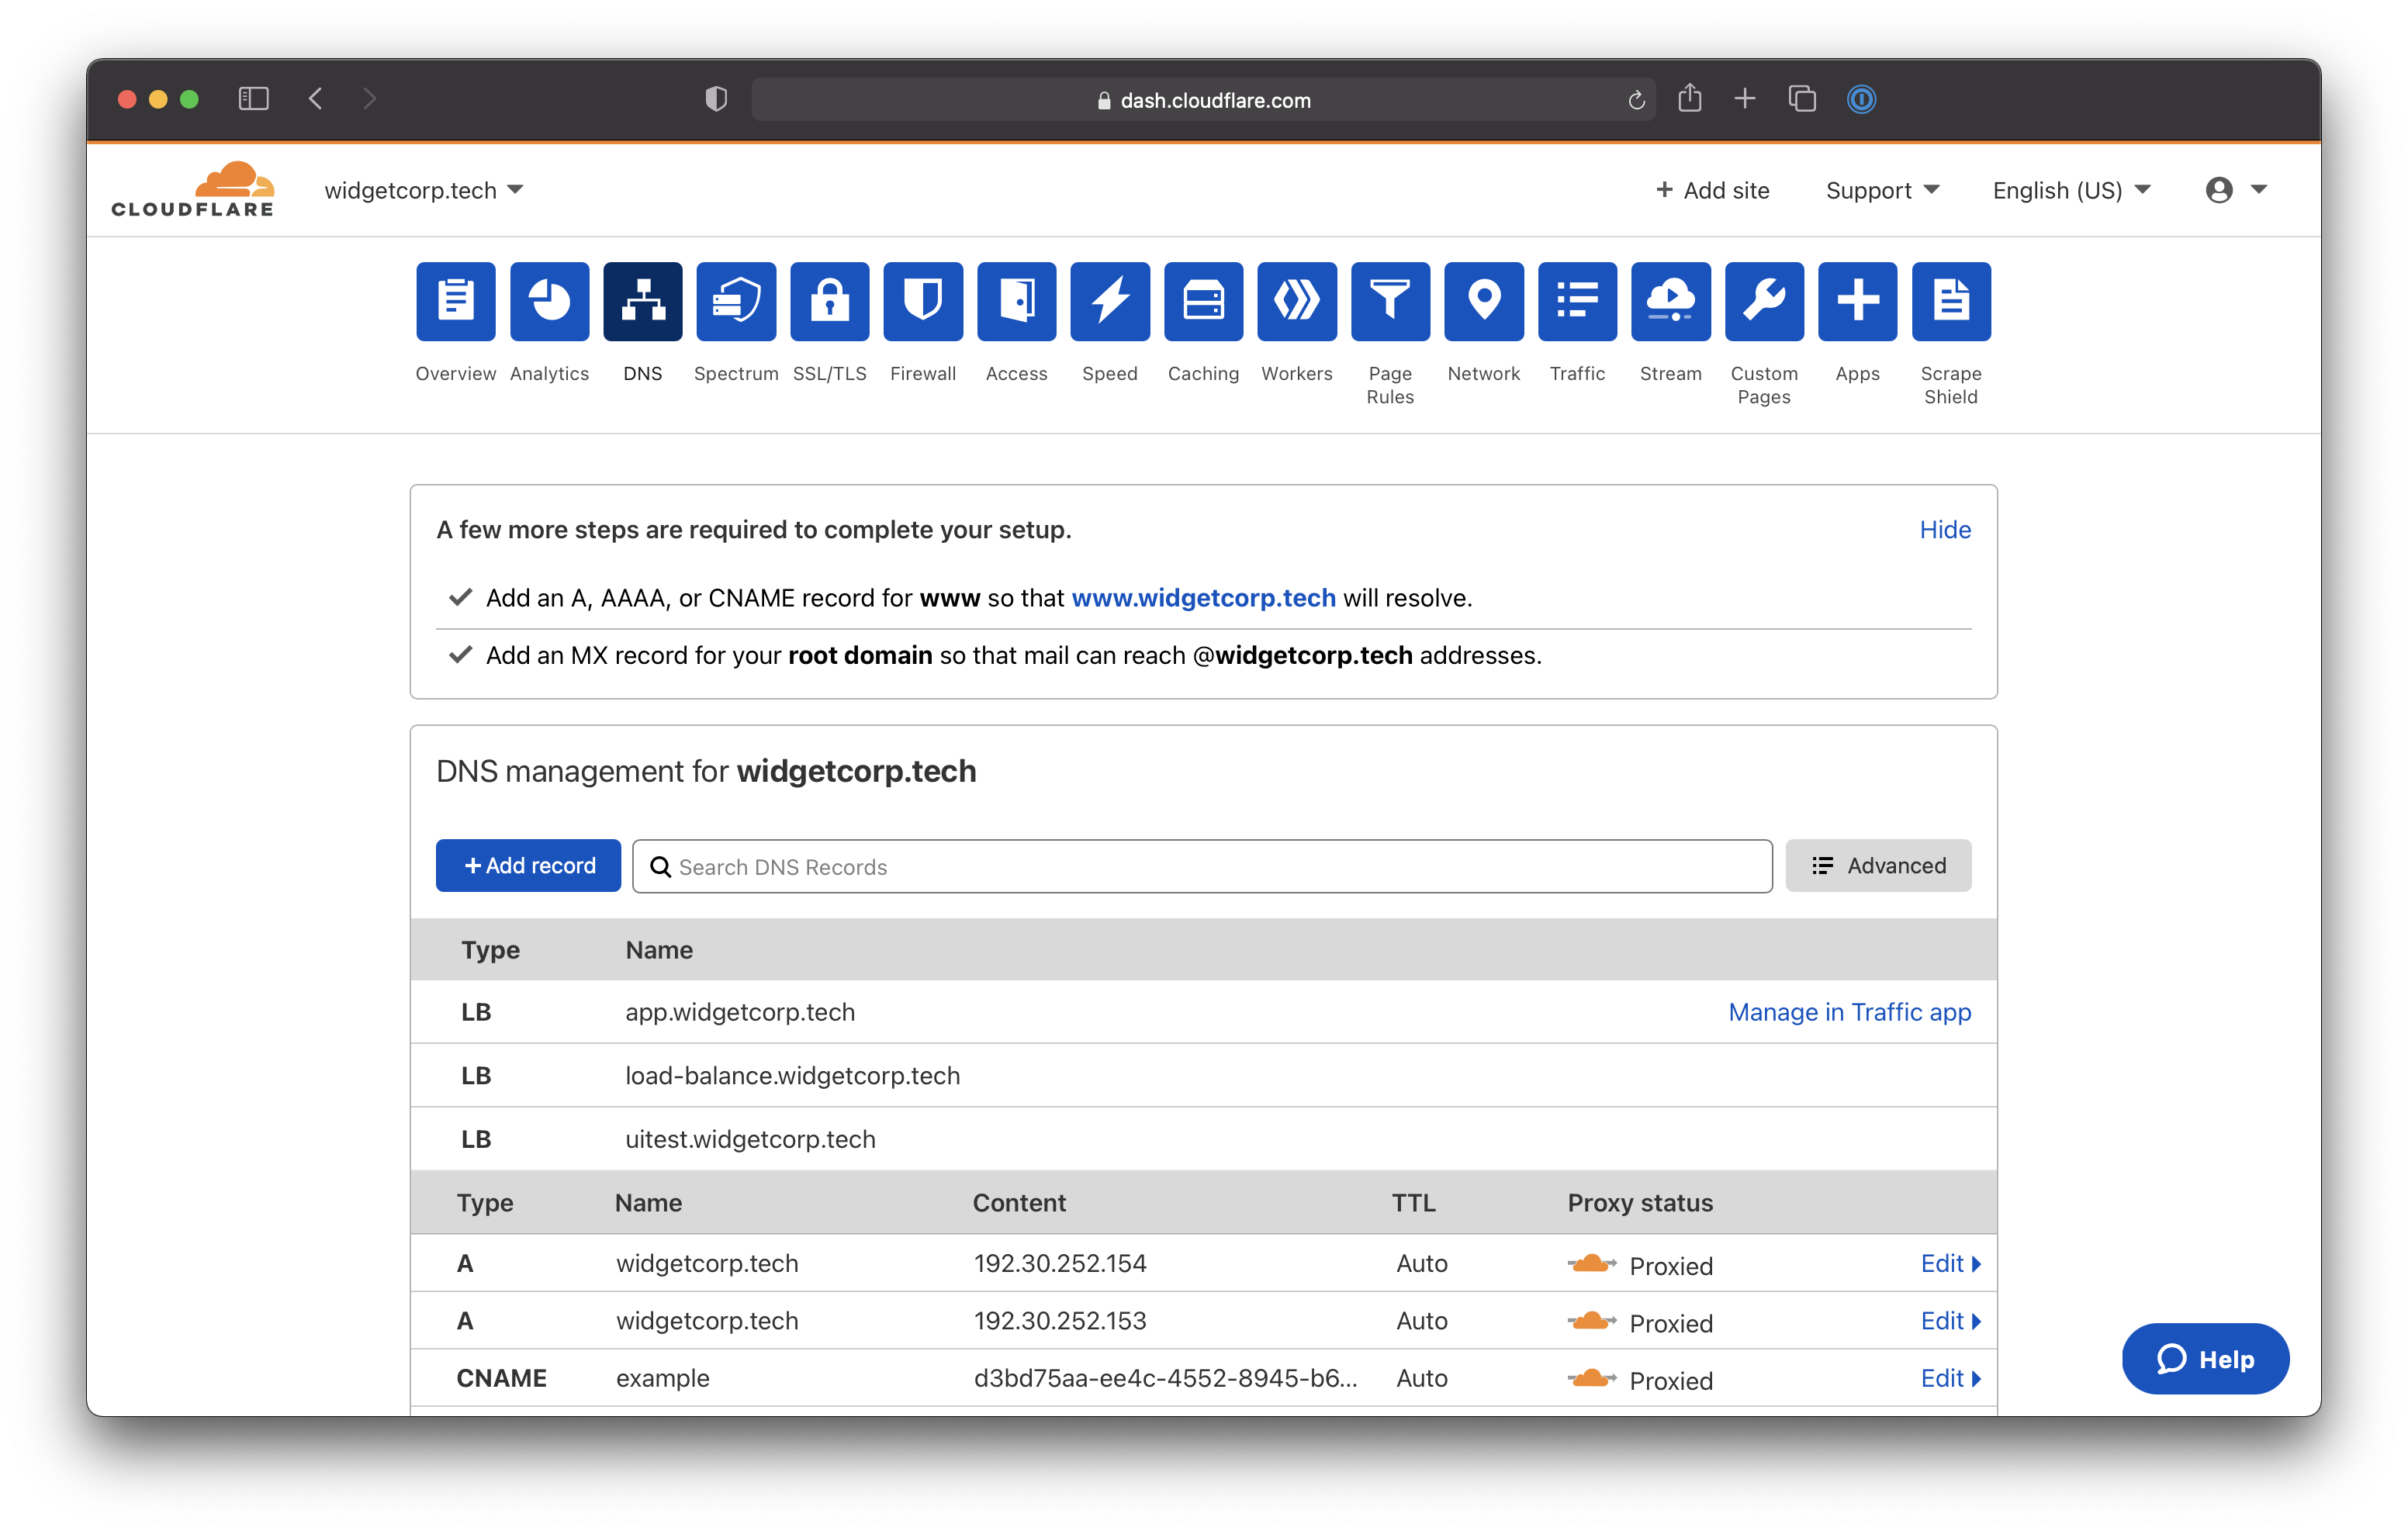
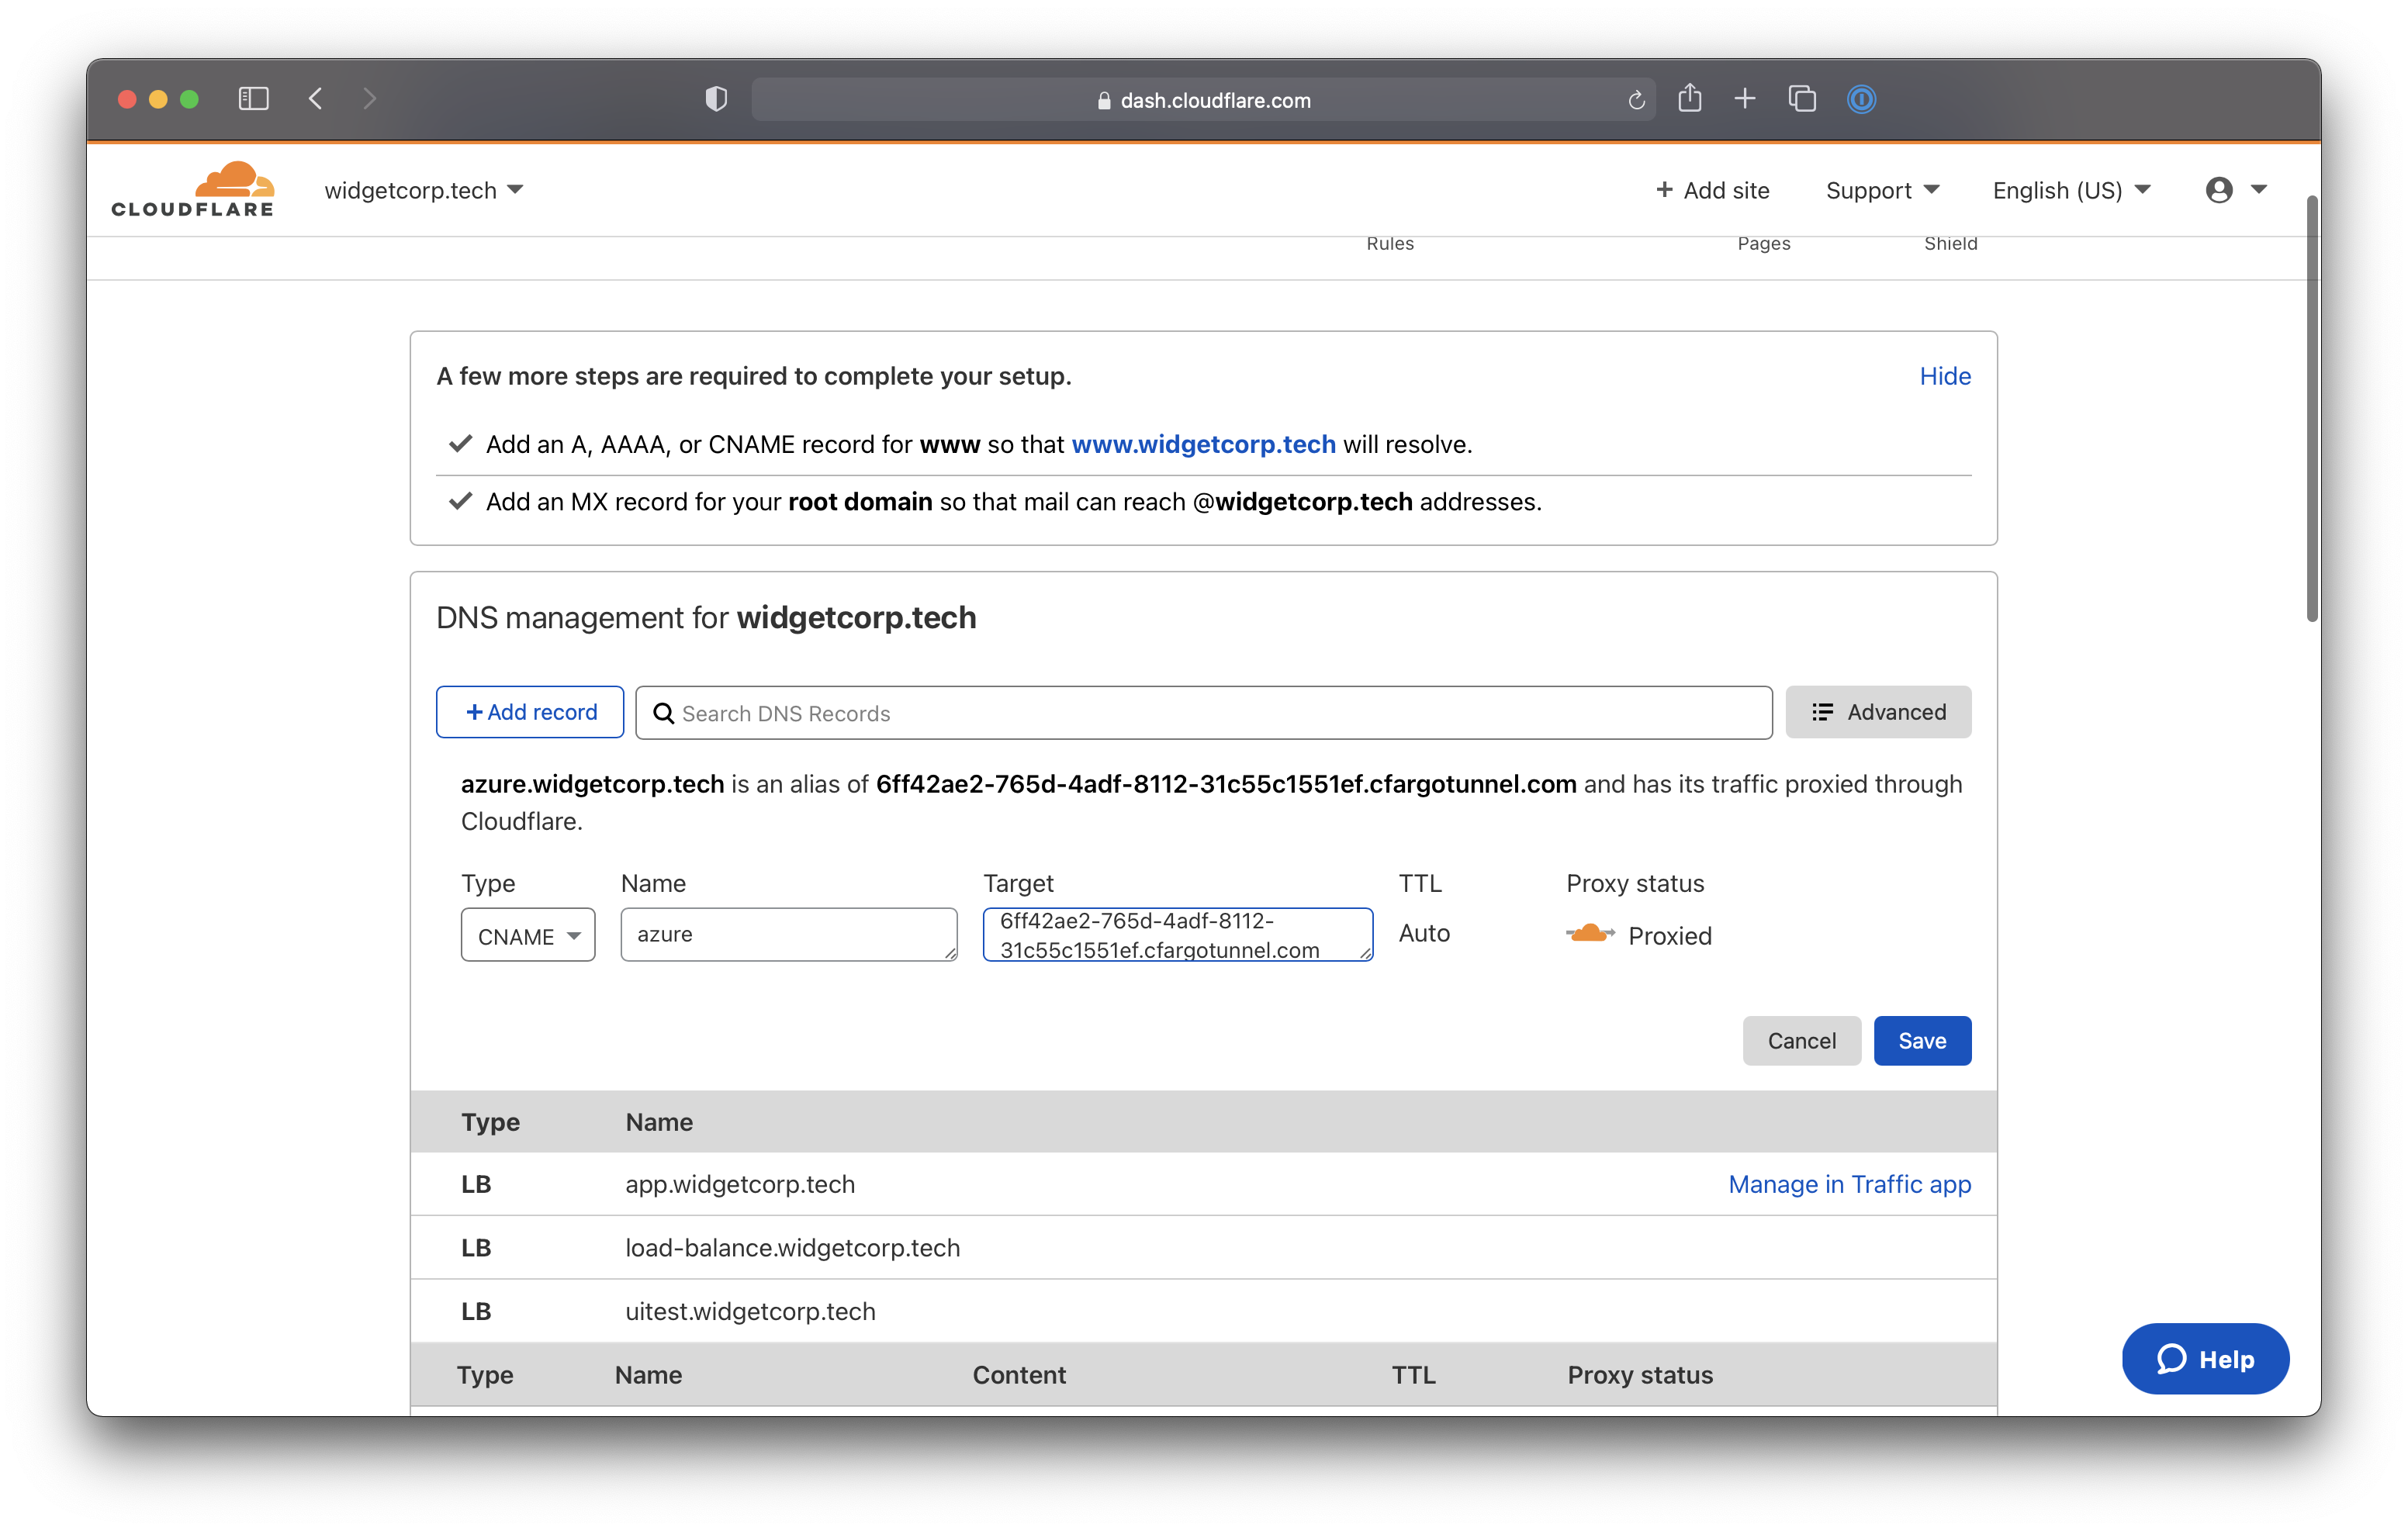
Select CNAME as the record type. For the target, input the ID of your Tunnel followed by cfargotunnel.com. In this example, the target would be:
6ff42ae2-765d-4adf-8112-31c55c1551ef.cfargotunnel.com
Click Save.
Run the Tunnel
You can now run the Tunnel to connect the target service to Cloudflare. Use the following command to run the Tunnel, replacing <NAME> with the name created for your Tunnel.
cloudflared tunnel run <NAME>
We recommend that you run cloudflared
as a service
that is configured to launch on start.
Connect from a client machine
You can now connect from a client machine using cloudflared.
This example uses a macOS laptop. On macOS, you can install cloudflared with the following command using Homebrew.
$ brew install cloudflare/cloudflare/cloudflared
Run the following command to create a connection from the device to Cloudflare. Any available port can be specified.
$ cloudflared access tcp --hostname azure.widgetcorp.tech --url 127.0.0.1:1234
With this service running, you can run a kubectl command and cloudflared will launch a browser window and prompt the user to authenticate with your SSO provider. Once authenticated, cloudflared will expose the connection to the client machine at the local URL specified in the command.
kubeconfig does not support proxy command configurations at this time, though the community has submitted plans to do so. In the interim, users can alias the cluster’s API server to save time.
$ alias kubeone="env HTTPS_PROXY=socks5://127.0.0.1:1234 kubectl"